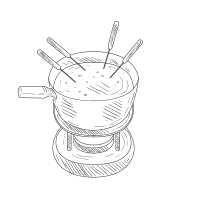
Kids’ Fondue Birthday Party Planning Guide


The Ultimate Kids’ Fondue Birthday Party Planning Guide: From Messy Mayhem to Magical Memories

You envision a birthday party filled with laughter and delight. Children are gathered, engaged in the joyful act of creating their own delicious treats. The scene is interactive, unique, and utterly charming. Now, recall the reality of many kids’ parties: the chaotic sugar rush, the messy tables, the chorus of “I’m bored!” just minutes after the cake is gone. This gap between fantasy and frazzled reality is where most party plans falter.

A fondue party bridges this gap perfectly. It transforms passive eating into an active adventure. Mastering this guide is your key to unlocking a celebration that is spectacularly smooth, safe, and memorable. You will move from worrying about chaos to orchestrating joy.

Foundational Choices: The Party “Hardware”

Your initial decisions on equipment and setup form the unshakable foundation for a successful party. This is about creating a safe, functional environment where fun can flourish without incident.

Part A: Fondue Pot Selection & Setup

Choosing the right pot is your first critical decision. For a kids’ party, electric fondue pots are the superior choice. They offer consistent, adjustable heat without an open flame, making them inherently safer and less intimidating. If you use a Sterno (fuel-based) pot, ensure it is placed on a stable, high surface away from reaching arms.

Determine your quantity strategically. For a group of 6-8 children, one pot for a sweet station and one for a savory station is ideal. For larger groups, consider setting up duplicate stations to prevent long waiting lines. Place pots securely in the center of sturdy tables, with all cords taped down or routed out of foot traffic.

Part B: The Dipping Arsenal: Tools & Table Setup

Equip each child with their own color-coded fondue fork. This simple system prevents mix-ups and discourages double-dipping. Provide plenty of side plates for holding dipped items and a mountain of napkins. Use a washable tablecloth for easy cleanup, and consider placing a small “drip bowl” of water at each setting for messy chocolate forks.

Arrange your table in a “station” format. Keep the fondue pots central, surround them with platters of dippers, and ensure there is clear walking space around the entire table. This layout maximizes access and minimizes accidental bumps.

Part C: Core Component Comparison

Your choice of fondue defines the party’s flavor. This comparison will help you select the perfect centerpiece.

Fondue Type Best For Kid-Friendly Characteristics
Chocolate The Sweet Station & Dessert Universal crowd-pleaser. Easy to melt and hold. Use high-quality chocolate chips or melting wafers for smooth consistency. Perfect with fruit, cake, and pretzels.
Cheese A Savory Main Course Opt for mild, smooth-melting cheeses like Gruyère or Fontina. Add a splash of lemon juice to prevent stringiness. Ideal for dipping bread, steamed broccoli, and apple slices.
Broth or Oil Interactive Hot Cooking For older, supervised kids only. Use a flavorful broth. Provide pre-cooked, bite-sized items like chicken, beef, or shrimp for quick warming. This is an advanced, thrilling option.

The Core System: Menu & Activity Management

A great party is a dynamic system to be managed, not just a meal to be served. Control the flavor and the energy to maintain a perfect balance.

Controlling the Flavor: Building the Perfect Dipping Menu

For your Sweet Station, use a simple 2:1 ratio of chocolate to cream for a foolproof, silky dip. Offer diverse dippers: strawberries, banana chunks, marshmallows, pound cake cubes, and pretzel rods. For your Savory Station, a classic Swiss cheese fondue or a warm, mild cheddar beer sauce are excellent choices. Pair with crusty bread, blanched vegetables, and sliced sausages.

Always balance indulgence with wholesomeness. A platter of fresh fruit and vegetables is not just a dipper; it’s a visual palate cleanser. Proactively manage allergies by labeling ingredients clearly and having a separate, safe option available if needed.

Managing the Energy: Timetable & Activity Flow

The rhythm of your party is everything. Follow this structured flow: Arrival & Initial Activity (30 mins) – Start with a themed craft, like decorating their own chef’s hat or apron. Fondue Feast (45-60 mins) – Guide the children through the dipping stations with a brief safety talk. Cake & Singing (20 mins) – Transition to the birthday tradition. Presents & Wind-Down (30 mins) – Open gifts, then offer a quieter activity like a short movie as parents arrive.

These deliberate transitions prevent energy from peaking into chaos. The initial activity focuses excitement, the fondue session channels it into a shared task, and the wind-down allows for a calm conclusion.

Advanced Practices: Theming & Elevation

Now, elevate your party from great to unforgettable. This is where you layer in creativity and immersive detail.

Thematic Preparation: “Swiss Chalet” or “Candy Lab”

A simple theme unifies every element. For a Swiss Chalet theme, use red-and-white checkered tablecloths, play Alpine folk music, and favor small cowbells or Swiss chocolate bars. For a Mad Scientist Candy Lab, dress dippers in lab beakers and petri dishes, use dry ice for a cauldron effect (safely, away from kids), and provide lab-coat aprons.

Your theme starts with the invitation. A message like “Join our Fondue Laboratory!” sets the tone instantly. A curated playlist in the background completes the atmosphere without extra effort.

Strategic Dipper Presentation

Presentation directly impacts enjoyment. Arrange dippers on platters by color and type—create a rainbow of fruits, a mountain of marshmallows, a forest of pretzel sticks. Use tiered stands or muffin tins to separate items beautifully. Label each platter with playful, themed signs (“Dippable Dynamos,” “Fruit Fusion”). This organization is visually exciting and helps children make choices easily.

Threat Management: Problem Prevention & Solutions

Adopt a proactive stance. Your best defense is a plan that prevents problems before they start.

Prevention: Safety & Cleanliness Protocols

Begin the fondue session with a clear, 60-second “Fondue Safety Briefing.” My rule is: “One fork per hand, dip your own food, and never touch the hot pot.” Enforce the color-coded fork system strictly. Conduct allergy checks with parents during the RSVP process. Cover surfaces completely and have a dedicated “wet napkin” bowl on the table for sticky hands.

Intervention: Handling Common Scenarios

If chocolate seizes, whisk in a tablespoon of warm vegetable oil or cream to restore smoothness. If cheese fondue thickens, stir in a splash of warm milk. For spills, have a dedicated cleanup caddy with cloths and spray nearby. For a hesitant child, offer to dip the first piece for them. Always have a backup snack, like individual bags of popcorn, for any child who simply doesn’t participate.

The Action Plan: A Practical Party Timeline

This roadmap ensures nothing is forgotten. Follow it to move from concept to celebration with confidence.

Timeline Primary Tasks Focus Area
3 Weeks Out Set guest list, choose theme, order invitations, research/rent fondue pots. Concept & Invitations
1 Week Out Finalize shopping list for food and decor, confirm RSVPs, plan activity details. Logistics & Shopping Plan
Day Before Shop for perishables, prep dippers (wash/cut), set up tables and decor, create music playlist. Preparation & Setup
Party Day Arrange dipper platters, melt fondue 30 mins before feast, conduct safety briefing, manage the flow. Execution & Joy

The magic of a fondue party lies in the balance you create—between safety and adventure, structure and spontaneity. You begin with the foundational choice of a pot and build upward through menu design, energy management, and thematic flair. You anticipate challenges and have solutions ready.

The transformation is profound. You will witness the focused delight of children mastering their fondue forks, the shared laughter over a deliciously messy creation, and the quiet pride of hosting a uniquely memorable event. This is more than a birthday party; it’s the creation of a cherished tradition, a story to be retold, and an unparalleled joy that enriches your family’s life. The table is set. The moment awaits.


Related Articles

Try Our Free Tool: Use our Fondue Party Planner to plan your perfect fondue party with a custom shopping list, equipment checklist, and timeline.

Fondue and Game Night Pairings: Best Board Games for Fondue Parties


The Perfect Fusion of Flavor and Fun

Picture a typical game night. Cards are sticky, dice are dodging chip crumbs, and the flow of play is constantly broken by the rustle of snack bags. The fun is there, but it’s messy and fragmented. Now, envision a seamless evening where the shared meal is part of the entertainment, not an interruption. This is the promise of the fondue party. When executed with intention, it transforms social gathering into an art form. Mastering the art of Fondue and Game Night Pairings is the key to unlocking a uniquely sophisticated, engaging, and memorable experience where dining and play exist in perfect, delicious harmony.

Foundational Choices: The Fondue “Hardware”

Your equipment and setup form the bedrock of your evening. Strategic choices here prevent chaos and preserve playtime, allowing the party to flow effortlessly from bite to turn.

Selecting Your Fondue Format

The type of fondue you choose sets the social and logistical tone. Cheese fondue is communal and conversational, ideal for lighter games. Chocolate fondue is a sweet, punctuated activity perfect for thoughtful pauses. Bourguignon (hot oil or broth) is an active, immersive cooking experience suited to longer, thematic games. For groups larger than six, consider two pots to prevent a player bottleneck at the caquelon.

Location and Tabletop Strategy

Establish a dedicated “Fondue Zone” on a stable, heat-resistant surface away from the main game board. This is your safe harbor for molten cheese and bubbling oil. Arrange seating so every player has clear, unimpeded access to this zone without having to reach over game components. The board is sacred ground; the fondue pot is its delicious neighbor.

Essential Tools & Dippers

Your dippers are the interface between food and game. Choose wisely based on mess potential and eating pace. Here is your tactical comparison:

Component Category Options Key Characteristics
Long-Handled Forks Color-Coded, Standard Metal Color-coding is non-negotiable for avoiding cross-contamination and disputes. Ensure you have at least two per guest.
Low-Mess Dippers Firm Fruit (apple, pear), Pretzel Rods, Blanched Veggies Minimal crumbs or drips. The ideal choice for turn-based strategy games. They allow for clean, one-handed eating.
Moderate-Mess Dippers Bread Cubes, Marshmallows, Cake Pieces Higher crumb or drip risk but highly traditional. Best deployed during more casual, social game phases. Require strict adherence to the “double plate” doctrine.
Active-Cooking Dippers Raw Meats, Seafood, Mushrooms Used with bourguignon. This is a hands-on, slower dining activity. Pair only with games that have long, natural pauses or are highly immersive.

The Core System: Managing the Game & Food Cycle

A successful pairing is a dynamic system, not a static setup. Your role is to manage the rhythm between active eating and engaged play.

Pace & Turn Structure

The ideal flow synchronizes dipping with natural game pauses. In a turn-based game, the “active player’s” turn is the perfect time for others to dip. Simultaneous-play games allow for constant, low-commitment grazing. The consequence of poor synchronization is stark: either the game grinds to a halt for everyone to eat, or your beautifully prepared fondue congeals untouched.

Mess Mitigation Tools

Proactive defense is your best strategy. Place ample napkin stations at both the fondue zone and each player’s seat. Enforce the “Double Plate Doctrine”: each guest uses a small side plate for their dipped item, never bringing a loaded fork directly over the game board. This simple rule saves components from oily disasters.

Advanced Pairings: Matching Game Genres to Fondue Types

This is the art and science of curation. By strategically aligning your game choice with your fondue style, you elevate both the meal and the experience.

Light, Social Games: The Cheese Fondue Standard

Cheese fondue is conversational, communal, and continuous. Pair it with games that share these traits. Choose titles with simultaneous play or very short turns that won’t be ruined by constant chatter and dipping.

Preparation: Games like Just One, Wits & Wagers, or Railroad Ink. The social deduction game Coup works brilliantly, as the fondue pot becomes a perfect bluffing prop.

Strategy: The fondue here is the social lubricant. Keep the game rules light to maintain the focus on conversation and shared enjoyment.

Strategic, Turn-Based Games: The Chocolate Fondue Choice

Chocolate fondue is a sweet, punctuated reward. It pairs perfectly with games that have clear, contemplative turns. Players can plan their next strategic move while deliberately dipping a strawberry.

Ongoing Inputs: This is the realm of Euro-style engine builders and medium-weight strategy. Think Wingspan, Century: Spice Road, or Castles of Burgundy.

Strategy: The turn structure provides natural breaks for dipping. The sweetness offers a cognitive boost during analysis paralysis. Ensure dippers are low-mess to maintain component integrity.

Thematic, Immersive Games: The Bourguignon Adventure

A bourguignon fondue is an event in itself—a communal cooking ritual. Pair it with long-form, narrative games where the meal becomes part of the atmosphere.

Selection: Cooperative campaign games like Gloomhaven: Jaws of the Lion or rich thematic titles like Betrayal at House on the Hill are ideal.

Strategy: The cooking and eating are slower, matching the game’s pace. Frame the fondue as a thematic tavern meal or a campfire feast. This pairing is about committing to a shared, multi-sensory experience.

Threat Management: Preventing Party Fouls

Adopt a proactive stance. Your first defense is the pre-game briefing. Establish a “fork down” rule during critical, game-wide moments—like resolving a complex combat or revealing a mystery. For spills, have a tiered response: immediate application of a napkin by the spiller, a brief pause if the game state is threatened, and a calm “no big deal” attitude from the host to keep the mood light. Preparation prevents panic.

Your Fondue Game Night Calendar

Follow this phased roadmap to guide your evening from setup to sweet conclusion.

Phase Primary Tasks Focus On
Pre-Party Prep Choose fondue type; select 2-3 game options; prep all dippers; set up Fondue Zone and game area. Creating a stage for effortless flow. All physical prep should be complete before guests arrive.
The First Hour Light the fondue fuel, serve first course (cheese), teach and play a lighter, social game. Letting guests settle into the rhythm. The initial game should be simple to learn while eating begins.
Main Event Transition to the featured, main game. Refresh fondue fuel or switch to chocolate for dessert. Deep engagement. The game and food cycle should now feel natural, allowing full immersion in both.
Wind Down Shift to chocolate fondue if you haven’t already. Introduce a short, satisfying filler game like No Thanks! or Love Letter. A sweet, relaxed conclusion. The pressure is off; the evening ends with laughter and lingering treats.

The Masterful Host’s Reward

The core principle is simple but powerful: intentional pairing creates a sum far greater than its parts. You have moved from practical concerns of hardware and mess mitigation to the nuanced art of curating experiences. The reward is an evening of unparalleled social chemistry—the shared triumph in a game, the collective savoring of a perfect bite, the laughter that echoes over the pot. You are not just serving food and providing a game; you are architecting memories. This is the profound satisfaction of the masterful host, where flavor and fun exist in perfect, harmonious balance.


Related Articles

Try Our Free Tool: Use our Fondue Party Planner to plan your perfect fondue party with a custom shopping list, equipment checklist, and timeline.

Corporate Team-Building Fondue Workshops


Beyond the Cheese, The Recipe for Cohesion

Picture your typical team meeting. Screums are dark, conversation is transactional, and silos feel permanent. Now, imagine a different scene: laughter around a shared pot, colleagues strategizing over the perfect dip, and genuine connections forming over a simmering blend. This is the power of a masterfully executed Corporate Team-Building Fondue Workshop. It transcends a simple meal, leveraging the universal language of shared food to rewrite team dynamics.

The act of gathering around a fondue pot is inherently collaborative and equalizing. Mastering this format, however, is what transforms a fun event into a strategic tool for building trust, communication, and unity. A successful workshop doesn’t happen by accident; it is engineered. This guide details how to move from a basic social activity to a profound team development experience, where the shared pot becomes the tangible foundation for a more effective and cohesive unit.

Foundational Choices: The “Hardware” of Your Event

Your initial logistical decisions form the critical infrastructure. Get these right, and you create a seamless container for growth. Get them wrong, and you risk logistical chaos that undermines your goals.

Part A: Format & Scale Selection

Your choice of fondue style dictates the workshop’s energy and interaction. For intimate groups of 6-12, a traditional Swiss cheese fondue fosters deep, conversation-focused bonding. For larger teams of 20+, opt for multiple chocolate or broth (bourguignonne) stations. These formats are more active and energetic, allowing for mingling and smaller group interactions. Chocolate fondue is excellent for celebratory, creative energy, while cheese or broth fondues better suit longer, more conversational meals.

Part B: Venue & Setup Logistics

Space is your stage. Ensure ample room for round tables—which promote equality and eye contact—with a central fondue pot. Allow for at least 3 feet of space between tables for safe facilitator movement and guest comfort. Ventilation is non-negotiable; avoid cramped, low-ceilinged rooms. Designate three distinct zones: a welcome/pre-brief area, the main dining activity space, and a separate or reconfigured space for the guided debrief. This physical flow mirrors the workshop’s psychological journey.

Part C: Material & Component Breakdown

Your equipment and ingredients are the tangible tools of engagement. Select them with intention.

Component Category Options Key Characteristics
Fondue Pot (Caquelon) Ceramic (classic), Cast Iron, Electric Ceramic offers authentic, even heat for cheese. Cast iron retains heat superbly for oil or broth. Electric provides precise, flameless temperature control—ideal for safety in corporate settings.
Fuel Source Liquid Fuel (Gel), Ethanol, Electric Hotplate Gel or ethanol burners create ambiance but require strict safety protocols. Electric hotplates are the safest, most reliable choice for consistent, controllable heat without open flames.
Dipper Selection Long-Handled Forks, Skewers, Separate Plates Color-coded fork handles prevent mix-ups. Provide small personal plates for caught food. This simple organization prevents chaos and promotes mindful sharing.
Beverage Pairings White Wine, Herbal Tea, Sparkling Water Pair dry white wine with cheese fondue to aid digestion. Offer premium non-alcoholic options like herbal tea or sparkling water with citrus. Beverages should facilitate, not hinder, clear conversation.

The Core System: Facilitating Interaction & Flow

A great workshop is a dynamic social system to be actively managed. Your role is to control three key variables that determine the quality of interaction.

Variable 1: Conversation & Connection

Target: Organic, cross-team dialogue that breaks down hierarchical and departmental barriers.
Consequence of Failure: Cliques re-form, silence dominates, and the activity reinforces existing silos.
Control Methods: Use a strategic seating chart to mix teams. Place printed discussion prompts at each table related to the fondue process: “What’s one ‘unique ingredient’ you bring to our team project?” or “How is stirring this pot like managing our team’s priorities?” The facilitator should launch the meal with a metaphorical icebreaker linking the first dip to taking a collaborative risk.

Variable 2: Collaborative Task Management

Target: Shared responsibility and the natural emergence of informal leaders.
Consequence of Failure: One person dominates the pot, or chaos ensues with dropped food and conflicting actions.
Control Methods: At each table, subtly assign or suggest rotating roles: the Stirrer (keeps the mix smooth), the Replenisher (adds bread or fruit), and the Coordinator (ensures everyone gets a turn). Create a simple, shared goal like “Keep our cheese perfectly emulsified” to foster immediate, low-stakes teamwork.

Variable 3: Timing & Pacing

Target: A seamless, purposeful rhythm that blends activity, dining, and reflective learning.
Consequence of Failure: A rushed eating frenzy followed by awkward dead air, with no connection to workplace lessons.
Control Methods: Communicate a clear agenda upfront: “Welcome & Metaphor (10 min), Collaborative Dining (45 min), Guided Debrief (20 min).” Use the natural waiting times—while the cheese melts or chocolate warms—for a structured prompt. The facilitator must watch the room energy and use pre-planned interventions to gently transition between phases.

Advanced Practices: Crafting the Learning Metaphor

This is where logistics become leadership development. Your goal is to embed a lasting lesson within the experience.

Preparation: Theming and Objective Alignment

Intentionally select your fondue style to mirror a business objective. Use a cheese fondue to theme a session on “Blending Diverse Strengths” into a cohesive whole. Choose a chocolate fondue for “Celebrating Sweet Success” and innovative thinking. A broth fondue (bourguignonne) can represent “Navigating a Simmering Market”—where individual contributions (dippers) cook quickly in a shared, dynamic environment. Tailor every discussion guide to the team’s specific current challenge.

Ongoing Inputs: Facilitator Guidance

The facilitator is the subtle guide, not the lecturer. Observe group dynamics silently for the first 10 minutes of dining. Then, circulate and ask pointed, open-ended questions that link the action to the workplace: “I see you’re helping each other retrieve lost items from the pot. How can we apply that ‘rescue mentality’ to our projects?” or “What happens to our cheese if we all stop stirring? What’s the workplace equivalent?”

Selection and Strategy: Beyond a One-Off Event

To maximize impact, sequence the workshop strategically. Use it as a kick-off to a new project to establish collaborative norms. Employ it at mid-year to re-energize a fatigued team. Follow up one week later with a “Fondue Pact”—a simple agreement displayed in the office referencing a lesson learned, like “We will keep stirring the pot on Project X.” This transforms a single event into an ongoing cultural touchstone.

Threat Management: Preventing a Meltdown

Adopt a proactive stance. Anticipate common pitfalls and have solutions ready before the first fork is dipped.

Prevention: Setting the Stage for Success

Communicate clearly in advance. Send a brief that includes a casual dress code (“business casual, no loose sleeves”), a dietary restrictions survey, and a one-sentence teaser of the workshop’s purpose. On-site, begin with a non-negotiable 2-minute safety briefing on burner and fork etiquette. Have a detailed run sheet and ensure all facilitators are briefed on the core metaphor and agenda.

Intervention: Handling Common Issues

Have a tiered response plan for facilitator use. For disengaged participants, use subtle redirection: ask them to explain the dipping process to a newcomer. For overly dominant participants, gently enforce the rotating roles: “Thanks for leading the stirring, Sarah. Let’s have Mark take over the next round so we can all practice.” For logistical hiccups (e.g., a pot breaks), reframe it for the group: “Interesting! Our first collaborative challenge. How should we, as a table, solve this?”

The Action Plan: A Seasonal Workshop Calendar

Integrate this powerful tool into the rhythm of your corporate year for continuous reinforcement.

Season/Quarter Primary Tasks What to Focus On
Q1 / Kick-Off Plan a cheese fondue workshop. Align theme with new year/quarter goals. Secure venue. Building foundational trust and setting collaborative intentions for new projects. Focus on “blending” individual goals into team objectives.
Q2 / Mid-Year Boost Organize a broth fondue event. Review H1 challenges in the debrief. Re-energizing the team. Use the “cooking in shared broth” metaphor to discuss adapting quickly to market changes and supporting each other under pressure.
Q3 / Innovation Push Host a creative chocolate fondue with unusual dippers (pretzels, bacon, fruit). Encouraging creative risk-taking and celebrating diverse ideas. The metaphor is about combining unexpected elements for “sweet” innovative results.
Q4 / Review & Celebrate Execute a festive, multi-station finale workshop combining cheese and chocolate. Reviewing year-end successes, expressing gratitude, and solidifying team identity. Focus on shared accomplishment and the unique “flavor” of the team.

The Lasting Flavor of Success

The true mastery of the Corporate Team-Building Fondue Workshop lies in this intentional design—transforming a shared meal into a mechanism for genuine growth. It is a journey that begins with selecting the right pot and culminates in facilitating profound, workplace-relevant insights. The ultimate reward is not a clean plate, but a transformed team dynamic. You are left not with colleagues who merely shared a meal, but with a cohesive unit that possesses a common, positive reference point. They are now a team ready to “stir the pot” on new challenges together, equipped with the tasted experience of collaboration, communication, and trust. That is the unparalleled return on investment—a team whose shared success has a rich, memorable, and lasting flavor.


Related Articles

Try Our Free Tool: Use our Fondue Party Planner to plan your perfect fondue party with a custom shopping list, equipment checklist, and timeline.

Fondue Speed Dating Events: How to Host Interactive Singles Nights


Beyond Awkward Small Talk: The Fondue Solution

You know the scene. A sterile room, name tags, and a series of three-minute conversations that feel more like job interviews than romantic possibilities. The clock ticks loudly over stilted small talk. This is the pain point of conventional speed dating: it often amplifies pressure instead of fostering connection. Now, imagine a different scene. Laughter bubbles up from a table where two people collaboratively spear a piece of steak into a shared pot. A playful debate erupts over which chocolate fondue pairs best with a strawberry. The ice isn’t just broken; it’s melted, dipped, and deliciously consumed. This is the transformative power of a fondue speed dating event. Mastering this unique format is the key to creating unforgettable, connection-driven singles nights where genuine interaction flows as naturally as the cheese and chocolate.

Part 1: Foundational Choices – Crafting Your Interactive Arena

Your venue, menu, and guest list are the essential hardware of your event. These foundational choices create the stage upon which every connection will be built. Get them right, and you establish an environment where comfort and interaction are inevitable.

A. Venue Selection & Seating Architecture

The space dictates the social dynamics. A private dining room in a restaurant offers ease and professional service, ideal for a first-time host. Home hosting provides ultimate control over ambiance and timing, demanding more logistics but allowing for a more personal touch. Within either space, table architecture is critical. Long, communal tables encourage a festive group vibe but can make one-on-one rotations confusing. Intimate round tables for two or four create clear “date stations” and simplify rotations. Prioritize warm, dimmable lighting over harsh fluorescents, and ensure background music is loud enough to provide acoustic privacy for conversations but low enough that prompts are easily heard.

B. The Fondue Format: Choosing Your Social Lubricant

Fondue is not just food; it’s your primary social catalyst. Each style engineers a different type of interaction. Your choice sets the emotional tone for the entire evening.

Component Category Social Vibe Key Characteristics
Cheese Fondue Cozy & Classic Ideal for the first half of the event. Encourages sharing bread, apples, and vegetables. Its communal, dipping nature creates a warm, relaxed, and comforting atmosphere that lowers initial guards.
Broth or Oil Fondue Active & Collaborative Perfect for the middle act. Guests cook their own proteins and veggies, sparking conversation about preferences (“How rare do you like your steak?”). It’s interactive, engaging, and provides a shared activity that eliminates silent pauses.
Chocolate Fondue Playful & Sweet The essential finale. Universally delightful, it encourages playful experimentation with fruits, marshmallows, and cake. This course fosters lightheartedness and ends the night on a universally positive, indulgent note.

C. Curating Your Guest List: The Balance Equation

Chemistry requires a balanced formula. Aim for a strict gender balance and an ideal total of 16 to 24 guests. This allows for a full rotation without becoming a marathon. When crafting invitations, be clear about the age range and vibe (e.g., “professionals 30-45”). A cohesive attendee profile in terms of life stage or interests increases the likelihood of mutual connection, though a dash of diversity keeps conversations surprising. Use a clear RSVP system with a waitlist to manage last-minute cancellations seamlessly.

Part 2: The Core System – Orchestrating the Flow

With your arena built, you must now master the event as a dynamic system. The host’s role shifts from planner to conductor, actively managing time, conversation, and sustenance to maintain perfect rhythm.

A. The Clock: Mastering the Dating Rotation

The ideal “date” lasts 6 to 8 minutes. This is enough time to move beyond introductions without exhausting topics. Use a clear, consistent signal for rotation—a gentle bell, a specific song fade-out, or a dimmed light. The consequence of poor timing is severe: too short feels frantic, too long leads to awkward silences or, worse, a guest stuck in an unpleasant interaction. Enforce the rotation politely but firmly; it is the framework that protects everyone’s experience.

B. The Conversation Catalyst: Beyond “What Do You Do?”

Banish generic questions. Provide themed prompt cards on each table to ignite meaningful dialogue. Categories should include Food & Taste (“What’s your ultimate comfort food?”), Travel & Adventure (“Describe your perfect weekend getaway”), and playful “Would You Rather” scenarios. A simple solution is to place printed cards in a small holder. An advanced tactic is to write prompts directly on the fondue skewer tags or menu cards. This integrates the catalyst directly into the shared activity.

C. The Sustenance Engine: Keeping Fuel (and Fun) Flowing

Nothing halts a budding connection like an empty plate or glass. Manage logistics invisibly. Replenish dipper platters and clear used plates during rotations, not during conversations. For larger events, a dedicated server is invaluable. For home events, set up a well-organized “replenishment station” where guests can subtly grab extra dippers between dates. Ensure drink refills are handled proactively. A smooth engine keeps the social focus on people, not logistics.

Part 3: Advanced Practices – The Art of Connection Cuisine

This is where you elevate your event from well-run to extraordinary. It’s the nuanced art of using every element—food, drink, and ambiance—to engineer connection.

A. Preparation: The Dipper Doctrine

Dippers are more than food; they are conversation pieces. Move beyond basic bread cubes. Offer a selection: sourdough batons, soft pretzel bites, crisp green apples, exotic mushrooms for broth fondue. This variety naturally sparks dialogue—”Have you tried the pear with the blue cheese fondue? It’s incredible!” For broth fondues, present communal plates of raw proteins and vegetables that encourage sharing and recommendation.

B. Ongoing Inputs: The Social Glue

Sequence your elements strategically. Begin with a signature welcome cocktail or mocktail to ease initial nerves as guests arrive. Then, follow a fondue progression: start with cheese (comforting and communal), transition to broth (active and collaborative), and culminate with chocolate (playful and sweet). This arc takes the social temperature from warm, to engaged, to joyful.

C. Selection and Strategy: Curating the Vibe

Every sensory detail matters. Craft a music playlist that is upbeat but lyric-light (think jazz, bossa nova, or acoustic covers) to avoid competing with conversation. As the host, your demeanor sets the tone. Be facilitative but not intrusive. Welcome everyone warmly, explain the simple rules with enthusiasm, and then become a ghost in the machine, ensuring smooth operations while the guests become the stars of the show.

Part 4: Threat Management – Preventing Meltdowns

A proactive host anticipates friction points and has solutions ready. Your goal is to solve problems before guests are even aware they exist.

Prevention: The First and Best Defense

Clear pre-event communication is paramount. Send details on attire (is it casual or cocktail?), ask about major food allergens, and provide precise parking/transit info. Establish a “quarantine” plan for latecomers: have a designated seat for them to join the next rotation without disrupting the established flow. A well-informed guest is a relaxed guest.

Intervention: Solving Common Issues

Despite planning, minor issues arise. Have a tiered response plan.

The Overly Shy Guest: Identify them early. Use a host-initiated, open-ended prompt to the pair to give them a gentle launch. “You two, settle a debate for me: is a hot dog a sandwich?”

The Conversation Monopolizer: Your clear, enforced rotation bell is the primary solution. It objectively ends all conversations, protecting everyone’s time equally.

Fondue Mishaps: Drips and slips are part of the fun. Have ample spare forks, plenty of playful napkins, and a “no worries” attitude. A small mishap can become a shared laugh and a memorable moment.

Part 5: The Action Plan – Your Hosting Timeline

Phase Primary Tasks Focus On
2 Weeks Out Finalize guest list and send invites. Confirm venue booking and finalize fondue menu. Order or source specialty dippers. Curation & Logistics: Locking in the key components of your event framework.
Day Before Prep and store dippers. Finalize and test music playlist. Charge speakers, timers, and phones. Set the table and fondue stations. Mise en Place & Ambiance: Completing all physical preparations so the event day is about people, not tasks.
Event Day Set rotation timer. Light candles or adjust lighting. Greet each guest personally. Give a brief, confident welcome speech outlining the fun, simple rules. Flow & Energy: Transitioning from planner to conductor, initiating the social rhythm.
Post-Event Within 24 hours, send the “matches” email where guests indicate who they’d like to see again. Send a thank-you note and a brief feedback survey. Follow-Through & Improvement: Solidifying connections and gathering insights to make your next event even more masterful.

From Strangers to Shared Stories

The magic of a fondue speed dating event lies in its elegant alchemy: it structures social interaction around a inherently shared, tactile experience. You are not just hosting a dinner or managing a rotation; you are engineering an environment where connection is the most natural outcome. You have journeyed from selecting the perfect venue and savory fondue to mastering the social rhythm of timed conversations and seamless transitions. Recall that initial vision of awkward silence. Now replace it with the scene you have created: a room buzzing with the clink of forks, bursts of genuine laughter, and the warm hum of new connections being forged over a shared pot. Hosting a successful fondue speed dating event does more than facilitate dates. It creates memorable stories, builds community, and delivers the unparalleled joy of seeing strangers leave as potential friends, all thanks to your mastery of the interactive art.


Related Articles

Try Our Free Tool: Use our Fondue Party Planner to plan your perfect fondue party with a custom shopping list, equipment checklist, and timeline.

Fondue Smoking Techniques: Adding Wood-Smoked Flavor to Cheese


From Simple Melt to Smoky Masterpiece

You know the scene: a pot of melted cheese, warm and comforting. It’s good. But imagine the moment a new aroma rises—deep, woody, and intriguing. The first taste reveals a complex, savory note that transforms the familiar into the extraordinary. This is the power of smoke. Moving beyond barbecue, smoking cheese for fondue is an accessible art form. It elevates a communal dish into your signature culinary achievement. Mastering fondue smoking techniques is the key to unlocking this new dimension of flavor.

Foundational Choices – The Smoking Vessel

Your smoker is the stage for flavor. This first choice dictates your control and results. You must match your equipment to your goal.

Selection and Sizing: Matching Method to Goal

Your primary decision is between two techniques. Cold smoking infuses flavor without applying cooking heat, keeping cheese solid. It is ideal for pure flavor addition. Hot smoking cooks the cheese with warm smoke, creating a softer, fully integrated smoky base perfect for fondue. Choose your vessel accordingly.

For cold smoking, use a dedicated cold smoker, a pellet tube or maze inside a standard grill, or an improvised setup with a smoke generator and a separate, insulated box. For hot smoking, a stovetop smoker, a grill with very low indirect heat, or an electric smoker with precise temperature control works perfectly.

Location and Setup: Creating a Stable Environment

Especially for cold smoking, environment is everything. Set up in a cool, shaded, and well-ventilated area. Stable ambient temperatures prevent cheese from warming unintentionally. Ensure your setup allows for indirect heat and a consistent, gentle flow of smoke over the cheese, not through intense heat.

The Core System: Managing Smoke & Temperature

This is not cooking with fire; it is controlling an environment. You are a conductor guiding temperature and smoke to carry flavor.

The Temperature Imperative

The golden rule is non-negotiable: keep cheese below 90°F (32°C). Exceeding this causes melting, oil separation, and a greasy texture. Use a remote probe thermometer to monitor the cheese surface temperature constantly. For cold smoking, work on a cool day or even place your smoking chamber in a larger container with ice packs.

Mastering Smoke Density and Duration

Observe the smoke itself. You want thin, barely visible blue smoke. It carries clean, pleasant flavors. Thick, white smoke is dirty and will impart a bitter, acrid taste. Manage this by using minimal wood and ensuring good airflow. Duration is critical: smoke delicate cheeses like young Gouda for 30-60 minutes. Hard, aged cheeses like Parmesan or sharp Cheddar can handle 1 to 2 hours.

The Wood Selection Matrix

Wood is your flavor ingredient. Choose it as carefully as you choose your cheese.

Wood Type Key Characteristics
Apple, Cherry, Alder Mild, sweet, and fruity notes. Ideal for classic fondue cheeses like Gruyère, Emmental, and Gouda. The perfect starting point for beginners.
Hickory, Oak Medium-bodied, robust, and classic. Excellent with sharp Cheddar or aged Comté. Use sparingly to complement, not overpower, the cheese.
Mesquite, Pecan Strong, earthy, and bold. Best used in small amounts within a blend, or with very robust cheeses. Use with caution to avoid dominating the fondue.

Advanced Practices: Cheese Preparation & Integration

The art lies in preparation and strategy. How you treat the cheese before and after smoking defines the final balance.

Cheese Preparation for Optimal Absorption

Maximize surface area. Cut your cheese blocks into consistent, smaller chunks or cubes. Before smoking, let the cheese sit uncovered on a rack in the refrigerator for an hour. This air-dries the surface, creating a better pellicle for smoke adhesion and preventing unwanted moisture.

Blending and Melting Strategy

Rarely should you smoke every cheese in your fondue. Use the “Smoked Anchor” method: smoke one key cheese in your blend—typically the Gruyère or primary Cheddar. Then, blend it with unsmoked varieties like Emmental or Fontina. This creates a sophisticated, balanced flavor profile. After smoking, vacuum-seal or tightly wrap the cheese and let it rest in the refrigerator for 24-48 hours. This crucial step allows the smoke flavor to mellow and integrate evenly throughout the cheese. When melting, use gentle, indirect heat to preserve these delicate smoky nuances.

Threat Management: Avoiding Common Pitfalls

Adopt a proactive stance. Simple vigilance prevents wasted effort and ensures perfect results.

Prevention: The Prime Directives

Temperature vigilance is your first defense. Never leave your smoking cheese unattended. Second, ensure absolute cleanliness. Your smoker or grill grates must be free of residual flavors from past meats or strong woods. Dedicate equipment for cheese if possible.

Intervention: Troubleshooting Guide

If you see beads of oil or the cheese starts to slump, the temperature is too high. Immediately move the cheese to a cooler spot or pause the smoking. A bitter, acrid flavor is the sign of dirty, thick white smoke or over-smoking. The fix: use less wood, ensure proper ventilation for clean combustion, and reduce smoking time next session.

Your Smoking to Serving Roadmap

Follow this phased plan for a flawless process from preparation to presentation.

Phase Primary Tasks What to Focus On
Preparation (Day Before) Select your cheese blend; cut cheese into chunks; set up smoker in a cool location; select and prepare your wood chips or pellets. Strategic planning of your final flavor profile. Ensuring all equipment is clean and ready.
Smoking Day Air-dry cheese surface; start smoker to generate thin blue smoke; monitor cheese temperature relentlessly; smoke for your predetermined time. Absolute temperature control. Observing and maintaining clean smoke quality.
Post-Smoke (Resting) Vacuum-seal or tightly wrap smoked cheese in parchment and then plastic; refrigerate for 1-2 full days. Patience. Letting the smoky flavors mellow and harmonize within the cheese structure.
Service Day Grate the rested, smoked cheese; blend with your unsmoked cheeses; melt gently with wine, garlic, and kirsch. Creating a perfectly balanced, velvety, and aromatic fondue that is uniquely yours.

The Art of the Smoky Melt

Mastery is found in the balance: a controlled environment, thoughtful wood selection, and strategic blending. You begin by choosing a vessel and end by serving a transformed dish. The journey itself—the careful monitoring, the anticipation during the rest—culminates in profound satisfaction. Presenting a deeply flavorful, uniquely personal smoked fondue makes you the architect of a memorable experience. It becomes the centerpiece of any gathering, a testament to a craft that enriches your culinary life.


Related Articles

Try Our Free Tool: Use our Fondue Cheese Pairing Guide to discover the best cheese combinations for your fondue.

Creating Layered Fondue: Multiple Cheese Flavors in One Pot


The Art of the Stratified Pot

You’ve mastered the classic Gruyère fondue. It’s reliable, comforting, and delicious. Yet, as you watch guests dip into the same uniform flavor for the tenth time, you sense a missed opportunity. The conversation is pleasant, but the culinary experience is static. What if the pot itself could tell a story, offering a journey from a bright, tangy peak down to a deep, earthy foundation? This is the promise of the layered fondue. It transforms a simple communal dish into an interactive tasting event, where each dip is a deliberate choice and every layer reveals a new dimension. Mastering the art of creating layered fondue: multiple cheese flavors in one pot is not a party trick; it is the foundation for an unforgettable, conversation-worthy dining experience that places you firmly in control of flavor and narrative.

Foundational Choices: The Fondue Hardware

Your initial equipment choices are the bedrock of success. The right tools maintain distinct layers, distribute heat gently, and keep the fondue flowing from first dip to last. Compromise here, and your beautiful strata will collapse into a homogenous mass.

Pot Selection and Fuel Source

The classic caquelon (fondue pot) comes in two primary materials, each with distinct thermal properties. Ceramic or enameled cast iron provides gentle, even heat that is ideal for preventing scorching at the bottom layer. It’s my personal preference for layered fondues because it allows for subtle temperature control. Traditional cast iron heats aggressively and retains heat exceptionally well, which is excellent for a single cheese but risks cooking your layers together too quickly. Your heat source must match. A adjustable alcohol burner offers the fine-tuned flame control essential for maintaining a bare simmer. Gel fuel cans or electric pots with low, stable settings are also viable, but avoid high-BTU stovetop burners for serving.

The Strategic Serving Setup

Layered fondue is a performance. Stage it for success. Place the pot centrally with ample room for guests to access all sides. Provide each guest with two fondue forks—one for dipping, one for eating—to prevent cross-contamination of flavors. Most critically, prepare a diverse armada of dippers. You need textural and flavor vehicles designed to interact with specific cheese layers.

Component Category Options Key Characteristics
Pot Material Ceramic/Enameled Cast Iron; Traditional Cast Iron Gentle, even heat; ideal for layer integrity. Aggressive heat retention; best for single-layer or expert heat management.
Heat Source Adjustable Alcohol Burner; Electric Fondue Pot; Gel Fuel Offers precise flame control for maintaining a simmer. Provides consistent, set-and-forget low heat. Convenient but offers less adjustable control.
Essential Dippers Crusty Bread; Blanched Vegetables; Cured Meats; Firm Fruits Neutral canvas that carries any cheese. (e.g., broccoli, cauliflower). Adds salty, savory contrast (e.g., chorizo). Provides sweet acidity (e.g., apple, pear).

The Core System: Cheese Science and Layer Architecture

Think of your fondue not as melted cheese, but as a dynamic, layered emulsion system. Each stratum must be stable on its own yet complementary to its neighbors. This requires a deliberate blueprint.

The Flavor Blueprint

Select cheeses with purpose. Aim for a harmonious progression, typically from lightest and sharpest on top to boldest and creamiest on the bottom. A classic trio might be: a tangy, melt-friendly goat cheese at the summit; a nutty, complex Gruyère or Comté in the middle; and a deeply flavorful, aged cheddar or an alpine Appenzeller at the base. Contrast textures and intensities. A creamy fontina can bridge a sharp layer and a funky blue cheese.

The Structural Foundation

Each layer relies on its own liquid and stabilizer. The base liquid—dry white wine, lager beer, or hard cider—provides acidity and flavor while preventing proteins from clumping. Never use the same un-thickened liquid for all layers. For each cheese, you must create a slurry. Toss your grated cheese with a teaspoon of cornstarch or flour per cup. This starch coats the cheese proteins and, when heated with the liquid, creates a stable emulsion that resists breaking. For foolproof stability, a small amount of sodium citrate dissolved in your liquid will guarantee a smooth melt, especially for harder cheeses.

The Layering Technique

The method is sequential and patient. Start by rubbing the pot with a cut garlic clove. Add the liquid for your bottom layer and bring to a simmer. Gradually whisk in your first (bottom-layer) cheese mixture until fully melted and smooth. Do not let it boil. Carefully pour this first fondue into a heatproof bowl. Rinse the pot quickly with hot water and dry. Now, repeat the process in the now-empty pot for your middle layer. Once smooth, gently pour the reserved bottom layer back on top. It will sink, creating two distinct strata. Repeat for a third top layer. This “reverse build” ensures clean separation.

Advanced Practices: Flavor Optimization and Dipper Strategy

With a stable structure in place, you can focus on the art—elevating each layer into a memorable flavor zone and guiding your guests through the experience.

Strategic Flavor Infusions

Introduce aromatics and accents between layers. After pouring a layer, sprinkle finely chopped fresh herbs (chives, thyme), a drizzle of truffle oil, or a spoonful of whole-grain mustard across its surface before adding the next cheese. For a spirit-infused layer, replace a portion of the wine with a complementary liquor—a splash of kirsch in the alpine layer, a bit of whiskey in the cheddar base.

The Dipper Doctrine

This is where layered fondue becomes interactive theater. Don’t just provide dippers; suggest pairings. Guide guests to try a crisp apple slice with the sharp top layer, a piece of sourdough with the nutty middle, and a slice of seared steak or smoked sausage with the robust bottom layer. The right pairing turns a simple dip into a targeted flavor explosion.

Orchestrating the Sequence

As the host, you are the guide. Encourage guests to start at the top, exploring the brighter, lighter flavors first. As the meal progresses and the top layer diminishes, they will naturally delve into the richer, more profound depths. This pacing creates a narrative and prevents the layers from being mixed prematurely.

Threat Management: Preventing Breaks and Clumps

A broken, greasy, or clumpy fondue is the enemy of elegance. Adopt a proactive defense; rescue missions are a last resort.

Prevention: The Unbreakable Emulsion

Constant, low heat is non-negotiable. A rolling boil will cause proteins to tighten and squeeze out fat, breaking the emulsion. Ensure your cheese is grated finely and, crucially, is room temperature and dry—toss it with starch right before adding. Always add cheese gradually, whisking constantly until fully incorporated before adding more. This slow integration is the single most important step for smoothness.

Intervention: The Tiered Rescue Plan

If your fondue looks oily or begins to separate, do not panic. First, increase the heat slightly and whisk vigorously. Often, this is enough to re-emulsify. If separation persists, create a quick slurry by mixing a teaspoon of cornstarch with a tablespoon of your base liquid or kirsch. Whisk this into the fondue over medium heat until it tightens and becomes smooth again. For stubborn clumps, an immersion blender is a powerful, last-ditch tool.

The Action Plan: A Layered Fondue Timeline

Phase Primary Tasks Focus On
Prep (1-2 Hours Before) Grate all cheeses to room temperature; toss each variety with its starch. Prepare all dippers and arrange on platters. Measure base liquids and aromatics. Organization. Your mise en place is critical. A calm, prepared cook builds a stable fondue.
Build (During Cooking) Execute the reverse layering technique: cook bottom layer, remove; cook middle layer, add bottom back; cook top layer, add combined middle/bottom back. Maintain low simmer. Emulsion Stability. Patience and temperature control. Rushing this phase guarantees failure.
Serve & Maintain (At the Table) Transfer to fondue burner. Guide initial pairings. Stir gently every few minutes. Monitor flame to maintain a lazy bubble. Add a splash of warm liquid if fondue thickens. Guest Interaction & Texture. You are the curator and technician, ensuring the journey lasts.

The Masterpiece Pot

The true mastery of creating layered fondue: multiple cheese flavors in one pot lies in the perfect balance of intentional architecture and controlled technique. It is the culmination of thoughtful hardware selection, a scientific understanding of emulsion, and the artistic flair of flavor pairing. You begin with the right pot and the blueprint for your strata. You build a stable, dynamic system layer by careful layer. Finally, you orchestrate the shared experience, guiding your guests from one delicious discovery to the next. The reward is more than a meal; it is the shared joy of culinary exploration, the animated conversation sparked by each new combination, and the profound satisfaction of presenting not just a dish, but a memorable, interactive masterpiece.


Related Articles

Try Our Free Tool: Use our Fondue Cheese Pairing Guide to discover the best cheese combinations for your fondue.

Fondue Fuel Alternatives: Comparing Sterno, Gel, and Electric Heat Sources


The Heart of the Feast: Mastering Your Fondue Fuel Source

Picture the perfect fondue moment: laughter fills the air, bread is poised for dipping, and the pot beckons with its smooth, velvety promise. Then, disaster. The cheese clumps into a rubbery mass. The chocolate seizes into a grainy halt. The oil never gets hot enough. This culinary letdown almost always traces back to a single, overlooked element: an inconsistent or inadequate heat source. Your choice of fuel is the silent conductor of the entire fondue symphony. It dictates not just temperature, but pace, safety, and the very success of your dish. Selecting the optimal fondue fuel alternative is the foundational key to transforming your fondue from a precarious experiment into a reliably exquisite, social centerpiece. Master this, and you unlock confidence, control, and superior results every time.

Foundational Choices: The Heat Source “Hardware”

Your fuel choice is the non-negotiable bedrock of your fondue experience. It determines what you can cook, how you control it, and where you can host. This isn’t a minor detail; it’s the hardware that enables your culinary software.

Part A: Selection and Sizing: Matching Fuel to Fondue

The first rule is compatibility. Your fuel must align with your fondue type and pot material. A mismatch guarantees frustration.

  • Sterno (Canned Heat): The classic choice. Its gentle, diffuse flame is ideal for traditional cheese and chocolate fondues that require sustained, low heat. It struggles to reach and maintain the high temperatures needed for oil or broth fondue. Choose Sterno for atmosphere and simplicity.
  • Gel Fuel (Liquid/Gel Ethanol): The portable specialist. It burns cleanly and is remarkably wind-resistant, making it excellent for outdoor patios or decorative fondue sets. It suits moderate-heat applications like cheese or chocolate, but like Sterno, lacks precise adjustability.
  • Electric Fondue Pot: The versatile champion. With its built-in, adjustable thermostat, it provides precise, consistent heat for all fondue types. It is absolutely critical for safely maintaining the exact high heat needed for oil fondue and is foolproof for delicate chocolate. This is the tool for control and menu flexibility.

Part B: Setup and Safety: The Non-Negotiable Protocols

Regardless of your choice, universal rules apply. Always use a stable, level, heat-resistant surface. Keep the setup away from curtains, paper, and flammable decorations. Then, follow your fuel’s specific protocol.

  • For Sterno & Gel Fuel: Use a long-reach lighter. Place the can or burner securely in the stand before lighting. Never attempt to refill or “top up” a burning or hot fuel container. Always have a snuffer or metal lid ready to extinguish the flame.
  • For Electric Pots: Practice diligent cord management to prevent tripping. Ensure the pot is seated correctly on its heating base for proper contact. Never immerse the base or cord in water. Plug into an outlet away from the dining area.

Part C: Material and Component Comparison

This detailed comparison breaks down your core options. Use it as your quick-reference guide to the characteristics of each fondue fuel alternative.

Component Category Primary Options Key Characteristics & Best Use
Fuel / Heat Source Sterno (Canned Heat)
  • Portable & traditional. Provides a gentle, atmospheric flame.
  • Typical burn time: 2-3 hours per can.
  • Best for casual cheese or chocolate fondue indoors.
  • Heat output is fixed; control by raising/lowering the pot.
Gel Fuel (Liquid Ethanol)
  • Highly portable & wind-resistant. Clean-burning and smokeless.
  • Typical burn time: 1.5-2 hours per container.
  • Excellent for outdoor use or in decorative fondue sets.
  • Heat output is fixed; not ideal for high-temperature frying.
Electric Element
  • Precise & powerful. Offers adjustable, consistent thermostat control.
  • Unlimited “burn time” while plugged in.
  • The ideal choice for oil, broth, and delicate chocolate fondues.
  • Enables versatile, multi-course fondue meals with total control.

The Core System: Actively Managing Your Heat

Think of your fondue not as a pot of food, but as a dynamic thermal system. Your role is to actively manage its key variables. The right fuel is your tool; these techniques are your skills.

Variable 1: Temperature Precision

Hit the sweet spot. For cheese, aim for 115-130°F (46-54°C)—a bare simmer. Oil must reach and hold 375°F (190°C) for safe, quick cooking. Chocolate is most delicate, thriving between 110-120°F (43-49°C). Stray outside these ranges, and you invite broken cheese, soggy meat, or seized chocolate.

Control Methods: An electric thermostat provides effortless precision. For Sterno or gel, you must become the thermostat. Regulate heat by sliding the adjustable pot stand higher or lower above the flame. A metal snuffer can partially dampen the flame to reduce heat.

Variable 2: Burn Time and Fuel Capacity

Your target is simple: sufficient heat for the entire meal, typically 1.5 to 2 hours. Running out of fuel mid-fondue is a hosting failure that breaks the social spell.

Planning is Key: Always have extra, sealed cans of Sterno or gel fuel ready. For electric pots, ensure your outlet is accessible and not on a switch that might be accidentally turned off. Know your equipment’s limits before your guests arrive.

Variable 3: Ambient Influence and Safety

Your environment interacts with your heat source. A draft from a door or fan can extinguish or wildly distort a Sterno or gel flame, leading to uneven heating. Electric elements are blissfully immune to this issue.

Safety is the Ultimate Control: Never leave an open flame unattended. Position the fondue pot so no guest can accidentally brush against the flame or hot components. With electric models, keep cords tidy and out of foot traffic. Your vigilance ensures the feast remains joyful.

Advanced Practices: Optimization for Superior Results

With the fundamentals mastered, shift your focus to the artful application of heat. This is where good fondues become great.

Preparation: The Right Pot for the Fuel

Your pot material is part of the thermal system. Ceramic or clay pots, common for cheese fondue, require a heat diffuser (like a stand) when used with Sterno or gel to prevent thermal shock and cracking. They often come with their own electric base. Metal pots—enameled cast iron or stainless steel—are the workhorses. They conduct heat efficiently and are compatible with all heat sources, making them indispensable for high-heat oil fondue.

Ongoing Inputs: Fueling the Social Experience

Consider the sequence of your meal. For an oil fondue, start at the highest setting to reach temperature quickly, then reduce to maintain. A cheese fondue should never boil; maintain that gentle simmer. Your fuel choice also dictates your role as host. With Sterno or gel, someone must act as “Fondue Butler,” actively managing the flame. An electric pot liberates the host to fully participate in the conversation, making it the superior choice for seamless entertainment.

Threat Management: Preventing the Fondue Fail

Adopt a proactive stance. Most common fondue disasters are preventable with the right setup and simple checks.

Prevention: Your First and Best Defense

  • Cleanliness: Wipe the rim of Sterno cans and the burner cup of gel units. Debris causes an uneven flame.
  • Inspection: Before each use, check electric cords for fraying. Ensure gel fuel burners are free of old, gelled fuel residue.
  • Quarantine: Test a new fuel type or an unfamiliar pot with a water run-through before the big event. This reveals heat distribution and control quirks.

Intervention: A Tiered Troubleshooting Guide

If a problem arises, respond calmly and methodically.

  • Symptom: Flame is too weak or low.
    • Sterno/Gel: Ensure the can lid or burner cover is fully open. The fuel may be nearly spent; replace it with a fresh unit.
    • Electric: Verify the pot is seated perfectly on the heating base. Check that the thermostat dial isn’t stuck on low.
  • Symptom: Overheating or burning contents.
    • Sterno/Gel: Immediately raise the pot higher above the flame. Use a snuffer to partially block the flame.
    • Electric: Turn the thermostat down immediately. For oil, you may need to briefly unplug to cool it down quickly.

Your Fondue Action Plan: A Seasonal Roadmap

Apply your knowledge strategically throughout the year. This practical calendar turns theory into flawless execution.

Season / Occasion Primary Tasks & Fuel Choice What to Focus On
Winter Holiday Gathering Use an Electric pot for a stress-free, multi-course fondue (cheese, then oil or broth). Precision, consistent heat for different courses, and full host participation in the festivities.
Summer Outdoor Party Opt for Gel Fuel in a portable set for chocolate or cheese fondue on the patio. Portability, wind resistance for a steady flame, and creating ambient lighting as the sun sets.
Casual Game Night Choose classic Sterno for a simple, atmospheric cheese fondue. Nostalgic tradition, minimal setup, and easy cleanup so the fun never pauses.

Mastery over fondue fuel alternatives is, in essence, mastery over the experience itself. You have journeyed from understanding the foundational hardware—the distinct roles of Sterno, Gel, and Electric—to actively managing the thermal system for perfect results. This knowledge transforms you from an anxious host into a confident curator of joy. The perfect, steady heat becomes the unseen conductor, orchestrating laughter, conversation, and unforgettable shared meals. It enriches your life, one perfectly timed, delicious dip at a time.


Related Articles

Try Our Free Tool: Use our Fondue Pot Selector to find the perfect fondue pot for your needs.

Using Fondue Leftovers: Savory Breakfast Ideas and Baked Dishes


The Art of the Second Act: Mastering the Use of Fondue Leftovers

From Last Bite to First Meal

You clear the table after a perfect fondue evening. The laughter lingers, but in the fridge, a new challenge congeals: a bowl of once-molten cheese now firm, a pot of wine-scented broth, or a vessel of rich chocolate. The temptation is to see it as an ending, a culinary full stop. This is a fundamental misjudgment. That container holds not waste, but a concentrated essence of flavor, a superior foundation begging for a second act. Mastering the art of using fondue leftovers transforms last night’s communal joy into this morning’s triumphant, savory breakfast and tomorrow’s effortlessly impressive baked dish. It is the key to a resourceful, zero-waste kitchen that consistently delivers deep, complex flavors.

Foundational Choices: Assessing Your Leftover “Hardware”

Your success begins not with a recipe, but with a forensic assessment. Correctly identifying and preparing your foundational ingredient—the leftover fondue itself—sets the stage for all that follows.

Part A: Identification and Separation

Immediately categorize your leftovers. Cheese fondue (Gruyère, Emmental, Cheddar-based) is a fat-and-protein-rich emulsion. Broth fondue (Fondue Bourguignonne, court-bouillon) is an aromatic, seasoned liquid infused with meat juices and herbs. Chocolate fondue is a sweet, fatty blend. The critical first step is separation. For broth fondues, strain out any solid herbs or peppercorns. For cheese fondues, if oils have separated, do not discard them; they will be reintegrated during gentle reheating.

Part B: Re-constitution and Readiness

Cheese fondue requires a gentle touch. Reheat it slowly in a double boiler or a non-stick pan over very low heat, stirring constantly. A small splash of milk, cream, or white wine can help re-emulsify the fats and proteins, restoring a silky texture. Broth-based leftovers should be treated oppositely. Simmer them uncovered to reduce and intensify their flavor, concentrating them into a powerful stock or glaze.

Part C: The Flavor Profile Matrix

Leftover Type Core Characteristics Ideal Culinary Direction
Classic Cheese (Swiss-style) Nutty, slightly sharp, wine-accented, creamy when melted. Savory breakfast sauces, egg dishes, gratins, savory bread doughs, and sandwich spreads.
Rich Broth (Bourguignonne) Deeply savory, aromatic with herbs, garlic, and meat essence. Poaching liquid for eggs, base for savory oatmeal or grits, cooking liquid for grains in a bake.
Chocolate or Dessert Sweet, rich, often flavored with liqueur or spice. Swirl into breakfast muffin batter, blend into oatmeal, or use as a pastry filling (separate guide).

The Core System: Savory Breakfast Transformations

Think of breakfast as a dynamic system where fondue leftovers become your ultimate control variable for instant, profound flavor. You are not just adding an ingredient; you are integrating a pre-built sauce or stock.

Variable 1: The Cheese Foundation

Your target is seamless integration. For scrambled eggs, fold in a few spoonfuls of re-warmed cheese fondue during the last minute of cooking—it creates pockets of luxurious, flavorful cheese. Transform Eggs Benedict by replacing the hollandaise with a thinned, warm cheese fondue. For a baked shirred egg, spoon a layer of fondue into a ramekin, crack in an egg, and bake until set for an instant, individual gratin.

Variable 2: The Broth Foundation

Your target is building an aromatic base. Use your reduced, intensified broth to poach eggs gently. The eggs will absorb the complex flavors, creating a dish reminiscent of French œufs en meurette. Alternatively, cook steel-cut oats, polenta, or farro directly in the broth instead of water. The grains will absorb every bit of savory depth, turning a simple porridge into a sophisticated breakfast bowl.

Variable 3: The Strategic Add-In

Your target is a balanced, restaurant-quality plate. Do not forget the other elements from your fondue spread. Leftover bread cubes, slightly stale, are perfect for a breakfast strata or a savory bread pudding. Blanched vegetables like broccoli or potatoes can be diced into a morning hash. Cured meats like salami or ham can be integrated into a frittata. The fondue leftover becomes the unifying, flavorful glue that ties these components together.

Advanced Practices: Baked Dish Mastery

This is where you elevate your practice from quick meals to show-stopping creations. Here, fondue leftovers shift from a topping to an integral component of the dish’s structure.

Preparation: The Best Mediums

Leftover cheese fondue is a secret weapon for baked dishes. Use it as the rich, flavorful layer in a Croque Monsieur or a grilled cheese, ensuring a melt that never separates. It acts as a superb binder and sauce for pasta bakes or vegetable gratins—simply toss cooked pasta or vegetables with the fondue, top with breadcrumbs, and bake. For a profound twist, knead a cooled, firm cheese fondue into a basic bread or biscuit dough; it will create pockets of flavor and incredible tenderness.

Ongoing Integration: The Seamless Blend

The key to incorporating fondue into batters is temperature control. Ensure your cheese fondue is cool but not solid when folding it into a scone or gougère batter. This prevents it from melting prematurely and breaking the emulsion within the dough. For broth-based leftovers, use them at room temperature to hydrate dry ingredients in a savory quick bread or stuffing, ensuring even flavor distribution.

Selection and Strategy: Flavor Sequencing

Pair with intention. A nutty Swiss cheese fondue is sublime layered into a classic potato gratin. A robust broth fondue is the ideal soaking liquid for the bread in a savory mushroom and herb bread pudding. A sharper Cheddar fondue can be the star in a baked macaroni and cheese, adding a layer of complexity store-bought cheese cannot match.

Threat Management: Problem Prevention and Solution

Adopt a proactive stance. The best rescue is avoiding the problem altogether.

Prevention: The First Defense

Cool and store leftovers rapidly to prevent bacterial growth and texture breakdown. Portion cheese fondue into a shallow container to speed cooling. Remember the cardinal rule: fondue is already seasoned with garlic, wine, and spices. Always season your final dish incrementally, tasting as you go. Over-salting is the most common error.

Intervention: The Rescue Protocols

If your reheated cheese fondue becomes grainy, a splash of acidic white wine or lemon juice, stirred vigorously over low heat, can often coax the proteins back into a smooth emulsion. For a broken sauce that has separated, create a quick slurry with a teaspoon of cornstarch and a tablespoon of cold water or milk, then whisk it into the fondue over heat. If the flavor of a broth fondue seems weak after incorporating it into a bake, a final sprinkle of a complementary hard cheese (like Parmesan) or fresh herbs before serving will add a necessary top note.

A Seasonal Roadmap for Fondue Leftovers

Season Primary Leftover Type Focus Dishes (Breakfast & Baked)
Winter Rich Cheese & Meat Broth Hearty stratas, savory bread puddings, enriched breakfast biscuits, and deep-poached eggs.
Spring Lighter Cheese & Herb Broth Asparagus and fondue frittatas, savory herb scones, and green grain bowls cooked in broth.
Summer Quick Cheese Dips, Vegetable Broths Cold fondue as a savory spread for breakfast tartines, blended into picnic quiches, or used in stuffed breakfast muffins.
Fall Robust Cheese, Mushroom Broths Pumpkin or squash soup enriched with cheese fondue, mushroom and fondue stuffed bread, and baked polenta.

The Cycle of Culinary Excellence

Mastering using fondue leftovers is the ultimate exercise in resourceful creativity and intelligent flavor layering. It is a practice that begins with assessing a humble container and culminates in the confident creation of dishes that taste of care and sophistication. This journey transforms your relationship with ingredients, turning every fondue night into a beginning. The profound satisfaction lies not just in the avoidance of waste, but in the consistent delivery of deeply flavorful, impressive meals. Your fondue pot becomes a gift that keeps on giving, enriching your daily cooking with unparalleled depth and joy.


Related Articles

Try Our Free Tool: Use our Fondue Glossary to look up any fondue term or technique.

Fondue Temperature Zones: Optimal Heat for Different Cheese Types


The Agony and the Ecstasy of Fondue

You’ve gathered friends, chosen fine cheeses, and followed the recipe. Yet, instead of a velvety, cohesive pot, you’re left with a grainy, separated mess clinging to the bread. The disappointment is palpable. The difference between that failure and a perfect, silky fondue isn’t luck or magic—it’s science. The single most critical factor is precise heat management. Mastering Fondue Temperature Zones is the non-negotiable foundation for transforming simple ingredients into an extraordinary experience. It is the key that unlocks each cheese’s perfect texture and flavor, turning a potential disaster into a guaranteed triumph.

Foundational Choices: Your Fondue Hardware

Your pot and heat source are not mere utensils; they are the bedrock of your thermal control. The right choices here create a stable platform for success.

Pot Selection and Material

The classic earthenware caquelon offers tradition, but modern materials provide superior control. Your choice dictates how heat is applied and retained.

Pot Material Key Characteristics
Traditional Ceramic Provides gentle, even heat distribution ideal for classic fondues. Fragile and sensitive to sudden temperature changes. Requires pre-warming to prevent cracking.
Enameled Cast Iron Offers exceptional heat retention for steady, consistent temperatures. Heavy and stable. Excellent for long, leisurely meals but can hold heat aggressively, requiring careful monitoring.
Stainless Steel Delivers precise, responsive heat control. Often used with an electric base. Less traditional but unparalleled for managing fine temperature adjustments, especially with delicate cheeses.

The Heat Source: Flame vs. Electricity

This is your throttle. Alcohol or gel burners offer the romantic, adjustable flame of tradition, but they demand constant vigilance. Electric burners are the precision tool of the modern fondue master, providing dial-controlled, consistent heat that eliminates guesswork. For mastering temperature zones, especially with finicky cheeses, electric control is a significant advantage.

The Core System: Mastering the Temperature Zones

Think of your fondue not as a dish, but as a delicate thermal ecosystem. Your goal is to maintain equilibrium within a specific, cheese-friendly range.

The Golden Rule: Low and Slow

High heat is the enemy. It causes cheese proteins to coagulate violently, squeezing out fat and moisture, resulting in a broken, greasy mess. The ideal range is the Simmer Zone, well below a boil, typically between 160°F and 185°F (71°C and 85°C). Within this zone, cheeses melt gently into a stable emulsion.

Variable Control: Tools and Techniques

Control requires measurement and method. An instant-read thermometer is non-negotiable for precision. Learn visual cues: tiny, lazy bubbles signal the perfect zone; large, rolling bubbles mean danger. Employ the “lift-and-stir” method—gently lifting the melted cheese from the bottom and folding it over—to distribute heat evenly. For ultimate control, use a two-burner technique: melt your fondue gently on the stove, then transfer it to a lower-heat burner for maintenance at the table.

Advanced Practices: Cheese-Specific Temperature Strategies

True mastery lies in nuance. Different cheeses demand tailored approaches within the safe Simmer Zone.

Preparation: The Cheese Foundation

Success begins before heat is applied. Tossing your grated cheese with a tablespoon of cornstarch or flour coats the proteins, preventing them from clumping and creating a stabilizing network. Always grate your own cheese; pre-grated contains anti-caking agents that hinder melting. Letting grated cheese sit at room temperature for 20 minutes before cooking reduces the thermal shock when it hits the pot.

Ongoing Management: The Stirring and Dipping Rhythm

Fondue is a living dish. Frequent, gentle stirring maintains the emulsion. Remember that every cold piece of bread dipped into the pot cools it slightly. This rhythmic cooling is natural, but you must compensate with tiny adjustments to your heat source to stay in the zone. It’s a dance between dipping and adjusting.

Cheese Type Strategy: Your Temperature Guide

Apply this framework to build your perfect blend.

  • High-Moisture, Melting Cheeses (Gruyère, Emmental): These are the workhorses. They thrive in the lower-mid range, 160-170°F (71-77°C). They are forgiving and tolerate slight fluctuations well.
  • Firm, Aged Cheeses (Comté, Aged Gouda): These cheeses need a steady, committed heat in the mid-range, 170-180°F (77-82°C), to melt fully without seizing. Patience is key.
  • Soft or Blue Cheeses (Brie, Gorgonzola): Handle with care. They require the gentlest heat, 160-165°F (71-74°C), and constant attention. They often lack structure alone, so blend them with a firmer, high-moisture cheese for stability and sublime flavor.

Threat Management: Saving a Broken Fondue

A proactive stance is your best defense, but even masters need a rescue plan.

Prevention: The Best Defense

Gradual cheese addition, constant stirring, and religious avoidance of boiling are your holy trinity. If you respect the temperature zone, separation is unlikely.

Intervention: The Rescue Plans

If your fondue begins to separate or grain, act immediately with this tiered response:

Tier 1: Remove the pot from heat. Add a splash of cool wine, lemon juice, or kirsch while whisking vigorously. The sudden cool liquid and acid can often shock the proteins back into emulsion.

Tier 2: If Tier 1 fails, create a cornstarch slurry by mixing a teaspoon of cornstarch with a tablespoon of cold wine or water. Whisk this into the troubled fondue over low heat until it re-thickens smoothly.

If all else fails, repurpose with pride: your broken fondue becomes a magnificent base for a soup or pasta sauce. No great effort is truly wasted.

The Action Plan: Your Fondue Service Timeline

Phase Primary Tasks What to Focus On
Preparation (30 mins before) Grate cheese and mix with starch; rub pot with garlic; prepare all accompaniments; set table with heat source. Organization and mise en place. A calm start is crucial.
Melting Phase (First 10 mins) Heat wine/base gently on stove to a bare simmer. Add cheese in small handfuls, stirring constantly in a figure-8 pattern until fully melted and smooth. Achieving a smooth, initial emulsion without rushing. This is where the foundation is built.
Maintenance Phase (During service) Transfer pot to table heat. Monitor temperature with a thermometer. Adjust flame/dial minutely. Stir the pot gently every few dips. Holding the perfect Fondue Temperature Zone for your specific cheese blend. This is the art of balance.

The Transformation at Your Table

Mastery of heat transforms cooking from chance to certainty. This journey—from selecting the right pot and understanding the Simmer Zone to executing a cheese-specific thermal strategy—culminates in profound satisfaction. A perfectly maintained pot becomes the centerpiece of shared joy, enabling uninterrupted conversation and unparalleled creamy delight. This knowledge turns a simple meal into a memorable event, enriching your life one perfect, confident dip at a time. You are no longer following a recipe; you are conducting a symphony of flavor and texture, guaranteed to impress.


Related Articles

Try Our Free Tool: Use our Fondue Cheese Pairing Guide to discover the best cheese combinations for your fondue.

Professional Chef Secrets for Restaurant-Quality Fondue at Home


The Fondue Fantasy vs. Your Reality

You envision a pot of molten, velvety cheese, a centerpiece of laughter and shared bites. The reality? A grainy, separated mess or a bland, gluey pool that hardens into a rubbery mass. This disappointment isn’t fate. It’s a gap in technique. The chasm between a failed fondue and a flawless one is bridged not by expensive ingredients, but by a handful of critical, professional methods. Mastering these professional chef secrets for restaurant-quality fondue at home transforms it from a risky novelty into a foolproof pillar of elegant entertaining. This is your guide to commanding the pot.

The Foundation: Choosing Your Culinary Arsenal

Your initial choices in tools and ingredients form the unshakable base for everything that follows. Treat this not as shopping, but as assembling your control system.

The Pot and Heat Source: Your Command Center

The vessel and its heat are your primary levers of control. Choose wisely.

The Caquelon vs. The Modern Pot: The traditional Swiss ceramic caquelon isn’t just for show. Its thick, earthenware walls distribute heat gently and evenly, preventing scorching and maintaining a stable temperature—key for the delicate emulsion. A heavy-bottomed enameled cast iron or stainless steel pot is an excellent alternative, offering similar heat retention. Avoid thin, reactive metals like aluminum or plain stainless steel without a clad bottom; they create hot spots that will break your sauce.

Heat Management is Non-Negotiable: A pot over a direct, high stove burner is a recipe for disaster. You must use a low, consistent, adjustable flame. A tabletop rechaud (fondue burner) fueled by ethanol gel or butane is the professional’s choice for maintaining the perfect gentle simmer at the table. This is not optional equipment; it is the heart of temperature control.

The Core Components: Cheese, Liquid, and Stabilizers

Every element has a chemical and culinary purpose. Understanding this turns cooking into chemistry.

Component Category Options & Characteristics
Cheese (The Star)
  • Gruyère: The backbone. Nutty, complex, and excellent meltability. Provides foundational flavor.
  • Emmental: The lightener. Buttery, mild, and creamy. Helps create a smooth, flowing texture.
  • Appenzeller or Comté: The accent. More pungent or fruity notes. Use in smaller amounts to add character without overwhelming.

Chef’s Rule: Always grate your own cheese. Pre-shredded cheese contains anti-caking agents (like cellulose) that can inhibit a smooth melt.

The Liquid (The Medium)
  • Dry White Wine (e.g., Sauvignon Blanc, Chasselas): The classic. Its acidity helps stabilize the cheese proteins, preventing them from clumping and becoming stringy. The alcohol also lowers the boiling point, allowing for gentler heating.
  • Light Beer or Hard Cider: Excellent alternatives. They add malty or fruity notes and provide the necessary acidity.
  • Non-Alcoholic Substitute: Use a mix of good-quality broth and a tablespoon of lemon juice to replicate the acid.
The Stabilizers (The Insurance)
  • Cornstarch or All-Purpose Flour: These are your emulsifying agents. They coat the cheese proteins and fat, helping them stay suspended in the liquid, creating a stable, silky sauce instead of an oily separation.
  • Acidic Element (Lemon Juice): Often used in addition to wine, a squeeze brightens flavor and further aids in protein management.
  • Kirsch (Cherry Brandy): Traditional in Swiss fondue. Added at the end, it provides a sharp, aromatic kick and a final layer of stabilizing alcohol.

The Core System: Commanding the Science of the Melt

Fondue is not merely melted cheese. It is a temporary, hot emulsion—a suspension of fat in water—that you are personally responsible for maintaining. These are your control variables.

Variable 1: Precision Temperature Control

The Target: A bare, gentle simmer. You should see tiny bubbles lazily rising to the surface, never a rolling boil. If your pot is bubbling vigorously, you have lost control.

The Consequence of Failure: Excessive heat causes the proteins in the cheese to tighten and squeeze out their fat, resulting in a broken, greasy pool with tough, rubbery curds. This is the point of no return for texture.

The Method: Use your rechaud on its lowest effective setting. If adjusting the flame, do so in tiny increments. Your fondue should stay hot enough to melt a dipped piece of bread, but never so hot it cooks aggressively.

Variable 2: Acid and Moisture Balance

The Role of Acidity: Acid from wine or lemon juice keeps the cheese proteins relaxed and cooperative. Without it, the fondue becomes stringy and difficult to manage. It’s the difference between smooth silk and sticky glue.

Managing Consistency: If your fondue thickens too much as it sits, do not crank up the heat. Take the pot off the flame and stir in a splash of warm wine, broth, or even a touch of cream. If it seems too thin from the start, a slurry of a teaspoon of cornstarch mixed with a tablespoon of kirsch or wine, whisked in over low heat, will tighten it gently.

Variable 3: The Thickening Protocol

The “Shake-in-a-Jar” Chef’s Trick: To guarantee lump-free integration of your stabilizer, toss your grated cheese with the cornstarch or flour in a large bowl until evenly coated. For an even more foolproof method, add the cornstarch to your cold wine or kirsch in a lidded jar and shake vigorously until completely dissolved. This slurry integrates seamlessly.

The Stirring Technique: Once the cheese begins to melt, stir with a wooden spoon in a slow, consistent figure-eight pattern. This ensures even heat distribution and emulsification. Aggressive, fast stirring can incorporate too much air and sometimes hinder the emulsion.

Advanced Practices: The Art of Flavor and Flow

With the science secured, you can focus on optimization and the experience itself.

Building a Sophisticated Flavor Base

Before adding cheese, infuse your liquid. Rub your pot with a halved garlic clove. Then, gently heat the wine with that garlic, a few peppercorns, and perhaps a bay leaf until just steaming. Let it steep for five minutes off the heat. This creates a nuanced background that precludes blandness. A few fine gratings of fresh nutmeg added with the cheese is the secret aromatic finish every chef knows.

The Sequence of Operations

The order is sacred for a reason. 1) Heat your infused liquid to a simmer. 2) Reduce heat to low. 3) Add your cornstarch-coated cheese handful by handful, stirring constantly in a figure-eight until fully melted before adding the next. 4) Once smooth, stir in kirsch if using. 5) Let the fondue rest off the direct heat for two minutes before serving. This brief pause allows the emulsion to settle and the flavors to marry, resulting in a creamier texture.

Dipping Architecture and Table Management

Choose dippers for contrast. Cubes of day-old, crusty bread (the stale interior soaks up cheese without disintegrating), blanched broccoli, crisp pear or apple slices, and cured meats. Establish the “no double-dip” rule upfront. Provide long-stemmed forks and plates for each guest to transfer their dipped morsel to, ensuring the communal pot remains a shared joy, not a hygiene hazard.

Threat Management: The Fondue Rescue Squad

Avoid problems through control, but have a plan for intervention.

Prevention is Paramount: 90% of fondue disasters are caused by excessive heat or adding cheese too quickly. Maintain that gentle simmer and add cheese gradually.

Tiered Intervention Plan:

  • Problem: Too Thick or Clumpy. Solution: Immediately remove from heat. Stir in a tablespoon of warm wine, broth, or cream at a time until it loosens.
  • Problem: Broken or Separated (oily with solids). Solution: Remove from heat. Add an ice cube or a tablespoon of cold cream or lemon juice. Whisk vigorously. The rapid temperature change and added emulsifiers can often bring it back.
  • Problem: Too Thin. Solution: Mix 1 tsp cornstarch with 1 tbsp of cold wine or water into a slurry. Return fondue to low heat, whisk in slurry, and simmer gently for 1 minute until thickened.

Your Foolproof Fondue Timeline

Phase (Countdown) Primary Tasks Focus On
T-60 Minutes Grate all cheese; toss with cornstarch. Cut bread and prep all dippers. Set the table with fondue burner, forks, and plates. Mise en place. Having everything ready is the key to a calm, controlled melt.
T-15 Minutes On the stovetop, rub pot with garlic, add wine and aromatics. Heat to a bare simmer, then steep off-heat. Flavor base infusion. Building the aromatic foundation.
T-5 Minutes to Serve Return infused wine to low heat. Gradually add cheese, stirring constantly in a figure-eight. Stir in kirsch. Transfer to fondue burner. The emulsification. Patient, gradual addition and constant, gentle stirring.
Serving Time Light the rechaud to the lowest flame that maintains a simmer. Invite guests to dip, reminding them of the stirring rule. Heat maintenance and communal flow. Your role is now guardian of the temperature.

From Fantasy to Your Signature Centerpiece

Fondue mastery distills to a trinity: the balance of acid, the command of heat, and the patience of technique. You have moved from simply selecting cheese to understanding its chemistry, from fearing the pot to commanding its microclimate. This knowledge transforms your dining table. It becomes a hub of shared joy, centered around a pot of your own creation—silky, robust, and perfectly maintained. This is the profound satisfaction of the craft: not just making dinner, but orchestrating an experience. Your restaurant-quality fondue at home is now a testament to skill, a warm, bubbling invitation to connection, and a personal culinary triumph you can repeat with unwavering confidence.


Related Articles

Try Our Free Tool: Use our Fondue Glossary to look up any fondue term or technique.

Affiliate Disclosure: FondueCooking.com is a participant in the Amazon Services LLC Associates Program, an affiliate advertising program designed to provide a means for sites to earn advertising fees by advertising and linking to Amazon.com. As an Amazon Associate we earn from qualifying purchases. Learn more