What to Dip in Fondue: The Complete Guide to Fondue Dippers

The right dippers make or break a fondue night. Whether you’re serving melted cheese, warm chocolate, hot oil, or savory broth, choosing what to dip in fondue determines how satisfying — and how varied — the experience feels at the table. This guide covers every fondue type with specific, tested dipping options and quick prep tips for each.

What to Dip in Cheese Fondue

Cheese fondue is the most versatile — almost anything savory works. The goal is a dipper that’s sturdy enough to stay on the fork and absorbent or rich enough to carry the cheese without overpowering it.

Bread (Essential)

  • Crusty French baguette — the classic. Cut into 1-inch cubes, day-old bread holds the fork better and soaks up cheese without falling apart.
  • Sourdough — the slight tang cuts through the richness of Gruyère and Emmentaler.
  • Rye or pumpernickel — earthy flavors complement Swiss cheese blends particularly well.
  • Soft pretzel bites — salty crust pairs perfectly with sharp cheese fondue.

Vegetables

  • Broccoli and cauliflower florets — blanch for 2 minutes to soften slightly; raw is too crunchy and slides off the fork.
  • Baby potatoes — boil until just tender, halve them. One of the best pairings with Alpine-style cheese fondue.
  • Cherry tomatoes — no prep needed; the acidity balances rich cheese.
  • Mushrooms — button or cremini, wiped clean and left whole.
  • Bell pepper strips — add color and a fresh crunch.
  • Asparagus spears — blanched, cut into 3-inch pieces.

Proteins and Charcuterie

  • Cured meats — salami, prosciutto, and chorizo rolled into bundles hold on the fork well.
  • Cooked sausage slices — kielbasa or smoked sausage cut into coins.
  • Hard-boiled eggs — halved or quartered; unusual but genuinely good.
  • Shrimp — pre-cooked, chilled, and dipped cold into hot cheese for a satisfying contrast.

Other

  • Apple slices — sweet-tart Granny Smith is the best match for sharp cheese.
  • Cornichons — eaten between dips as a palate cleanser, not technically dipped but always on the board.
  • Tortilla chips — works with cheddar-style or queso fundido variations.

What to Dip in Chocolate Fondue

Chocolate fondue rewards anything sweet or tangy. The contrast between rich, warm chocolate and fresh or tart dippers is what makes it work.

Fruit (Best Dippers)

  • Strawberries — the gold standard. Use whole berries with the stem as a built-in handle.
  • Banana slices — cut thick (¾ inch) so they hold on the skewer; thinner slices break.
  • Pineapple chunks — fresh works better than canned; the brightness cuts chocolate richness perfectly.
  • Raspberries and blackberries — delicate, so skewer them gently; the tartness is excellent with dark chocolate.
  • Mandarin orange segments — chocolate and orange is a classic combination.
  • Dried apricots — chewy texture holds a thick coating well.

Sweets and Baked Goods

  • Marshmallows — crowd favorite, especially with kids. Gets a thick, even coating.
  • Brownie bites — chocolate on chocolate; works better than it sounds.
  • Pound cake cubes — dense enough to stay on the fork and absorbs chocolate well.
  • Graham crackers — broken into pieces; the honey flavor pairs well with milk chocolate.
  • Pretzels — the salt-chocolate combination is addictive; use pretzel rods for easier dipping.
  • Rice Krispie treats — cut into cubes; the crunch contrast is satisfying.
  • Oreos — dip the whole cookie or pull apart and dip the cream side.

Other

  • Cheesecake bites — frozen briefly so they hold their shape on the fork.
  • Candied bacon strips — for adults; the sweet-salty-smoky combination with dark chocolate is exceptional.

What to Dip in Oil Fondue (Fondue Bourguignonne)

Oil fondue works differently — raw food cooks in the hot oil at the table, then gets dipped in sauces. The dippers here are raw proteins and vegetables that cook in 1–3 minutes.

Meat

  • Beef tenderloin or sirloin — cut into 1-inch cubes; the most popular choice for oil fondue.
  • Chicken breast — cube and ensure it reaches full cook temperature (165°F) before eating.
  • Pork tenderloin — lean, cooks quickly, benefits from a marinade beforehand.
  • Lamb — leg of lamb cubed is traditional in French fondue bourguignonne.
  • Shrimp — peel, devein, and cook 60–90 seconds until pink.

Vegetables

  • Mushroom caps — cook 2 minutes until golden.
  • Zucchini rounds — thick-cut so they don’t fall apart.
  • Bell pepper squares — cook 1–2 minutes.
  • Artichoke hearts — canned, drained, and dried; fry until crispy.

What to Dip in Broth Fondue

Broth fondue is oil fondue’s lighter alternative — a seasoned simmering broth that gently poaches rather than fries. Everything from oil fondue works here, plus delicate options that would overcook in hot oil.

  • All meats from oil fondue — cook times are slightly longer (2–4 minutes).
  • Tofu cubes — firm tofu, pressed and dried; absorbs the broth flavor well.
  • Dumplings or wontons — cook in the broth 3–4 minutes; the broth becomes a dipping sauce too.
  • Thin noodles — rice noodles or ramen noodles; add at the end of the meal when the broth is richest.
  • Leafy greens — bok choy, spinach, or Napa cabbage wilted briefly in the broth.
  • Seafood — scallops, fish cubes, and clams all work well in broth; cook gently 2–3 minutes.

Dipping Tips for Any Fondue Type

  • Dry your dippers: Pat vegetables, fruit, and proteins dry before serving. Moisture causes hot oil to splatter and prevents chocolate from coating evenly.
  • Room temperature fruit: Cold strawberries straight from the fridge cause chocolate fondue to seize around them. Let fruit sit out 20 minutes first.
  • Cut uniform sizes: 1-inch cubes cook and coat evenly. Inconsistent sizes mean some pieces are overdone before others are ready.
  • Stagger the board: Arrange dippers in groups so guests can easily identify what’s what and reach across without crowding.

How to Make Fondue at Home: A Beginner’s Guide to All 4 Types

how to make fondue at home


Fondue is a Swiss dish in which small pieces of food are dipped into a communal pot of hot liquid kept warm at the table. It started in the Alps as a practical way to use aged cheese and hardened bread through long winters, and became an international sensation after debuting at the 1964 World’s Fair in New York. Today it’s one of the easiest, most impressive meals you can host at home — and once you understand the four types, you can build an entire evening around it.

What Are the 4 Types of Fondue?

Every fondue is built around a hot communal pot — but what goes in the pot changes everything.

  1. Cheese fondue — melted cheese and white wine, served with bread cubes and vegetables. The Swiss classic, and the best starting point for beginners.
  2. Chocolate fondue — melted chocolate and cream, served with fruits, marshmallows, and sweets. The easiest fondue to make and the biggest crowd-pleaser.
  3. Oil fondue (Fondue Bourguignonne) — hot oil used to cook raw meat at the table. Origin: Burgundy, France. Interactive, fun, and satisfying for meat lovers.
  4. Broth fondue — seasoned simmering broth used to cook meat and vegetables. A lighter alternative to oil fondue.

What Do You Need to Make Fondue at Home?

  1. A fondue pot — ceramic or cast iron for cheese and chocolate; deep stainless steel for oil or broth
  2. A heat source — tealight candles, a gel burner, or an electric fondue base
  3. Long fondue forks — color-coded tips prevent mix-ups at a busy table
  4. Your fondue base — cheese, chocolate ganache, oil, or broth
  5. Dippers — bread and vegetables for cheese; fruit and sweets for chocolate; raw meat for oil or broth

That’s it. No special training required.

How to Make Cheese Fondue at Home (Step-by-Step)

Cheese fondue is the ideal first fondue. It takes about 20 minutes and needs just four ingredients: Gruyère, Emmental, dry white wine, and cornstarch.

  1. Rub the inside of your fondue pot with a halved garlic clove, then discard it.
  2. Pour in dry white wine and warm over medium-low heat until just simmering.
  3. Toss shredded Gruyère and Emmental with one teaspoon of cornstarch.
  4. Add cheese in small handfuls, stirring in figure-8 motions, waiting for each addition to melt before adding more.
  5. Stir in a splash of kirsch (cherry brandy) and a pinch of fresh nutmeg.
  6. Transfer the pot to your fondue stand and light the burner — or plug in your electric pot.
  7. Keep the flame on the lowest setting that maintains a slow, gentle bubble. Never let it boil.

The most common beginner mistake is rushing step 4. Add cheese slowly and it will come together perfectly every time.

Best Dippers for Every Type of Fondue

Fondue Type Best Dippers
Cheese Crusty bread cubes, apple slices, broccoli, cornichons, salami
Chocolate Strawberries, bananas, marshmallows, pound cake, pretzel rods
Oil Bite-size beef, chicken, and shrimp — served with dipping sauces
Broth Thin beef slices, mushrooms, tofu, bok choy, glass noodles

Tips for Your First Fondue Night

  • Pick one type for your first time — cheese is the most forgiving and universally loved.
  • Prep everything before guests arrive. Have dippers sliced and plated. The fondue comes together at the last minute.
  • Keep warm white wine nearby during cheese fondue — if it thickens, whisk in a tablespoon to loosen it.
  • Plan portions: about 6 oz of cheese per person, or 4 oz of chocolate per person for dessert fondue.
  • Never double-dip — it drops the temperature and is a fondue party foul.

Frequently Asked Questions

Is fondue hard to make at home?
Not at all. Cheese fondue takes 20 minutes and four ingredients. Chocolate fondue is even simpler — just warm cream and good chocolate. Every type is achievable with basic equipment.

Can you make fondue without alcohol?
Yes. Replace white wine with non-alcoholic white wine, apple juice, or chicken broth. Add a teaspoon of lemon juice for the acidity that keeps cheese smooth. Skip the kirsch entirely — it’s optional.

What is the difference between fondue and raclette?
Both are classic Swiss cheese dishes but served differently. Fondue is a communal dipping pot. Raclette uses a table grill to melt cheese, which is scraped over boiled potatoes, cornichons, and charcuterie.

Where did fondue originate?
Fondue comes from the Swiss Alps, where mountain communities used it to make the most of aged cheese and stale bread in winter. The word comes from the French fondre — to melt. It became a North American dinner-party staple after the 1964 New York World’s Fair.

Ready to go deeper? See our guides to the Best Cheese Fondue Pot for Home Use and the Best Chocolate Fondue Pot for Home Use for full equipment recommendations.


Related Articles

Try Our Free Tool: Use our Fondue Glossary to look up any fondue term or technique.

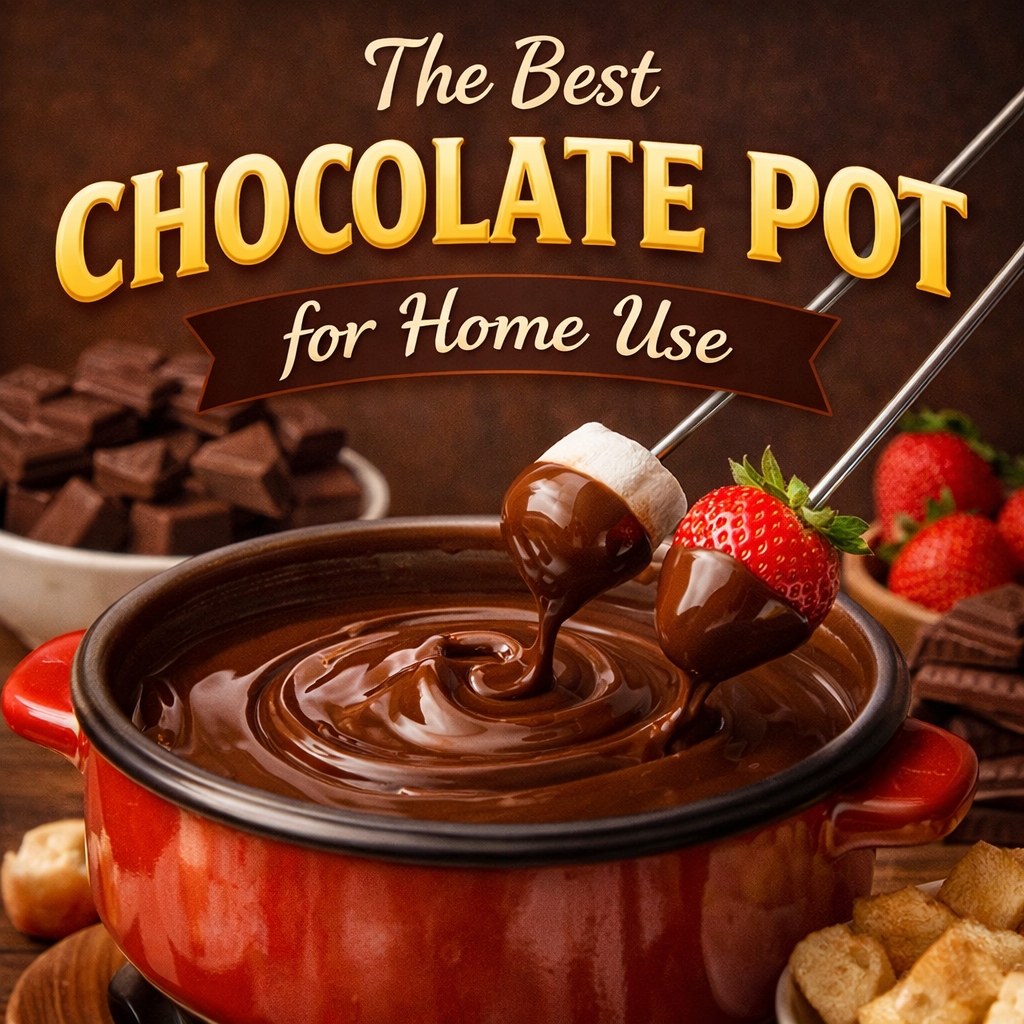
The Best Chocolate Fondue Pot for Home Use: Electric, Tealight, and Mini Options

best chocolate fondue pot


A chocolate fondue pot does one thing a saucepan can’t: it keeps melted chocolate at the perfect temperature — 115 to 120°F — right at the table, so the chocolate stays silky and dippable from the first strawberry to the last marshmallow. Go too hot and it seizes; too cold and it thickens to a paste. This guide covers the best chocolate fondue pots for home use, how to choose between electric and tealight models, and exactly how to use one for a flawless fondue night.

What to Look for in a Chocolate Fondue Pot

The right pot comes down to three things: size, heat source, and material.

Size: How Much Chocolate Do You Need?

  1. Mini (0.5–1 quart) — ideal for 2 people; great for date nights or Valentine’s Day
  2. Medium (1–1.5 quarts) — the sweet spot for 3 to 4 people
  3. Large (2+ quarts) — best for parties of 6 or more

For most couples and small families, a 1 to 1.5-quart pot is plenty.

Electric vs Tealight — Which Is Better for Chocolate?

Heat Source Pros Best For
Electric Precise temperature dial, set-and-forget Beginners, large groups
Tealight/burner Portable, no cord, atmospheric Smaller gatherings, table ambiance

For chocolate specifically, electric wins. Chocolate is far more temperature-sensitive than cheese or broth — a small spike above 130°F can scorch it or cause it to seize. An electric pot with a dial takes the guesswork out entirely.

Material: Ceramic vs Nonstick Stainless

Ceramic distributes heat gently and looks beautiful on the table. Nonstick stainless steel is more durable, easier to clean, and works for all fondue types. Avoid bare cast iron for chocolate — the metal can react with the acids in chocolate and affect the flavor.

Best Chocolate Fondue Pots by Type

Best Overall: Cuisinart CFO-3SS Electric Fondue Maker

The Cuisinart is the gold standard for home chocolate fondue. The temperature dial runs from low to 375°F, giving you precise control in the chocolate-safe range (115–120°F). The nonstick interior wipes clean easily, and the 3-quart capacity handles a crowd. It also works for cheese, broth, and oil — making it the most versatile pot you can own.

Best Mini: Wilton Mini Fondue Set or MultiOutools Mini Electric

If you’re cooking for two, a mini fondue set is exactly what you need. Wilton’s tealight-powered ceramic pot is charming and easy to store. For more control, the MultiOutools Mini Electric pot holds about 1 quart with a nonstick bowl and simple dial — perfect for a romantic evening without the cleanup of a full-size pot.

Best Budget: Hamilton Beach Electric Fondue Pot

At under 0, the Hamilton Beach is an excellent entry-level electric pot. Adjustable temperature, a nonstick bowl, and color-coded forks for 4 are included. It’s not as precise as the Cuisinart, but for a family chocolate night it more than does the job.

How to Use a Chocolate Fondue Pot (Step-by-Step)

  1. Chop your chocolate into small, even pieces — or use good-quality chips.
  2. Heat heavy cream in a small saucepan over medium heat until it just begins to simmer.
  3. Pour the hot cream over the chocolate and stir slowly until completely smooth.
  4. Transfer the ganache to your fondue pot set to 115–120°F.
  5. Arrange dippers on a platter around the pot.
  6. Stir the chocolate every few minutes to keep the texture silky.

Best Things to Dip in a Chocolate Fondue Pot

Fruits: Strawberries, banana slices, pineapple chunks, cherries, raspberries

Sweet dippers: Marshmallows, pound cake cubes, brownies, Rice Krispies treats, shortbread cookies

Salty dippers: Pretzel rods, graham crackers, salted caramel popcorn

The sweet-salty contrast of pretzels or salted caramels against dark chocolate is one of the best discoveries in home fondue — don’t skip it.

How to Keep Chocolate Smooth and Prevent Burning

Keep the temperature at or below 120°F throughout the evening. Stir regularly in slow circles to prevent a skin from forming on top. If the chocolate starts to thicken, whisk in a tablespoon of warm heavy cream to loosen it. If it seizes (turns grainy and stiff), the heat was too high — lower it and add cream while stirring gently. Starting with quality chocolate (60–70% cacao) dramatically reduces the chance of problems.

Frequently Asked Questions

What temperature should a chocolate fondue pot be?
Keep your chocolate fondue between 115 and 120°F. Above 130°F the chocolate scorches or seizes; below 110°F it becomes too thick to dip into.

Can you use a cheese fondue pot for chocolate?
Yes — most fondue pots work for both. Just make sure the pot is clean and dry before switching. Electric pots with adjustable temperature handle the swap most reliably.

What is the best chocolate for fondue?
Semi-sweet or dark chocolate with 60–70% cacao gives the smoothest, richest melt. Milk chocolate works well for a sweeter, kid-friendly fondue. Avoid white chocolate — it seizes easily and requires very careful temperature control.

Can you make chocolate fondue without a fondue pot?
Yes. A small slow cooker on the lowest setting works well and keeps chocolate at a safe temperature for serving. A double boiler melts chocolate well but won’t keep it warm at the table.

Love fondue night? Check out our Best Cheese Fondue Pot Guide and our Chocolate Fondue Dipping Ideas for your complete fondue party playbook.


Related Articles

Try Our Free Tool: Use our Fondue Dipping Ingredients Selector to discover the best dippers for your chocolate fondue.

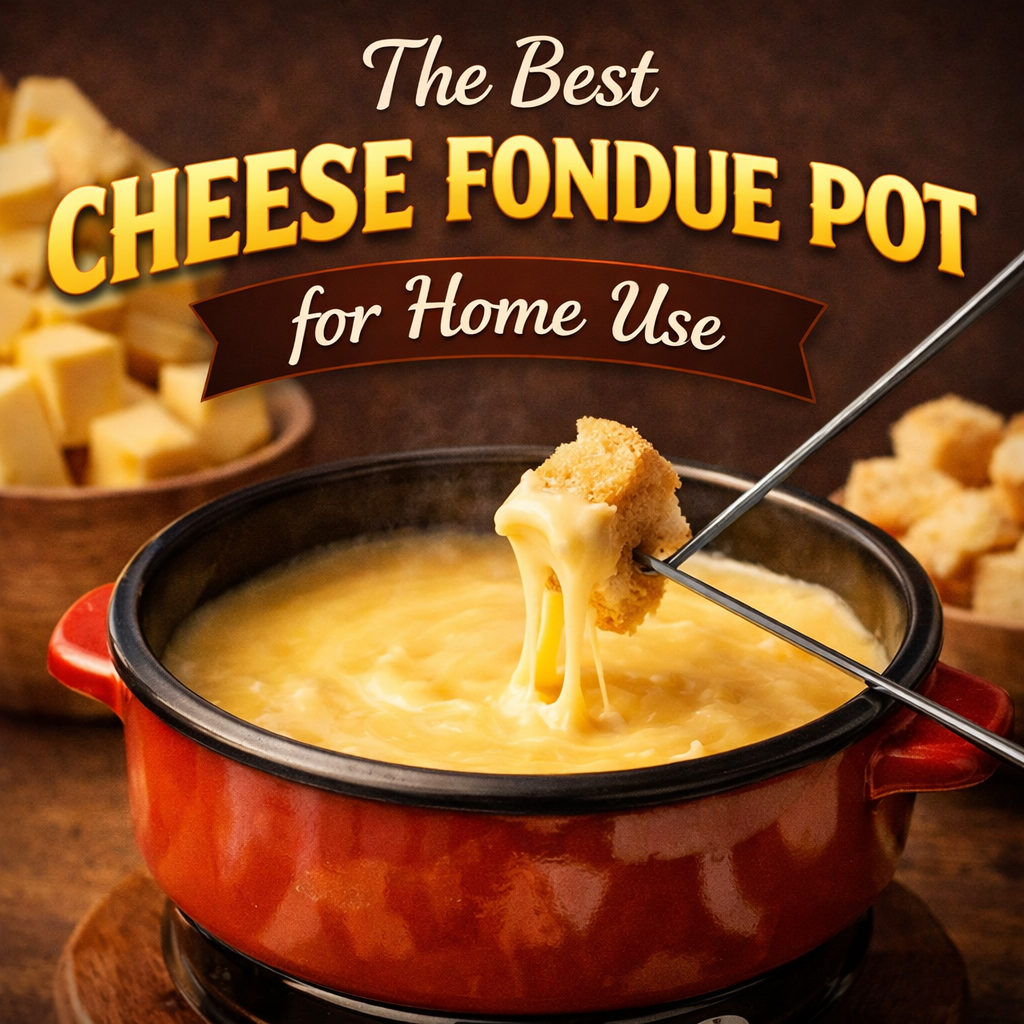
The Best Cheese Fondue Pot for Home Use: Cast Iron, Ceramic, or Electric?

cheese fondue pot


A cheese fondue pot isn’t just a vessel — it’s the difference between a silky, bubbling centerpiece and a scorched, clumpy mess. The right pot keeps your cheese at a low, steady heat so guests can dip bread, vegetables, and charcuterie for the entire evening without the fondue separating or burning. This guide breaks down the three main types of cheese fondue pots, what to look for when buying, and exactly how to use one at home.

What Makes a Great Cheese Fondue Pot?

The best cheese fondue pot for home use does three things well: it holds a gentle, even heat, it’s the right size for your crowd, and it’s easy to clean. Here’s what to consider before you buy.

How Much Pot Do You Need?

Fondue pot size is measured in quarts, and for cheese fondue the rule is simple:

  1. 1 to 1.5 quarts — ideal for 2 to 3 people
  2. 1.5 to 2 quarts — the sweet spot for 4 to 6 people
  3. 2+ quarts — best for larger dinner parties of 8 or more

For most home gatherings, a 1.5 to 2-quart pot hits the mark.

Which Material Is Best for Cheese Fondue?

The material of your pot directly affects how your cheese melts. Here’s a quick comparison:

Material Heat Distribution Best For Notes
Ceramic Gentle, even Cheese and chocolate Traditional choice; the Swiss caquelon is ceramic
Enameled Cast Iron Excellent retention Long dinner parties Heavier but holds heat beautifully
Stainless Steel Good All fondue types More forgiving; great for electric sets

For pure cheese fondue, ceramic is the traditional Swiss choice — the classic earthenware pot is called a caquelon, and it’s designed specifically to keep cheese warm without scorching it.

Best Cheese Fondue Pots by Type

Best Ceramic: Swissmar Caquelon Series

Swissmar’s ceramic caquelons are the closest you’ll get to a Swiss mountain hut experience at home. The enamel interior is easy to clean, the gentle heat prevents burning, and the long handle makes moving the pot to the table safe and simple. Available in 1.2-quart and 1.6-quart sizes — the larger is ideal for four people sharing a classic Gruyère-Emmental blend.

Best Cast Iron: Artestia Cast Iron Fondue Set

If you entertain regularly and want something that will last decades, an enameled cast iron pot is worth the investment. The Artestia set includes color-coded forks for 6 and a gel burner stand. The cast iron retains heat longer than ceramic, which means fewer flame adjustments during a long meal.

Best Electric: Cuisinart CFO-3SS Electric Fondue Maker

For beginners, an electric fondue pot removes the guesswork entirely. The Cuisinart CFO-3SS has a non-stick interior, a detachable cord for easy serving and cleanup, and a temperature dial that keeps cheese in its ideal range (around 120–140°F). It also works for chocolate, broth, and oil — making it the most versatile option.

How to Use a Cheese Fondue Pot (Step-by-Step)

Here’s the classic method for a Gruyère and Emmental fondue:

  1. Rub the inside of the pot with a halved garlic clove, then discard the garlic.
  2. Shred your cheeses fresh — pre-shredded cheese contains starch that prevents smooth melting.
  3. Warm dry white wine in the pot over medium-low heat until it just begins to simmer.
  4. Add cheese in small handfuls, stirring in a figure-8 motion between each addition.
  5. Stir in a splash of kirsch (cherry brandy) and a pinch of fresh nutmeg.
  6. Transfer to your fondue stand and light the burner — or plug in the electric pot.
  7. Keep the flame or heat on the lowest setting that maintains a slow bubble.

How to Keep Cheese Fondue Warm Without Burning

The biggest mistake home cooks make is running the heat too high. For a burner pot, use a low, gentle flame — barely a flicker. For electric pots, stay below 140°F. Stir the fondue every few minutes to prevent a skin from forming on top. If the fondue starts to seize or gets too thick, whisk in a tablespoon of warm white wine to bring it back.

Cleaning Your Cheese Fondue Pot

  1. Let the pot cool completely before washing — thermal shock can crack ceramic.
  2. Soak in warm, soapy water for 10 minutes to loosen any hardened cheese.
  3. Use a soft sponge or wooden spatula — never abrasive scrubbers on ceramic or enamel.
  4. Check your brand’s instructions before putting any fondue pot in the dishwasher.

Frequently Asked Questions

What is a caquelon?
A caquelon is the traditional Swiss ceramic or enameled cast iron pot used for cheese fondue. It has a long handle and a wide, shallow bowl designed to keep cheese evenly warm at low heat.

Can you make cheese fondue without a fondue pot?
Yes. A small Dutch oven or heavy-bottomed saucepan works in a pinch. To keep it warm at the table, transfer to a slow cooker set on its lowest setting or use a portable induction burner.

Is cast iron or ceramic better for cheese fondue?
Both are excellent. Ceramic distributes heat more gently and is the classic choice. Cast iron holds heat longer, making it better for extended entertaining when you don’t want to keep adjusting the flame.

What cheeses work best?
Classic Swiss fondue calls for Gruyère and Emmental in roughly equal parts. For a sharper fondue, add Appenzeller. Always grate cheese freshly — the anti-caking agents in pre-shredded cheese prevent it from melting smoothly.

Ready to host your first fondue night? Check out our Classic Swiss Cheese Fondue Recipe and our guide to Fondue Dipping Sauces to round out your spread.


Related Articles

Try Our Free Tool: Use our Fondue Cheese Pairing Guide to discover the best cheese combinations for your fondue.

Fondue Tasting Party: Side-by-Side Cheese Comparison Format


The Fondue Tasting Party: Your Guide to the Side-by-Side Cheese Comparison Format

Beyond the Single Pot

You gather around a single pot, anticipating rich, complex flavors. Instead, you get a monotonous, vaguely cheesy glue. The subtle notes of alpine pasture or nutty aging are lost in a homogenous melt. This disappointment is the pain point of traditional fondue. The solution is not a better recipe, but a better format. Mastering the Side-by-Side Cheese Comparison Format transforms a simple meal into an epicurean exploration. It is the key to unlocking the nuanced, spectacular world of cheese, turning guests into informed tasters and a dinner into an event.

Foundational Choices – The Hardware of Comparison

Your equipment is not just cookware; it is the essential stage for a flawless tasting. The right setup allows direct comparison without cross-contamination or logistical chaos.

Pot Selection and Sizing

You need multiple melting vessels. Individual small caquelons (traditional fondue pots) offer authenticity and portability. A single station with multiple burners provides centralized control. For a tasting with 6-8 guests, I recommend three pots. This number creates a manageable, insightful flight. Each pot should serve 2-4 people for tasting portions. Ceramic or enameled cast iron pots retain heat evenly, which is crucial for maintaining the perfect texture throughout your party.

The Tasting Station Setup

Layout dictates flow. Arrange pots in a line or a wide arc on a stable, heat-resistant table. Ensure each pot has its own dedicated burner, fork set, and serving spoon. Label each station clearly with the cheese’s name. Create clear pathways so guests can move from one pot to the next without bottlenecking. Safety is paramount: keep cords and fuel canisters secured away from reaching arms and flowing sleeves.

Fuel and Utensil Materials

Consistent, adjustable heat is non-negotiable. Your choice of fuel and forks directly impacts control and experience.

Component Category Options Key Characteristics
Heat Source Gel Fuel, Ethanol Burner, Sterno Gel Fuel: Easy and safe; offers limited heat adjustment.
Ethanol Burner: Provides excellent, adjustable flame; requires careful handling.
Sterno: Reliable and common; can impart a slight odor if not covered.
Fork Material Stainless Steel, Color-Coated Stainless Steel: Durable and traditional; all forks look identical.
Color-Coated: Essential for a tasting. Different colors prevent guests from mixing forks between pots, which would muddy the comparison.

The Core System – Managing the Perfect Melt

Fondue-making is a controlled, replicable chemical process, not magic. You manage two critical variables to achieve a silken, stable emulsion every time.

Variable 1: Temperature Control

The ideal melt happens between 160°F and 180°F (71°C-82°C). This is a gentle simmer, never a boil. Boiling cheese causes proteins to tighten violently, squeezing out fat and water. The result is a grainy, broken, oily mess. Use your burner’s adjustability to maintain a low, steady heat. A quick-read thermometer is your best friend for the initial melt. After that, watch for lazy, bubbling foam—the sign of perfect fondue heat.

Variable 2: Emulsion Stability

A fondue is an emulsion: fat and water held together by proteins and starch. The key to stability is acid and starch. The wine’s tartaric acid or a squeeze of lemon juice helps proteins disperse evenly. A cornstarch or flour slurry, tossed with the grated cheese, provides the structural net that holds everything in suspension. Your method is constant, gentle stirring in a figure-eight pattern with a wooden spoon. This incorporates heat evenly and encourages the smooth union of wine and cheese.

Advanced Practices – Curating Your Cheese Flight

With the melt mastered, the art begins. This is where you design the comparative experience that enlightens and delights.

Preparation: The Cheese Selection Matrix

Build your flight around a theme. This focuses the comparison and highlights differences. Choose three cheeses. For a classic Alpine Showdown, select Gruyère (bold, crystalline), Comté (complex, nutty), and Appenzeller (herbaceous, spicy). For a Milk Type Marathon, compare a cow’s milk Gouda, a goat’s milk Bûcheron, and a sheep’s milk Manchego. For a Process & Additive exploration, pit a traditional Emmentaler against a beer-infused fondue cheese and a commercial “fondue mix.” The contrast is educational and delicious.

Ongoing Inputs: Dippers & Accompaniments

Dippers are diagnostic tools. Offer a neutral canvas like day-old sourdough cubes to assess the cheese pure. Then provide contrast: tart apple slices, blanched broccoli florets, or cured meat like Speck. These change the cheese’s expression on the palate, revealing new facets. Crucially, include palate cleansers. A basket of cornichons, pickled pearl onions, and sips of dry, acidic white wine (like Sauvignon Blanc) reset taste buds between pots, ensuring each cheese is tasted fresh.

Tasting Strategy: The Comparison Method

Guide your guests. Encourage them to examine each pot’s visual texture and color. Have them inhale the aroma above the steam. As they taste, prompt them to note the mouthfeel (silky, creamy, stringy?) and the flavor evolution (initial hit, mid-palate, finish). Provide simple note cards or a shared board to jot words like “brown butter,” “hazelnut,” or “grassy.” Facilitate discussion by asking, “How does the finish of Pot 2 differ from Pot 1?” This structured approach turns eating into analysis and shared discovery.

Threat Management – Saving a Broken Fondue

A proactive stance guarantees success. Your first and best defense is impeccable technique.

Prevention: The Golden Rules

Always grate your cheese finely and evenly. Bring it to room temperature. Use a dry, acidic wine. Dust the cheese with your starch. Stir constantly over gentle heat. Following these rules prevents 95% of fondue failures before they start.

Intervention: The Rescue Protocol

If your fondue turns grainy or separates into a pool of fat, act immediately. First, take the pot off the heat. Vigorously whisk in a teaspoon of fresh lemon juice or a splash of cold wine. If that fails, mix a new slurry of one teaspoon cornstarch with one tablespoon of wine or kirsch. Whisk this into the broken fondue vigorously over low heat. For a last-ditch effort, toss in a handful of fresh, starch-dusted bread cubes and stir; they can sometimes re-absorb excess fat and help re-emulsify.

Your Tasting Party Calendar

Phase Primary Tasks What to Focus On
Planning (1 Week Prior) Finalize your 3-cheese flight theme. Source pots, burners, and color-coded forks. Plan dipper and accompaniment menu. Balance and Contrast. Ensure your cheeses are distinct yet comparable.
Day Of (Setup) Grate all cheeses; keep separated. Set up labeled tasting stations. Prepare all dipper boards and palate cleansers. Measure wine and starch for each pot. Organization and Mise en Place. Every component should be ready to go.
During the Party Manage burner heat. Demonstrate the tasting method. Facilitate conversation and note-sharing. Replenish dippers. Being the Conductor. You are guiding an experience, not just cooking dinner.

The Transformation at the Table

The core principle is proven: controlled, side-by-side comparison is the fastest path to deep understanding and pure joy. You have journeyed from selecting the right hardware to managing a chemical emulsion, from curating a cheese flight to leading a guided tasting. The result is not just a meal. It is the animated conversation, the “aha!” moments of discovery, the shared laughter as opinions are debated. It is the profound satisfaction of hosting a memorable, insightful event that enriches everyone’s palate. This is the power of the Fondue Tasting Party and its definitive Side-by-Side Cheese Comparison Format.


Related Articles

Try Our Free Tool: Use our Fondue Party Planner to plan your perfect fondue party with a custom shopping list, equipment checklist, and timeline.

Virtual Fondue Party Ideas: Remote Entertaining During Distance


Rekindling Connection, One Dip at a Time

You feel it in the quiet moments after another video call ends. The squares go dark, and the familiar flatness settles in. You’ve seen faces and heard voices, but you haven’t truly shared an experience. The laughter feels reactive, not collective. This is the subtle ache of remote living—the missing warmth of a shared meal, the spontaneous joy of gathering around a table. But what if your next digital gathering could be different? What if you could transform that grid of faces into a vibrant, interactive celebration?

The solution is deceptively simple and profoundly effective. Mastering the art of the virtual fondue party is the key to unlocking memorable, joyful, and deeply connected remote entertainment. It replaces passive viewing with active participation, turning a simple meal into a shared adventure. This guide will equip you with everything you need to move beyond the standard call and host an event that feels less like a meeting and more like a reunion.

Foundational Choices: The “Hardware” of Your Digital Soirée

Your initial decisions form the bedrock of your event. A successful virtual fondue party hinges on seamless logistics and accessible equipment, removing friction so the fun can flow.

Platform Selection & Guest Coordination

Choose your digital venue with stability in mind. Zoom, Google Meet, and Microsoft Teams are reliable workhorses. For a more social feel, platforms like Discord allow for easier movement between “channels” (e.g., a main video room and a text channel for sharing photos of dipper creations). Your choice is less about features and more about universal access for your guests.

Centralize all communication. Your invitation must be a one-stop shop: clear date/time (consider time zones), the video link, and a detailed guide. This guide is critical—it sets expectations and empowers guests. Include the chosen fondue type, a simple recipe, and a definitive equipment list. Assume nothing. This document is your first act as a master host.

The Fondue Setup & Equipment

Fondue is wonderfully adaptable. You do not need a traditional pot to succeed. The goal is gentle, consistent heat. Here is your strategic breakdown.

Fondue Type Key Characteristics & Equipment Solutions
Cheese
  • Profile: Savory, social, the classic choice.
  • Heat Need: Constant low heat to prevent separation.
  • Best Setup: A traditional fondue pot over a tea light or gel fuel. A small slow cooker on “warm” is a perfect, foolproof modern alternative.
  • Group Tip: Ideal for groups of 2-4 per pot; larger groups should have multiple pots.
Chocolate
  • Profile: Sweet, versatile, and universally loved.
  • Heat Need: Very gentle, indirect heat to avoid scorching.
  • Best Setup: A makeshift double boiler (a heatproof bowl over a pot of simmering water). A fondue pot with a low flame or even a microwave (with careful stirring) works.
  • Group Tip: The easiest for beginners and large groups.
Broth or Oil
  • Profile: An interactive main course for the adventurous.
  • Heat Need: High, sustained heat for cooking.
  • Best Setup: An electric fondue pot is safest. A tabletop butane burner with a stable pot is a common alternative. Emphasize safety.
  • Group Tip: Requires more space and attention. Best for smaller, engaged groups.

The Core System: Orchestrating Logistics and Flow

Think of your party not as a call, but as a dynamic system with key variables to manage. Control these, and you create effortless enjoyment.

Synchronous Timing: The Rhythm of the Party

The ideal sequence has three acts. Act One: The Prep. Guests should have all ingredients prepped and stations ready before logging on. Act Two: The Social Log-On. Start the call 15 minutes before the “first dip.” This is for greetings, showing off setups, and pouring drinks. Act Three: The Simultaneous Dip. As host, you formally begin the cooking or dipping. This shared start is magical—it creates a unified experience.

Poor timing leads to a logistical meltdown: one guest is still grating cheese while another has finished eating. The consequence is a fractured, frustrating experience. Avoid this with a clear schedule in your pre-party guide.

Engagement & Atmosphere: Crafting the Vibe

Your tools here are subtle but powerful. Create a shared playlist and invite guests to add songs beforehand; start it as everyone logs on. Encourage thematic virtual backgrounds or real-life decorations. Most importantly, have a few conversation starters ready that go beyond “how’s work?”—”What’s the most surprising thing you’ve ever dipped in fondue?” or “What’s your ultimate comfort food memory?”

Your role as host is that of a facilitator. Actively include quieter guests by asking for their opinions. “Sarah, your cheese blend looks amazing, what’s in it?” This gentle guidance ensures no one feels like a spectator.

Advanced Practices: The Art of the Dipping Spread

This is where you elevate the event from a novelty to a culinary highlight. The quality and variety of your dippers define the experience.

Dipping Selection & Preparation Strategy

Curate dippers with texture, flavor, and function in mind. For cheese: crusty bread (day-old is best), blanched broccoli, apple slices, cured meats. For chocolate: pound cake, strawberries, pretzels, marshmallows, orange segments. For broth/oil: thinly sliced meats (sirloin, chicken), shrimp, mushrooms, baby bok choy.

In your guest guide, provide a preparation checklist: “Chop bread into 1-inch cubes,” “Slice strawberries and keep them separate so they don’t get soggy,” “Pat all meat dry for safer oil fondue.” This ensures everyone is ready to dive in together.

Fondue Recipes & The Power of Customization

Provide a reliable base recipe, then empower your guests to make it their own. For a classic cheese fondue, offer the Swiss (Gruyère/Emmental) template and a sharp Cheddar beer fondue variant. For chocolate, provide a dark chocolate base with optional add-ins like a pinch of chili flake, a splash of orange liqueur, or a spoonful of peanut butter. This sparks conversation and personal investment—”Oh, you added cayenne? I went with sea salt!”

Threat Management: Preventing Digital & Culinary Disasters

A master host anticipates pitfalls. A proactive stance keeps minor hiccups from derailing the mood.

Prevention: The Non-Negotiable Briefing

Your pre-party communication is your first line of defense. Mandate a simple tech check: “Please test your audio/video beforehand.” For safety, include clear rules: “Keep pets and children away from hot pots,” “Have a stable, non-flammable surface for your burner,” “Never leave a lit fondue unattended.”

Intervention: The Tiered Response Plan

When issues arise, respond calmly and escalate solutions only as needed.

  • Problem: Broken, grainy cheese sauce.
    Response: Quick Fix: A squeeze of lemon juice or a teaspoon of cornstarch slurry can often rescue it. Backup Plan: Laugh it off. “Well, this is a cheese ‘souffle’ now! I have a backup wedge and crackers ready.”
  • Problem: Lagging video or audio echo.
    Response: Quick Fix: Guide everyone to mute when not speaking and turn off video briefly. Backup Plan: Shift to a phone-based audio call for a few minutes while screens are off, using the video link for visual check-ins.
  • Problem: The dreaded awkward silence.
    Response: Quick Fix: Deploy a prepared conversation starter. Backup Plan: Initiate a simple game like “Show us the most random item within arm’s reach of your fondue pot.” Humor is your ultimate tool.

Your Virtual Fondue Party Master Timeline

Phase & Time Primary Tasks Host Focus
One Week Before Send invites with clear recipe/equipment guide. Choose your fondue type. Test your own tech and setup. Vision & Communication. Set the tone and provide all necessary information.
2-3 Days Before Finalize your shopping list. Send a friendly reminder email with dipping prep instructions. Logistics & Momentum. Keep the event top-of-mind and guide preparation.
Party Day (Morning) Shop for fresh ingredients. Prepare your own dippers and station. Personal Readiness. Ensure your own experience will be stress-free.
30 Minutes Before Start Set up your camera angle to show your fondue pot. Start your music. Have a backup snack ready. Atmosphere & Contingency. Create the vibe and prepare for the unexpected.
Event Time Log on early. Greet guests. Facilitate the simultaneous start. Relax and enjoy. Facilitation & Presence. Guide the flow, then participate fully.

From Pixels to Shared Presence

The true mastery of a virtual fondue party lies in understanding that connection is not a passive result of proximity, but an active creation of shared intention. You have moved from selecting a platform to orchestrating a seamless flow, from listing ingredients to curating a culinary adventure. You have preempted problems and armed yourself with solutions.

When you execute this plan, the transformation is palpable. The screen dissolves. You are no longer just faces in grids; you are co-conspirators in a delicious experiment, comparing dips, laughing over a broken sauce, and toasting across the miles. The profound satisfaction comes not from perfect cheese, but from the unmistakable sound of shared laughter bubbling up over a shared pot. You have proven that distance is no match for a great virtual fondue party idea for remote entertaining during distance. You have not just hosted a call—you have created a moment, and that is the ultimate reward.


Related Articles

Try Our Free Tool: Use our Fondue Party Planner to plan your perfect fondue party with a custom shopping list, equipment checklist, and timeline.

Fondue Bar Setup for Weddings and Large Events


Beyond the Buffet—Creating an Interactive Culinary Experience

Picture the standard wedding buffet: a slow-moving line, chafing dishes of predictable food, and a transactional feel. Now, envision a magnetic, bubbling station where guests linger, laugh, and create their own perfect bite. This is the power of a masterfully executed fondue bar. It transforms passive consumption into an engaging event within your event. Achieving this shift requires more than just melting cheese; it demands a strategic approach. Mastering the fondue bar setup for weddings and large events is the definitive method for crafting a seamless, sophisticated, and conversation-sparking culinary centerpiece that becomes a core memory of your celebration.

Part 1: Foundational Choices—The Hardware of Your Station

Your equipment forms the unshakable foundation. The right choices ensure elegance, safety, and a smooth flow, while poor selections lead to logistical nightmares. Think of this as building your station’s infrastructure.

Part A: Fondue Fountain & Burner Selection and Sizing

Your first critical decision is the fondue vessel. Traditional pots with burners are versatile, handling cheese, broth, oil, and chocolate. Cascading fountains, however, are for chocolate only but offer dramatic visual appeal. For a wedding of 100 guests, I recommend a minimum of three stations: one for cheese, one for savory cooking, and one for chocolate. Plan for one quality fondue pot per 20-25 guests to prevent untenable lines. For fuel, denatured alcohol or gel is standard for portability, but electric burners offer superior, consistent heat control if outlets are accessible.

Part B: Station Layout and Flow Design

Placement is tactical. Position your station in a high-visibility area with easy access from multiple sides, but away from doorways or air vents to prevent drafts from chilling your fondue or flickering flames. Design the guest journey with intention: empty plates and skewers first, then the fondue pots, followed by logically grouped dippers, and finally garnishes and napkins. Allow a minimum of 10 linear feet of table space per active fondue pot to avoid crowding.

Part C: Component Breakdown: A Comparative Guide

Component Category Primary Options Key Characteristics & Best Use
Fondue Vessel Ceramic (Caquelon), Metal (Stainless Steel, Copper), Cascading Fountain Ceramic provides even heat for cheese and chocolate. Metal is durable for high-heat oil or broth. Fountains are for chocolate spectacle only.
Heat Source Liquid Fuel (Bioethanol), Gel Fuel, Electric Burner Liquid fuel burns hot and clean. Gel fuel is safer and spill-proof but offers less heat. Electric provides precise, consistent temperature control.
Skewers (Fondue Forks) Color-Coded, Long-Handled, Traditional Two-Tined Color-coding is essential for guests to identify their skewer. Long handles keep hands safe from heat. Ensure a surplus—at least two per guest.
Dinnerware Small Appetizer Plates, Bowls for Dippers, Ramekins for Sauces Opt for smaller plates to encourage movement and tasting. Bowls should be stable and shallow for easy grabbing. Provide ample napkin stations.

Part 2: The Core System: Temperature, Flow, and Safety Management

A fondue bar is a live culinary ecosystem. Your role is that of a conductor, maintaining perfect harmony between heat, guest movement, and safety protocols.

Variable 1: Temperature Control

Precise heat is the soul of fondue. Cheese fondue must stay between 130-160°F (55-70°C) to stay smooth. Chocolate should be kept just above 90°F (32°C). Oil or broth for cooking must reach 375°F (190°C) but monitored closely. The consequence of failure is severe: broken, grainy cheese; scorched chocolate; or undercooked, unsafe meat. Use high-quality burners, always have 50% extra fuel on hand, and adhere to the “low and steady” principle—never crank the heat to rush the process.

Variable 2: Guest Flow and Replenishment Rhythm

A stalled line kills the vibe. A dedicated attendant is not a luxury; it is a requirement. Their job is to gently guide the process, refresh dipper bowls before they hit half-empty, and swap out fondue pots seamlessly from a backup station. This invisible replenishment maintains an illusion of endless abundance and keeps the experience feeling fresh and generous.

Variable 3: The Safety Protocol

Safety is the non-negotiable framework. An active fondue station must never be left unattended. Use clear, elegant signage: “Caution: Very Hot Oil,” “Keep Flames Clear.” Strategically place stacks of napkins and small plates at both the beginning and end of the station to manage drips immediately. Instruct staff on a quick-response plan for any minor spill or flare-up.

Part 3: Advanced Practices: The Art of Curation and Presentation

With logistics mastered, you elevate the experience through thoughtful curation and stunning presentation. This is where your personal style shines.

The Fondue Selection: Building a Balanced Menu

Embrace the “Trifecta Strategy” for universal appeal. Offer one classic cheese (a robust Gruyère and Emmental blend), one interactive savory (a seasoned broth for cooking steak and shrimp), and one decadent chocolate (a dark chocolate with a hint of espresso). Choose recipes known for stability—those that can hold for two hours without breaking. I always include a cornstarch slurry on my backup station to instantly rescue a separating cheese sauce.

The Dipper & Garnish Gallery

Move far beyond basic bread cubes. Curate dippers that complement each fondue. For cheese: sourdough, roasted potatoes, crisp apples, and blanched broccoli. For broth: filet mignon cubes, shrimp, mushroom caps, and baby corn. For chocolate: pound cake, marshmallows, orange segments, and pretzel rods. Present them with artistry using tiered stands, lush greenery, and abundant bowls to create a sense of harvest-like plenty.

Thematic Integration and Styling

Weave the station into your event’s aesthetic. For a rustic wedding, use slate boards, wooden bowls, and burlap linens. A modern event calls for sleek metal stands, monochromatic plates, and minimalist signage. Select skewers and serving pieces that reinforce this theme. The station should look like an intentional part of the decor, not a rented afterthought.

Part 4: Threat Management: Preventing and Solving Common Pitfalls

A professional anticipates problems before they arise. Your proactive plan is the ultimate insurance policy for a flawless event.

Prevention: The Pre-Event Checklist

Conduct a full equipment test-run 48 hours prior. Melt your chosen recipes, time your fuel, and practice swapping pots. Confirm with your venue: access to power outlets, the weight capacity of your table, and the placement of your station in a confirmed “no-draft” zone. This dry run is where you find and fix issues quietly, away from guest view.

Intervention: Troubleshooting in Real-Time

Even with perfect planning, quick adjustments may be needed. Train your attendant on these fixes: To rescue a separating cheese fondue, whisk in a teaspoon of lemon juice or cornstarch slurry. If chocolate seizes or thickens, stir in a small amount of warm cream. If oil smokes, carefully lower the flame and add a fresh piece of bread to absorb impurities. The attendant’s calm, discreet action maintains guest confidence.

Part 5: The Action Plan: A Countdown Timeline

Timeframe Primary Tasks & Orders Focus & Goals
2-3 Months Out Finalize menu and dipper list. Book rental company for hardware (pots, burners, stands). Confirm attendant staffing. Strategic planning and vendor lock-in.
1 Month Out Place orders for all specialty food items. Finalize layout with venue coordinator. Purchase skewers, decor, and signage. Securing inventory and finalizing logistics.
1 Week Out Confirm delivery/pickup times with all vendors. Create detailed replenishment schedule for attendant. Communication and operational detailing.
48 Hours Out Conduct full equipment and recipe test-run. Pack “emergency kit” (extra fuel, cornstarch, towels, lighter). System validation and contingency preparation.
Day-Of Station setup 2 hours before service. Attendant briefing. First batches prepared and held at perfect temperature. Flawless execution and guest-ready presentation.

The Transformation—From Meal to Lasting Memory

The magic of a perfect fondue bar lies in this balance: the rigorous control of a system behind the scenes, enabling an experience of effortless joy for your guests. You have journeyed from selecting the foundational hardware to curating a beautiful, flowing spectacle. The result is profound satisfaction. You will watch as guests gather, connect over a shared pot, and delight in crafting their own perfect bite. This interactive culinary experience becomes more than a meal; it becomes a story they tell, a defining highlight of your celebration. That is the unparalleled reward of mastery.


Related Articles

Try Our Free Tool: Use our Fondue Party Planner to plan your perfect fondue party with a custom shopping list, equipment checklist, and timeline.

Outdoor Winter Fondue Parties: Heating and Setup Tips


The Winter Feast Awaits: Your Guide to Outdoor Winter Fondue Mastery

Imagine the scene: a crisp winter night, stars overhead, and the warm, communal glow of a fondue pot surrounded by laughter. Now imagine the frustration of a cold pot, a shivering guest, or a logistical nightmare pulling you back inside. This doesn’t have to be your story. The magic of an outdoor winter fondue party is entirely within your control. It hinges not on luck, but on a deliberate and expert approach to your environment. Mastering your heating strategy and physical setup is the absolute foundation for transforming a chilly idea into an unforgettable, cozy culinary event.

Foundational Choices: Selecting Your Battlefield and Gear

Your initial decisions on location and equipment set the stage for success or failure. Treat this phase as building the infrastructure for your edible campfire.

Part A: The Heart of the Party – Choosing Your Fondue Pot

The pot and its heat source are your command center. Your choice dictates your strategy.

Fuel-Based Pots offer portability but require careful management. Ethanol or gel burners provide a gentle, romantic flame ideal for maintaining cheese or chocolate. They are quiet and wind-vulnerable. Butane burners deliver high, adjustable heat, making them champions for oil fondue and more resilient in a breeze. Always have spare fuel canisters.

Electric Pots are the reliability kings, offering consistent, adjustable heat. This advantage is nullified if you ignore one rule: you must use a heavy-duty, outdoor-rated extension cord connected to a GFCI-protected outlet. Never use indoor-rated gear in the cold and damp.

Part B: The Strategic Location and Setup

Site selection is tactical. Seek a natural windbreak like a wall, fence, or dense shrubs. Overhead cover from a pergola or eave protects from light precipitation. The surface must be level, stable, and non-flammable—stone, brick, or concrete is ideal.

Create a dedicated “Fondue Zone.” Arrange seating in a tight circle around a sturdy table large enough for the pot, dippers, and plates, but small enough to keep conversation and heat intimate. This minimizes cold exposure and maximizes the communal feel.

Part C: Material and Component Comparison

Component Category Options Key Characteristics
Heating Source Ethanol/Gel Burner Quieter, ambient flame. Lower heat output. Best for cheese/chocolate. Highly susceptible to wind.
Butane Burner High, adjustable heat. Good performance in moderate wind. Requires cartridge spares; can be noisy.
Electric Element Most consistent and adjustable. Requires a safe outdoor power source. Zero open flame risk.
Pot Material Cast Iron Superior, even heat retention. Very heavy. Ideal for cheese or oil. Requires seasoning.
Ceramic (Caquelon) Traditional for cheese. Provides gentle, even heat. Can crack with rapid temperature changes. Charming aesthetic.
Stainless Steel Lightweight, durable, and easy to clean. Heats and cools quickly. Often used with electric elements.

The Core System: Mastering Heat and Atmosphere

Your party is a dynamic thermal system. Your job is to manage two zones: the pot and the people.

Primary Control: Maintaining Fondue Temperature

Each fondue type has a specific thermal sweet spot. Cheese fondue thrives between 120-140°F (49-60°C). Too hot, and it separates; too cool, and it congeals. Oil for frying must be stable at 375°F (190°C). Incorrect temperature leads to greasy, undercooked food. Chocolate fondue is delicate, best kept between 100-115°F (38-46°C) to prevent seizing.

Control the temperature by adjusting your burner and using your pot’s material properties. Perform the “bread cube test” for cheese: a thin coat should cling to the bread without dripping rapidly. This is your real-time gauge.

Secondary Control: Managing Ambient Comfort

A warm pot means nothing if your guests are shivering. Heating people is non-negotiable. Deploy radiant heat sources like a fire pit or patio heater—they warm objects and skin directly, much like the sun. Supplement with ambient heat through blankets, heated seat cushions, and even a rug underfoot to insulate against the cold ground. The goal is to create a warm microclimate that extends beyond the table’s edge.

Advanced Practices: Logistics and Culinary Execution

With your environment secured, shift focus to the art of the party itself. Flawless logistics enable pure enjoyment.

Preparation and Station Setup

Embrace the “mise en place” doctrine. Pre-cut every dipper—bread, vegetables, meat—and store them in covered containers. Organize sauces and seasonings on a separate tray. This creates a logical, self-service flow that keeps guests from huddling over the prep area. For safety, secure all cables against tripping, ensure table legs are stable on uneven ground, and keep a fire extinguisher or large lid nearby to smother a potential oil flare-up.

The Social Strategy: Flow and Facilitation

You are the conductor. Briefly guide guests on fondue etiquette: stir in a figure-eight to prevent sticking, don’t double-dip, and if you drop food in the pot, tradition demands a forfeit. This prevents chaos. Your beverage strategy should provide internal warmth. Offer mulled wine, hot cider, or a rich hot chocolate. These drinks complement the food and act as a secondary heating system for your guests.

Threat Management: Anticipating the Winter Elements

Adopt a proactive stance. Your foresight is the best defense against the elements.

Prevention: The First Line of Defense

Weather-proof your plan. Have a pop-up canopy or tarp on standby for unexpected snow or drizzle. Your number one rule: fuel and power redundancy. Have at least one extra butane cartridge or a full backup ethanol canister. For electric setups, a fully charged high-capacity power bank can be a party-saver.

Intervention: Solving Common Crises

When a problem strikes, act decisively. If wind extinguishes your flame, immediately deploy a portable wind guard (a small folding screen or even a strategically placed planter) or relocate the pot to a more sheltered part of your zone. If guests show signs of heat loss, activate supplemental heat sources immediately and distribute hand-warming packs. Your rapid response keeps the party’s energy from cooling down.

The Action Plan: Your Pre-Party Countdown

Phase Primary Tasks What to Focus On
1 Week Prior Confirm guest count. Test all heating equipment outdoors in evening conditions. Finalize menu and shopping list. Ensuring equipment functionality and securing all supplies.
Day Of (Morning) Charge all power banks. Pre-cut all dippers; store in fridge. Set up furniture, table, and primary ambient heat sources (fire pit, heater placement). Culinary preparation and physically staging your outdoor space.
1 Hour Before Guests Arrive Activate ambient heat sources to pre-warm the zone. Set the table with plates and utensils. Begin initial fondue prep (grating cheese, heating oil) indoors. Creating an immediately warm and inviting atmosphere the moment guests step outside.

From Frosty Idea to Warm Gathering

The perfect outdoor winter fondue party is a symphony of controlled heat and thoughtful setup. It moves from selecting the right pot as your anchor, to managing a joyful, warm gathering under the winter sky. This mastery transforms the challenge of the cold into its greatest asset—the profound satisfaction of hosting a unique, memorable feast where your expertise fosters connection and joy. You have the knowledge to turn the coldest night into the warmest of memories. Now, light the flame, and let the gathering begin.


Related Articles

Try Our Free Tool: Use our Fondue Party Planner to plan your seasonal fondue gathering with a custom checklist and timeline.

Fondue Potluck Guidelines: Coordinating Multiple Pots and Flavors


The Art of the Fondue Potluck: Your Guide to Coordinating Multiple Pots and Flavors

Picture a table crowded with mismatched pots, a tangle of forks, and a line of guests waiting for a turn. One cheese fondue is breaking, while a chocolate pot sits cold and forgotten. This chaotic scene is the fate of an uncoordinated potluck. It misses the true magic of fondue: a seamless, interactive feast where every flavor and moment harmonizes. A masterfully coordinated fondue potluck transforms into a culinary symphony. Your deliberate planning is the conductor’s baton, ensuring each element—from equipment to flavor progression—plays its part perfectly. These guidelines are your blueprint for that transformation.

Foundational Framework: The Hardware & Guest Coordination

Your initial decisions form the unshakable foundation of your event. Success hinges on securing the right tools and orchestrating contributions before a single dipper is sliced.

Pot & Fuel Selection and Sizing

Guide your guests clearly. For a group of 12, you need three active pots, not twelve. Plan for one pot per 4-6 guests per fondue type. Specify the pot material: classic ceramic or enameled cast iron for cheese and chocolate, which distribute gentle, even heat; stainless steel for broth and oil fondues that require higher temperatures. Fuel choice is critical. I prefer liquid fuel or denatured alcohol for its adjustable flame and longer burn time, especially for broth courses. Gel fuel cans are simpler but offer less control. Electric pots provide consistent heat but limit placement.

The Contribution Blueprint

Prevent a table of five cheddar cheeses and no bread. Structure sign-ups using a shared document. Assign the core fondue types first: one person on Classic Swiss Cheese, another on Herb-Infused Broth, a third on Dark Chocolate. Then, assign dipper categories: crusty breads and blanched vegetables for cheese; assorted meats and mushrooms for broth; fresh fruit and pound cake for chocolate. This blueprint guarantees balance and eliminates guesswork for your guests.

The Setup & Flow Logistics

Your physical layout dictates the experience. Create distinct stations. Group all savory pots—cheese and broth—on one table with their appropriate dippers and plates. Place the chocolate fondue station separately, ideally as a destination. This prevents savory drips in the sweet pot and manages traffic. Ensure each station has a surplus of fondue forks (at least two per guest), napkin stacks, and small plates. Designate clear areas for used forks to avoid double-dipping hazards.

Component Category Options Key Characteristics
Pot Type Ceramic/Enameled Cast Iron, Stainless Steel Ceramic: Ideal for cheese & chocolate. Provides gentle, even heat to prevent scorching.
Stainless: Essential for broth & oil. Withstands and conducts high heat efficiently.
Fuel Source Liquid Fuel, Gel Cans, Electric Liquid Fuel: Adjustable flame, longer burn. Best for multi-course events.
Gel Cans: Simple, portable. Good for shorter durations.
Electric: Consistent, no open flame. Limits table placement.
Critical Gear Forks, Plates, Napkins Forks: Minimum 2 per guest. Color-coded ends prevent mix-ups.
Plates: Small, compartmented plates are ideal for multiple dippers.
Napkins: Abundant supply. Fondue is a delightfully messy affair.

The Flavor System: Curating Harmony and Contrast

View your multiple pots not as separate dishes, but as a dynamic flavor system to be orchestrated. Your goal is a deliberate dining journey, moving the palate through complementary sensations.

The Savory Arc: Cheese and Broth

Begin with a mild, creamy cheese fondue, like a classic Neuchâteloise. This opens the palate. Follow with a more robust, aged Gruyère or beer-based cheese. The consequence of serving a sharp blue cheese first is palate fatigue; your guests will miss the subtleties that follow. Pair intentionally: contrast a sharp cheese with sweet dippers like apple slices or pear. For broth fondues, start with a clear, light chicken or vegetable broth for delicate items like shrimp or white fish. Later, introduce an aromatic mushroom or ginger-scallion broth for heartier meats like beef or lamb. This progression creates narrative and discovery.

The Sweet Finale: Chocolate

The chocolate course must be a clean, distinct reset. Enforce a strict rule: use separate, dedicated pots and forks for chocolate to avoid any hint of garlic or herbs. Offer a spectrum: a bitter 70% dark chocolate, a smooth milk chocolate, and a vanilla-infused white chocolate. Provide dippers that offer texture and temperature contrast: chilled strawberries, salty pretzels, chewy marshmallows, and airy angel food cake. This station is the celebratory climax of your flavor system.

Advanced Coordination: The Host’s Playbook for Flow

This is where logistics become artistry. Your role shifts from planner to conductor, managing the event’s pace and energy in real time.

Preparation & Staging: Mandate that all dippers are pre-cut and ready to serve. Encourage cheese fondue makers to pre-grate their cheese and coat it in cornstarch—this prevents clumping. Broth masters can prepare their aromatics in advance. Have all fondue pots fueled and tested before guests arrive. This pre-work is invisible but essential.

Ongoing Management: Appoint yourself or a helper as the “Fondue Guardian.” Circulate to stir pots gently, replenish fuel before it dies, and refresh broth levels. Establish a simple etiquette: announce the “no double-dipping” rule with a smile, and demonstrate how to swirl a dipper to prevent drips. This gentle guidance ensures hygiene and smooth operation.

Sequencing Strategy: Do not light all pots at once. Launch the first cheese fondue as guests gather. After 30-45 minutes, when cheese consumption slows, ignite the broth pots. This controls pacing and prevents food waste. Finally, as a clear transition, clear the savory stations and unveil the chocolate finale. This deliberate sequencing guides your guests through a satisfying culinary journey.

Threat Management: Preventing Fondue Fails

Adopt a proactive stance. The best solution to any fondue problem is ensuring it never happens.

Prevention: Food safety is paramount. For broth fondues with raw meat, provide separate, color-coded forks for cooking and eating. Use a thermometer to ensure oil stays below its smoke point and cheese remains warm but not boiling. Have a backup can of fuel for every pot type. Label everything clearly to avoid cross-contamination of allergens.

Intervention Guide: When issues arise, act swiftly. For a broken cheese sauce (grainy or separated), a squeeze of lemon juice or a splash of hot liquid, whisked vigorously, can often bring it back. For a boiling-over chocolate pot, immediately reduce the heat. Always have a backup plan: an extra block of cheese, a container of pre-made broth, or a bar of premium chocolate that can be quickly melted. Your calm resolution maintains the event’s magic.

Phase Primary Tasks Focus
One Week Before Send Contribution Blueprint; Assign pots/fondue types; Confirm guest count. Coordination & Structure
Day Before Shop for assigned items; Pre-cut dippers; Grate cheese; Prepare broths. Preparation & Mise en Place
Day Of (Pre-Event) Set up stations; Test all pots & fuel; Arrange dippers platters; Chill beverages. Execution & Setup
During Event Light pots in sequence; Manage fuel & replenishment; Guide etiquette; Clear between courses. Flow & Curation

The profound satisfaction of a masterful fondue potluck lies in the effortless flow you created. The laughter is uninterrupted, the flavors tell a story, and the shared experience feels both curated and spontaneous. You move from a host managing chaos to a curator of joy. This is the transformation that intentional coordination delivers—a gathering that resonates long after the last bit of chocolate is wiped from the pot, enriching your life with the unparalleled joy of connection, perfectly served.


Related Articles

Try Our Free Tool: Use our Fondue Party Planner to plan your perfect fondue party with a custom shopping list, equipment checklist, and timeline.

Fondue Cooking Class Ideas: Teaching Techniques to Guests


Beyond the Dip: Mastering the Art of the Shared Pot

Picture this: a pot of cheese that’s a greasy, grainy puddle. A chocolate fondue that’s seized into a stiff, sweet brick. An oil fondue that sputters dangerously, leaving dippers soggy and undercooked. This is the fate of fondue left to chance. But it doesn’t have to be yours—or your guests’. A truly memorable fondue experience is not a happy accident. It is the direct result of precise, teachable technique. This guide provides the complete framework for a transformative fondue cooking class, where teaching these core techniques is the key to unlocking consistent, impressive, and safe results. You will move from chaos to culinary elegance.

Foundational Choices: The Fondue “Hardware”

Superior fondue begins long before the heat is applied. Your initial equipment choices form the non-negotiable foundation for all that follows. Teach your guests that the right tools are not just accessories; they are integral to the process.

Pot Selection and Fuel Source

The pot, or caquelon, is the heart of the operation. Your choice dictates what you can cook successfully. For cheese fondue, a heavy ceramic or earthenware pot distributes gentle, even heat, preventing scorching. For oil or broth fondues, a metal pot—typically stainless steel or enameled cast iron—responds quickly to heat changes and maintains high temperatures safely. The fuel source is equally critical. Ethanol burners offer a traditional flame with adjustable heat but require caution. Gel fuel is simpler but offers less control. Electric fondue pots provide the safest, most consistent temperature, ideal for beginners and chocolate. Frame this choice as balancing tradition with control and safety.

The Support System: Forks, Stands, and Heat

A wobbly stand or a mismatched fork can derail the experience. Emphasize stability: the stand must be solid and level. Forks should be long-tined to securely spear food and often color-coded to avoid mix-ups—a simple but vital hygiene lesson. Teach heat management from the start: the flame should be adjusted to maintain a steady, gentle simmer for cheese and broth, or a precise 375°F for oil. This is the first lesson in active pot management.

The Ingredient & Dipper Prep Station

Here, you instill the chef’s principle of mise en place—everything in its place. A chaotic workstation leads to broken emulsions and cold oil. Organize stations with pre-measured ingredients for sauces, uniformly cut dippers, and all necessary tools. This preparation is what allows the hands-on magic to happen smoothly during the class. It transforms cooking from a frantic search for ingredients into a focused execution of technique.

The Core System: Mastering the Three Fondue Foundations

Fondue is not a passive meal. It is a live culinary system requiring constant, informed management. Break this system down into three critical control variables for your guests.

Control Variable 1: Emulsification (The Cheese Fondue Heart)

Ideal Target: A smooth, velvety, homogenous emulsion that coats a dipper perfectly.
Consequence of Error: A broken, oily, or grainy sauce that cannot be salvaged at the table.
Teaching Technique: This is your core lesson. Demonstrate the “figure-eight stir”: a constant, gentle motion that evenly distributes heat. Explain the science: cornstarch (coating the cheese) and acid (from wine or lemon juice) are the stabilizers that prevent protein clumping. Teach the method: warm the wine with garlic, then add cheese gradually while stirring in a figure-eight. Maintain a bare simmer—a violent boil will break the emulsion. This technique is non-negotiable for success.

Control Variable 2: Temperature Control (Oil & Broth Precision)

Ideal Target: Oil at a steady 375°F; broth at a vigorous but not rolling simmer.
Consequence of Error: Soggy, oil-logged food; unsafe, undercooked meat; dangerous splatter from too-cool oil.
Teaching Technique: Arm your guests with tools and tests. Insist on a deep-fry or candy thermometer for oil. Teach the “bread cube test”: a cube of day-old bread should brown golden in 30-45 seconds. For broth, bubbles should consistently break the surface. Emphasize recovery time: adding too many cold dippers at once crashes the temperature. Teach them to cook in small, deliberate batches.

Control Variable 3: Viscosity & Sweetness (Chocolate Alchemy)

Ideal Target: A glossy, fluid chocolate that sets slightly on a cool dipper.
Consequence of Error: Seized (grainy, stiff) chocolate from a single drop of water, or scorched chocolate from direct high heat.
Teaching Technique: Champion the double-boiler or the lowest possible indirect heat. Demonstrate chopping chocolate uniformly for even melting. Teach the ratio: heavy cream (or coconut milk) provides fluidity and fat, preventing seize. The key is gradual, gentle warmth. Have them stir slowly until just melted, then remove from heat. This teaches patience and precision.

Fondue Type Core Technique Critical Tool Don’t Forget
Cheese Figure-eight stir for emulsification Heavy ceramic pot, cornstarch Simmer, never boil. Acid is your friend.
Oil Precise 375°F temperature maintenance Metal pot, deep-fry thermometer Dry dippers thoroughly to prevent dangerous splatter.
Chocolate Gentle, indirect melting Double-boiler or very low heat Chop chocolate evenly. Keep all utensils completely dry.

Advanced Practices: The Art of Curation & Dipping Strategy

Once the core techniques are mastered, elevate the experience from mechanical to artistic. This is where your guests become true fondue connoisseurs.

Dipper Selection and Preparation

Teach pairing principles. For cheese: use crusty, day-old bread (it holds up better), crisp apples (acidity cuts richness), and blanched vegetables. For broth: select thinly sliced meats, delicate mushrooms, and leafy greens. For oil: choose items that cook quickly and evenly, like cubed meats, firm fish, and sturdy vegetables. A universal rule: pat all dippers completely dry before they meet the pot, especially for oil.

Sauce & Accompaniment Curation

Move beyond a single dip. Frame the fondue as the centerpiece of a flavor ecosystem. For broth fondues, prepare a trio of sauces: a ginger-scallion oil, a spicy sesame ponzu, and a creamy herb aioli. For oil, offer flavored salts, compound butters, and mustards. For chocolate, provide crushed nuts, sea salt flakes, and tart berries to balance sweetness. Include palate cleansers like cornichons with cheese or sparkling water between rich bites. This curation transforms the meal into a personalized tasting journey.

Threat Management: Safety and Problem-Solving

Adopt a proactive stance. A safe fondue party is a joyful one. Begin with prevention and equip your guests with rescue plans.

Prevention: The Rules of the Pot

Establish these rules as non-negotiable class law: 1) No double-dipping. 2) Secure loose clothing and long hair. 3) Never leave a lit fondue unattended. 4) Use fork etiquette—spear securely, lower gently. 5) Keep a lid nearby to smother a potential oil flame (never use water). 6) Stir cheese fondue regularly in a figure-eight to prevent settling and scorching. Prevention is the most elegant solution.

Intervention: Fondue Rescue Techniques

Even with perfect technique, problems can arise. Provide this quick-reference guide:

  • Broken Cheese Sauce: Immediately remove from heat. Whisk in a teaspoon of cold lemon juice or a splash of cold cream. If that fails, create a new slurry with 1 tsp cornstarch and 1 tbsp of the broken fondue, then whisk it back in.
  • Seized Chocolate: Instantly add a tablespoon of warm cream or neutral oil and stir gently. Do not add more liquid all at once.
  • Overheated Oil: Turn off the heat. Carefully move the pot to a cold burner. Allow it to cool below 350°F before resuming. Use the bread cube test to confirm.

The Action Plan: A Sample Class Flow & Timeline

Structure is the scaffold of learning. This sample 2-hour class plan ensures technique is taught, practiced, and immediately enjoyed.

Phase & Duration Primary Tasks Instructor Focus
Welcome & Theory (15 min) Safety briefing, fondue history, overview of the three core techniques (emulsification, temp control, gentle melting). Setting clear expectations, building foundational knowledge, and establishing safety as paramount.
Hands-On Station Rotation (60 min) Guests rotate in small groups: Group A prepares dippers & sauces, Group B emulsifies a cheese fondue, Group C tempers chocolate, Group D monitors oil temperature with a thermometer. Guided, hands-on practice. Circulate to correct stir technique, verify temperatures, and explain the “why” behind each action.
The Social Feast & Q&A (45 min) All stations converge. Guests enjoy the fruits of their labor, dipping, tasting, and experimenting with pairings. Instructor circulates. Reinforcing techniques in real-time (“See how the cheese coats the bread? That’s a perfect emulsion.”), answering advanced questions, and fostering the communal joy of the meal.

Crafting Culinary Connection

Mastery of these techniques transforms fondue from a kitschy novelty into a reliable, impressive culinary skill. The journey is clear: from choosing the right pot as your foundation, to executing the flawless figure-eight stir for a perfect emulsion, to managing temperature with the precision of a chef. The final result is more than a meal. It is the profound satisfaction of guiding your guests to create an experience—a moment of shared conversation, laughter, and unparalleled flavor, all centered around the pot you taught them to master. This is the art of the shared pot, and it enriches every gathering.


Related Articles

Try Our Free Tool: Use our Fondue Party Planner to plan your perfect fondue party with a custom shopping list, equipment checklist, and timeline.

Affiliate Disclosure: FondueCooking.com is a participant in the Amazon Services LLC Associates Program, an affiliate advertising program designed to provide a means for sites to earn advertising fees by advertising and linking to Amazon.com. As an Amazon Associate we earn from qualifying purchases. Learn more