The Art of the Stratified Pot
You’ve mastered the classic Gruyère fondue. It’s reliable, comforting, and delicious. Yet, as you watch guests dip into the same uniform flavor for the tenth time, you sense a missed opportunity. The conversation is pleasant, but the culinary experience is static. What if the pot itself could tell a story, offering a journey from a bright, tangy peak down to a deep, earthy foundation? This is the promise of the layered fondue. It transforms a simple communal dish into an interactive tasting event, where each dip is a deliberate choice and every layer reveals a new dimension. Mastering the art of creating layered fondue: multiple cheese flavors in one pot is not a party trick; it is the foundation for an unforgettable, conversation-worthy dining experience that places you firmly in control of flavor and narrative.
Foundational Choices: The Fondue Hardware
Your initial equipment choices are the bedrock of success. The right tools maintain distinct layers, distribute heat gently, and keep the fondue flowing from first dip to last. Compromise here, and your beautiful strata will collapse into a homogenous mass.
Pot Selection and Fuel Source
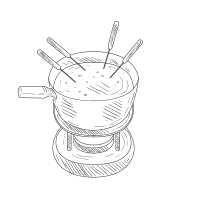
The classic caquelon (fondue pot) comes in two primary materials, each with distinct thermal properties. Ceramic or enameled cast iron provides gentle, even heat that is ideal for preventing scorching at the bottom layer. It’s my personal preference for layered fondues because it allows for subtle temperature control. Traditional cast iron heats aggressively and retains heat exceptionally well, which is excellent for a single cheese but risks cooking your layers together too quickly. Your heat source must match. A adjustable alcohol burner offers the fine-tuned flame control essential for maintaining a bare simmer. Gel fuel cans or electric pots with low, stable settings are also viable, but avoid high-BTU stovetop burners for serving.
The Strategic Serving Setup
Layered fondue is a performance. Stage it for success. Place the pot centrally with ample room for guests to access all sides. Provide each guest with two fondue forks—one for dipping, one for eating—to prevent cross-contamination of flavors. Most critically, prepare a diverse armada of dippers. You need textural and flavor vehicles designed to interact with specific cheese layers.
| Component Category | Options | Key Characteristics |
|---|---|---|
| Pot Material | Ceramic/Enameled Cast Iron; Traditional Cast Iron | Gentle, even heat; ideal for layer integrity. Aggressive heat retention; best for single-layer or expert heat management. |
| Heat Source | Adjustable Alcohol Burner; Electric Fondue Pot; Gel Fuel | Offers precise flame control for maintaining a simmer. Provides consistent, set-and-forget low heat. Convenient but offers less adjustable control. |
| Essential Dippers | Crusty Bread; Blanched Vegetables; Cured Meats; Firm Fruits | Neutral canvas that carries any cheese. (e.g., broccoli, cauliflower). Adds salty, savory contrast (e.g., chorizo). Provides sweet acidity (e.g., apple, pear). |
The Core System: Cheese Science and Layer Architecture
Think of your fondue not as melted cheese, but as a dynamic, layered emulsion system. Each stratum must be stable on its own yet complementary to its neighbors. This requires a deliberate blueprint.
The Flavor Blueprint
Select cheeses with purpose. Aim for a harmonious progression, typically from lightest and sharpest on top to boldest and creamiest on the bottom. A classic trio might be: a tangy, melt-friendly goat cheese at the summit; a nutty, complex Gruyère or Comté in the middle; and a deeply flavorful, aged cheddar or an alpine Appenzeller at the base. Contrast textures and intensities. A creamy fontina can bridge a sharp layer and a funky blue cheese.
The Structural Foundation
Each layer relies on its own liquid and stabilizer. The base liquid—dry white wine, lager beer, or hard cider—provides acidity and flavor while preventing proteins from clumping. Never use the same un-thickened liquid for all layers. For each cheese, you must create a slurry. Toss your grated cheese with a teaspoon of cornstarch or flour per cup. This starch coats the cheese proteins and, when heated with the liquid, creates a stable emulsion that resists breaking. For foolproof stability, a small amount of sodium citrate dissolved in your liquid will guarantee a smooth melt, especially for harder cheeses.
The Layering Technique
The method is sequential and patient. Start by rubbing the pot with a cut garlic clove. Add the liquid for your bottom layer and bring to a simmer. Gradually whisk in your first (bottom-layer) cheese mixture until fully melted and smooth. Do not let it boil. Carefully pour this first fondue into a heatproof bowl. Rinse the pot quickly with hot water and dry. Now, repeat the process in the now-empty pot for your middle layer. Once smooth, gently pour the reserved bottom layer back on top. It will sink, creating two distinct strata. Repeat for a third top layer. This “reverse build” ensures clean separation.
Advanced Practices: Flavor Optimization and Dipper Strategy
With a stable structure in place, you can focus on the art—elevating each layer into a memorable flavor zone and guiding your guests through the experience.
Strategic Flavor Infusions
Introduce aromatics and accents between layers. After pouring a layer, sprinkle finely chopped fresh herbs (chives, thyme), a drizzle of truffle oil, or a spoonful of whole-grain mustard across its surface before adding the next cheese. For a spirit-infused layer, replace a portion of the wine with a complementary liquor—a splash of kirsch in the alpine layer, a bit of whiskey in the cheddar base.
The Dipper Doctrine
This is where layered fondue becomes interactive theater. Don’t just provide dippers; suggest pairings. Guide guests to try a crisp apple slice with the sharp top layer, a piece of sourdough with the nutty middle, and a slice of seared steak or smoked sausage with the robust bottom layer. The right pairing turns a simple dip into a targeted flavor explosion.
Orchestrating the Sequence
As the host, you are the guide. Encourage guests to start at the top, exploring the brighter, lighter flavors first. As the meal progresses and the top layer diminishes, they will naturally delve into the richer, more profound depths. This pacing creates a narrative and prevents the layers from being mixed prematurely.
Threat Management: Preventing Breaks and Clumps
A broken, greasy, or clumpy fondue is the enemy of elegance. Adopt a proactive defense; rescue missions are a last resort.
Prevention: The Unbreakable Emulsion
Constant, low heat is non-negotiable. A rolling boil will cause proteins to tighten and squeeze out fat, breaking the emulsion. Ensure your cheese is grated finely and, crucially, is room temperature and dry—toss it with starch right before adding. Always add cheese gradually, whisking constantly until fully incorporated before adding more. This slow integration is the single most important step for smoothness.
Intervention: The Tiered Rescue Plan
If your fondue looks oily or begins to separate, do not panic. First, increase the heat slightly and whisk vigorously. Often, this is enough to re-emulsify. If separation persists, create a quick slurry by mixing a teaspoon of cornstarch with a tablespoon of your base liquid or kirsch. Whisk this into the fondue over medium heat until it tightens and becomes smooth again. For stubborn clumps, an immersion blender is a powerful, last-ditch tool.
The Action Plan: A Layered Fondue Timeline
| Phase | Primary Tasks | Focus On |
|---|---|---|
| Prep (1-2 Hours Before) | Grate all cheeses to room temperature; toss each variety with its starch. Prepare all dippers and arrange on platters. Measure base liquids and aromatics. | Organization. Your mise en place is critical. A calm, prepared cook builds a stable fondue. |
| Build (During Cooking) | Execute the reverse layering technique: cook bottom layer, remove; cook middle layer, add bottom back; cook top layer, add combined middle/bottom back. Maintain low simmer. | Emulsion Stability. Patience and temperature control. Rushing this phase guarantees failure. |
| Serve & Maintain (At the Table) | Transfer to fondue burner. Guide initial pairings. Stir gently every few minutes. Monitor flame to maintain a lazy bubble. Add a splash of warm liquid if fondue thickens. | Guest Interaction & Texture. You are the curator and technician, ensuring the journey lasts. |
The Masterpiece Pot
The true mastery of creating layered fondue: multiple cheese flavors in one pot lies in the perfect balance of intentional architecture and controlled technique. It is the culmination of thoughtful hardware selection, a scientific understanding of emulsion, and the artistic flair of flavor pairing. You begin with the right pot and the blueprint for your strata. You build a stable, dynamic system layer by careful layer. Finally, you orchestrate the shared experience, guiding your guests from one delicious discovery to the next. The reward is more than a meal; it is the shared joy of culinary exploration, the animated conversation sparked by each new combination, and the profound satisfaction of presenting not just a dish, but a memorable, interactive masterpiece.
Related Articles
- The Best Cheese Fondue Pot for Home Use: Cast Iron, Ceramic, or Electric?
- Fondue Temperature Zones: Optimal Heat for Different Cheese Types
- How to reheat cheese fondue without losing consistency
- The Best Chocolate Fondue Pot for Home Use: Electric, Tealight, and Mini Options