Beyond the Buffet—Creating an Interactive Culinary Experience
Picture the standard wedding buffet: a slow-moving line, chafing dishes of predictable food, and a transactional feel. Now, envision a magnetic, bubbling station where guests linger, laugh, and create their own perfect bite. This is the power of a masterfully executed fondue bar. It transforms passive consumption into an engaging event within your event. Achieving this shift requires more than just melting cheese; it demands a strategic approach. Mastering the fondue bar setup for weddings and large events is the definitive method for crafting a seamless, sophisticated, and conversation-sparking culinary centerpiece that becomes a core memory of your celebration.
Part 1: Foundational Choices—The Hardware of Your Station
Your equipment forms the unshakable foundation. The right choices ensure elegance, safety, and a smooth flow, while poor selections lead to logistical nightmares. Think of this as building your station’s infrastructure.
Part A: Fondue Fountain & Burner Selection and Sizing
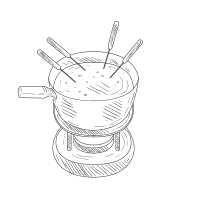
Your first critical decision is the fondue vessel. Traditional pots with burners are versatile, handling cheese, broth, oil, and chocolate. Cascading fountains, however, are for chocolate only but offer dramatic visual appeal. For a wedding of 100 guests, I recommend a minimum of three stations: one for cheese, one for savory cooking, and one for chocolate. Plan for one quality fondue pot per 20-25 guests to prevent untenable lines. For fuel, denatured alcohol or gel is standard for portability, but electric burners offer superior, consistent heat control if outlets are accessible.
Part B: Station Layout and Flow Design
Placement is tactical. Position your station in a high-visibility area with easy access from multiple sides, but away from doorways or air vents to prevent drafts from chilling your fondue or flickering flames. Design the guest journey with intention: empty plates and skewers first, then the fondue pots, followed by logically grouped dippers, and finally garnishes and napkins. Allow a minimum of 10 linear feet of table space per active fondue pot to avoid crowding.
Part C: Component Breakdown: A Comparative Guide
| Component Category | Primary Options | Key Characteristics & Best Use |
|---|---|---|
| Fondue Vessel | Ceramic (Caquelon), Metal (Stainless Steel, Copper), Cascading Fountain | Ceramic provides even heat for cheese and chocolate. Metal is durable for high-heat oil or broth. Fountains are for chocolate spectacle only. |
| Heat Source | Liquid Fuel (Bioethanol), Gel Fuel, Electric Burner | Liquid fuel burns hot and clean. Gel fuel is safer and spill-proof but offers less heat. Electric provides precise, consistent temperature control. |
| Skewers (Fondue Forks) | Color-Coded, Long-Handled, Traditional Two-Tined | Color-coding is essential for guests to identify their skewer. Long handles keep hands safe from heat. Ensure a surplus—at least two per guest. |
| Dinnerware | Small Appetizer Plates, Bowls for Dippers, Ramekins for Sauces | Opt for smaller plates to encourage movement and tasting. Bowls should be stable and shallow for easy grabbing. Provide ample napkin stations. |
Part 2: The Core System: Temperature, Flow, and Safety Management
A fondue bar is a live culinary ecosystem. Your role is that of a conductor, maintaining perfect harmony between heat, guest movement, and safety protocols.
Variable 1: Temperature Control
Precise heat is the soul of fondue. Cheese fondue must stay between 130-160°F (55-70°C) to stay smooth. Chocolate should be kept just above 90°F (32°C). Oil or broth for cooking must reach 375°F (190°C) but monitored closely. The consequence of failure is severe: broken, grainy cheese; scorched chocolate; or undercooked, unsafe meat. Use high-quality burners, always have 50% extra fuel on hand, and adhere to the “low and steady” principle—never crank the heat to rush the process.
Variable 2: Guest Flow and Replenishment Rhythm
A stalled line kills the vibe. A dedicated attendant is not a luxury; it is a requirement. Their job is to gently guide the process, refresh dipper bowls before they hit half-empty, and swap out fondue pots seamlessly from a backup station. This invisible replenishment maintains an illusion of endless abundance and keeps the experience feeling fresh and generous.
Variable 3: The Safety Protocol
Safety is the non-negotiable framework. An active fondue station must never be left unattended. Use clear, elegant signage: “Caution: Very Hot Oil,” “Keep Flames Clear.” Strategically place stacks of napkins and small plates at both the beginning and end of the station to manage drips immediately. Instruct staff on a quick-response plan for any minor spill or flare-up.
Part 3: Advanced Practices: The Art of Curation and Presentation
With logistics mastered, you elevate the experience through thoughtful curation and stunning presentation. This is where your personal style shines.
The Fondue Selection: Building a Balanced Menu
Embrace the “Trifecta Strategy” for universal appeal. Offer one classic cheese (a robust Gruyère and Emmental blend), one interactive savory (a seasoned broth for cooking steak and shrimp), and one decadent chocolate (a dark chocolate with a hint of espresso). Choose recipes known for stability—those that can hold for two hours without breaking. I always include a cornstarch slurry on my backup station to instantly rescue a separating cheese sauce.
The Dipper & Garnish Gallery
Move far beyond basic bread cubes. Curate dippers that complement each fondue. For cheese: sourdough, roasted potatoes, crisp apples, and blanched broccoli. For broth: filet mignon cubes, shrimp, mushroom caps, and baby corn. For chocolate: pound cake, marshmallows, orange segments, and pretzel rods. Present them with artistry using tiered stands, lush greenery, and abundant bowls to create a sense of harvest-like plenty.
Thematic Integration and Styling
Weave the station into your event’s aesthetic. For a rustic wedding, use slate boards, wooden bowls, and burlap linens. A modern event calls for sleek metal stands, monochromatic plates, and minimalist signage. Select skewers and serving pieces that reinforce this theme. The station should look like an intentional part of the decor, not a rented afterthought.
Part 4: Threat Management: Preventing and Solving Common Pitfalls
A professional anticipates problems before they arise. Your proactive plan is the ultimate insurance policy for a flawless event.
Prevention: The Pre-Event Checklist
Conduct a full equipment test-run 48 hours prior. Melt your chosen recipes, time your fuel, and practice swapping pots. Confirm with your venue: access to power outlets, the weight capacity of your table, and the placement of your station in a confirmed “no-draft” zone. This dry run is where you find and fix issues quietly, away from guest view.
Intervention: Troubleshooting in Real-Time
Even with perfect planning, quick adjustments may be needed. Train your attendant on these fixes: To rescue a separating cheese fondue, whisk in a teaspoon of lemon juice or cornstarch slurry. If chocolate seizes or thickens, stir in a small amount of warm cream. If oil smokes, carefully lower the flame and add a fresh piece of bread to absorb impurities. The attendant’s calm, discreet action maintains guest confidence.
Part 5: The Action Plan: A Countdown Timeline
| Timeframe | Primary Tasks & Orders | Focus & Goals |
|---|---|---|
| 2-3 Months Out | Finalize menu and dipper list. Book rental company for hardware (pots, burners, stands). Confirm attendant staffing. | Strategic planning and vendor lock-in. |
| 1 Month Out | Place orders for all specialty food items. Finalize layout with venue coordinator. Purchase skewers, decor, and signage. | Securing inventory and finalizing logistics. |
| 1 Week Out | Confirm delivery/pickup times with all vendors. Create detailed replenishment schedule for attendant. | Communication and operational detailing. |
| 48 Hours Out | Conduct full equipment and recipe test-run. Pack “emergency kit” (extra fuel, cornstarch, towels, lighter). | System validation and contingency preparation. |
| Day-Of | Station setup 2 hours before service. Attendant briefing. First batches prepared and held at perfect temperature. | Flawless execution and guest-ready presentation. |
The Transformation—From Meal to Lasting Memory
The magic of a perfect fondue bar lies in this balance: the rigorous control of a system behind the scenes, enabling an experience of effortless joy for your guests. You have journeyed from selecting the foundational hardware to curating a beautiful, flowing spectacle. The result is profound satisfaction. You will watch as guests gather, connect over a shared pot, and delight in crafting their own perfect bite. This interactive culinary experience becomes more than a meal; it becomes a story they tell, a defining highlight of your celebration. That is the unparalleled reward of mastery.
Related Articles
- Fondue Tasting Party: Side-by-Side Cheese Comparison Format
- Virtual Fondue Party Ideas: Remote Entertaining During Distance
- Fondue Potluck Guidelines: Coordinating Multiple Pots and Flavors
- Fondue Cooking Class Ideas: Teaching Techniques to Guests