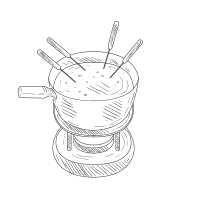
Altitude Adjustments for High-Elevation Fondue Making


The High-Altitude Fondue Fail

You’ve gathered friends at your mountain retreat. The fire crackles, the view astounds, and the anticipation for a classic cheese fondue is palpable. You follow your trusted recipe to the letter. Yet, instead of a velvety, cohesive dip, you’re left with a pot of grainy, separated sludge or a rubbery, unappealing mass. The dream of a communal, joyous feast dissolves into culinary frustration. The culprit is not your skill or your ingredients. It is the invisible, pervasive force of altitude. Mastering its effects is the single greatest differentiator between fondue failure and flawless, consistent results. Understanding and implementing precise altitude adjustments for high-elevation fondue making is the foundational skill that transforms your high-country kitchen into a haven of culinary confidence.

The Foundation: Understanding the Physics of Thin Air

Perfect high-altitude fondue begins not with a pot, but with principle. You must first comprehend how thin air alters the fundamental rules of cooking. This knowledge turns guesswork into a predictable science.

The Boiling Point Problem

At sea level, water boils at 212°F (100°C). For every 500-foot increase in elevation, the boiling point drops by approximately 1°F. At 7,000 feet, water boils near 198°F. This dramatically changes cooking dynamics. Your fondue will never reach sea-level temperatures, slowing starch gelatinization and affecting protein behavior. Simmering is more aggressive, and the margin for error before overheating shrinks.

Moisture Evaporation & Cheese Chemistry

Reduced atmospheric pressure causes liquids to evaporate much faster. In fondue, this rapid moisture loss is catastrophic. The dairy proteins in cheese, primarily casein, tighten and squeeze out fat too quickly when overheated or dried out. Without sufficient liquid to keep them lubricated, the proteins clump together, creating a grainy, curdled texture. Simultaneously, starches like flour or cornstarch thicken differently, often failing to form a stable emulsion before the cheese seizes.

The Core Adjustments: A Tactical System for Success

Consider this your fondue control panel. Actively managing these three variables grants you command over the challenging high-altitude environment.

Temperature & Heat Management

The “low and slow” mantra is non-negotiable. You must abandon high-heat techniques. Use the lowest possible burner setting that maintains a bare simmer. I insist on using a heavy-bottomed pot for even heat distribution and a clip-on candy or deep-fry thermometer. Your target pot temperature is 160-175°F (71-79°C)—well below the boiling point. This gentle heat coaxes the cheese into melting smoothly without shocking its proteins.

Liquid Ratios & Acidity

To combat rapid evaporation and keep proteins lubricated, you must increase your liquid base. For every 1,000 feet above 3,000 feet, add one extra tablespoon of wine, beer, or broth per pound of cheese. Acidity is your ally; it helps keep cheese proteins dispersed. Ensure your recipe includes a sharp, acidic white wine or a squeeze of lemon juice. For thickening, I prefer cornstarch over flour at altitude. It thickens at a lower temperature and creates a glossier sauce. Use 1 tablespoon of cornstarch per pound of cheese, dissolved in your cold liquid or kirsch before adding.

The Stirring Protocol

Frequent, gentle, figure-eight stirring is the engine of your emulsion. It distributes heat evenly, prevents hot spots that cause breaking, and slowly incorporates the cheese into the liquid. Stir constantly when adding cheese. Once melted, stir every 30-45 seconds to maintain the bond. Aggressive whisking can incorporate too much air and destabilize the fondue.

The Ingredient Arsenal: Selection and Preparation

Superior outcomes are built from the first choice. Select and prepare every component with altitude in mind.

Cheese Selection & Prep

Choose cheeses known for good melting properties and moderate moisture content. Gruyère, Emmental, Appenzeller, and Fontina are excellent. Avoid aged, dry cheeses like an extra-old cheddar as a primary base. Grate your cheese finely on a box grater; smaller pieces melt faster and more evenly, reducing the heat exposure time. Crucially, let the grated cheese sit at room temperature for 30 minutes before using. Adding cold cheese to the pot is a common cause of temperature shock and clumping.

The Liquid Base

Always use an acidic liquid like a dry white wine (Sauvignon Blanc, Grüner Veltliner) or a light beer. The acid promotes a smooth melt. Water lacks this stabilizing acidity and results in a bland, unstable fondue. Warm your liquid base in a separate saucepan or microwave before adding it to the fondue pot. Adding cold liquid drops the temperature and can cause the cheese to seize.

The Emulsifier Table

Component Key Characteristics & Use at Altitude
Cornstarch My preferred choice for high elevation. Thickens at lower temperatures, creating a shiny, smooth sauce. Must be dissolved in a cold liquid (wine, kirsch) first to prevent clumping. Use 1 tbsp per pound of cheese.
All-Purpose Flour Traditional, but requires higher heat to lose its raw flavor. Can lead to a slightly grainier texture if not cooked long enough at lower boiling points. Toss with grated cheese to coat before adding.
Lemon Juice A powerful acidic stabilizer. Adds brightness. Use 1-2 teaspoons per pound of cheese, added with the initial liquid. Essential if using a low-acid beer or broth.
Kirsch (Cherry Brandy) More than tradition; the alcohol helps keep cheese proteins fluid. Adds complex flavor. Add 1-2 tablespoons after the cheese has melted, and always mix with your cornstarch first for a slurry.

Advanced Techniques: Optimization for Excellence

Move beyond basic functionality into the realm of guaranteed excellence with these refined methods.

The Double-Boiler Method

For absolute control, abandon direct heat. Place your fondue pot over a saucepan of gently simmering water. This creates a gentle, indirect heat source that makes it nearly impossible to overheat the cheese. It is the single most effective technique for guaranteeing a silky texture at any elevation.

The Rescue Protocol

If your fondue begins to separate (an oily pool forms) or turns grainy, act immediately. Remove the pot from heat. In a separate bowl, whisk 1 tablespoon of warm liquid (wine, lemon juice) with 1 teaspoon of cornstarch until smooth. Vigorously whisk this slurry into the broken fondue. Return to very low heat, stirring constantly. It will re-emulsify within a minute.

Flavor Balancing at Altitude

Alcohol flavors can taste sharper at elevation. If using kirsch, start with the lower end of the recommended amount. Taste and adjust. Similarly, salt perception can change. Season with a light hand at first, then taste once the fondue is fully emulsified and adjust with fine sea salt.

Threat Management: Preventing Common Pitfalls

Adopt a proactive stance. Prevention is always simpler than the cure.

Prevention: The Best Defense

Mise en place is critical. Have all your ingredients grated, measured, and within reach before turning on the heat. Use a thermometer. Stir with purpose and consistency. Never walk away from a melting fondue pot. These simple disciplines form an impenetrable defense against most failures.

Intervention: The Recovery Plan

Learn to identify problems instantly:
Breaking/Oily: Fat is separating from the sauce. Caused by overheating.
Graininess: Cheese has curdled into small bits. Caused by high heat, cold ingredients, or insufficient acid/liquid.
Rubberiness: Fondue forms a thick, elastic mass. Caused by severe overheating and rapid moisture loss.
For all three, the first step is the same: immediately remove from heat and execute the Rescue Protocol outlined above.

The High-Altitude Fondue Action Plan

Scenario Primary Adjustments Focus Goal
Quick Weeknight Fondue Use pre-grated cheese blend (room temp). Increase liquid by 2 tbsp. Employ the double-boiler method for foolproof results. Use cornstarch slurry. Speed and Simplicity with zero risk of failure.
Crowd-Pleasing Party Fondue Choose robust cheeses like Gruyère and Fontina. Increase liquid base by 15%. Use a mix of cornstarch and 1 tbsp flour for extra stability. Keep on a dedicated fondue burner at its lowest setting. Robust flavor and a texture that holds for hours of social dipping.
Classic Swiss-Style at 7,000+ ft Traditional 50/50 Gruyère/Emmental. Use dry white wine, warmed. Increase wine by 3 tbsp per pound. Use kirsch-cornstarch slurry. Stir with wooden spoon in a figure-eight. Maintain pot temp at 165°F via thermometer. Authentic texture and tradition, perfected for the alpine environment.

The Summit of Flavor

Perfect fondue at altitude is a triumphant synthesis of applied knowledge over environmental challenge. It is the reward for understanding the physics of thin air, for wielding heat and starch with precision, and for respecting the delicate chemistry of cheese. You have moved from fearing failure to commanding the system. The final vision is deeply satisfying: a pot of flawless, creamy fondue, its surface glistening, surrounded by friends in a high-mountain cabin. This mastery of altitude adjustments for high-elevation fondue making transforms a simple shared meal into a memorable, triumphant experience—the true summit of communal flavor.


Related Articles

Try Our Free Tool: Use our Fondue Glossary to look up any fondue term or technique.

Aging Cheese for Fondue: Does It Make a Difference?


The Introduction: Beyond the Melting Pot

You’ve gathered friends, uncorked the wine, and lit the burner. But instead of a velvety, aromatic pool for dipping, you’re left with a pot of greasy, separated liquid or a bland, rubbery mass. This disappointment is the silent failure of a fondue built on convenience. The true secret to transcendence lies not just in the cheese you choose, but in the journey it has taken before it meets your pot. That journey is aging.

Mastering the art of aging cheese for fondue is the key to unlocking a sublime texture and profound depth of flavor that pre-shredded, young cheeses simply cannot provide. It is the difference between a simple melted snack and a crafted, memorable experience.

Foundational Choices: The Cheese “Hardware”

Your cheese selection is the non-negotiable foundation. Just as you cannot build a stable house on sand, you cannot build a sublime fondue on any random cheese. You must choose varieties engineered by tradition and chemistry to benefit from aging.

Part A: Selection by Style

The Alpine Classics (Gruyère, Emmental, Comté): These are the gold standard. Their firm, dense structure allows for slow, controlled aging. As they mature, they develop the perfect balance of flavor crystals and emulsifying proteins essential for a stable fondue.

Supporting Players (Appenzeller, Raclette): These cheeses offer pungent or creamy notes. Use them in smaller proportions within a blend to add complexity without overpowering the classic Alpine base.

Cheeses to Avoid: High-moisture, soft-ripening cheeses like Brie or fresh Mozzarella. They are not designed for extended aging in this context and will result in a poor texture and inconsistent melt.

Part B: The Age Spectrum – What the Labels Mean

Young (3-6 months): Mild, milky flavor, higher moisture content. Alone, they risk a watery or broken fondue but can be useful for balancing very aged cheeses.

Medium (6-12 months): The “sweet spot” for fondue. These cheeses have lost enough moisture to be stable but retain ample fat and protein for a creamy, cohesive melt. They offer developed nutty flavors without excessive sharpness.

Aged or “Réserve” (12+ months): Firm, often with crunchy tyrosine crystals. Flavors are intensely nutty, savory, and complex. Use as an accent—too much can make your fondue granular or oily.

Part C: Material Comparison – Building Your Blend

Cheese Type Ideal Age Range for Fondue Key Characteristics Role in the Blend
Gruyère 8-10 months Nutty, slightly sweet, excellent melt. The backbone of flavor and texture. Primary “Workhorse” (60-70%)
Emmental 6-9 months Milder, buttery, with iconic holes. Promotes a smooth, flowing texture. Texture Enhancer (20-30%)
Comté (Aged) 12-18 months Brothy, complex, with crystalline crunch. Adds deep savory notes. Flavor “Accent” (10-15%)
Appenzeller 5-7 months Pungent, herbal notes from brine washing. Adds a bold, aromatic kick. Complexity “Balancer” (10%)

The Core System: Flavor and Texture Chemistry

Aging is not passive storage; it is a controlled biochemical process. By understanding the variables it changes, you move from following a recipe to engineering your perfect fondue.

Variable 1: Moisture Loss & Concentration

Target: Lower water content. A drier cheese has less free water to separate from the fat and protein, leading to a stable, non-greasy emulsion.

Consequence of Error: A young, high-moisture cheese will weep water as it heats, causing a thin, watery, or suddenly broken fondue.

Variable 2: Flavor Development

Target: Enzymatic breakdown. Over months, enzymes and microbes break down proteins and fats into amino acids and fatty acids. This creates the coveted nutty, savory, and complex notes absent in young cheese.

Consequence of Error: Young cheese offers only a mild, milky, one-dimensional flavor. Your fondue will taste bland, no matter how much wine or garlic you add.

Variable 3: Melt and Flow

Target: A balanced calcium-phosphate network. This structure holds the cheese together when cold but breaks down evenly with heat. Aging optimizes this balance.

Consequence of Error: Over-aged cheese can have a weakened or altered structure, leading to a fondue that turns grainy, oily, or “breaks” by separating into fat and solids.

Advanced Practice: The Art of the Blend

The masterstroke is strategic blending. A single cheese can be good, but a calculated blend of ages and styles creates a fondue with greater depth, stability, and harmony.

Preparation: Grating Your Own

Pre-grated cheese is coated in anti-caking agents like potato starch or cellulose. These powders interfere with the cheese’s ability to emulsify smoothly with wine. For a silky fondue, you must buy a block and grate it yourself just before use.

The Blending Strategy

The “Workhorse” (Medium-aged Gruyère): This forms 60-70% of your blend. It provides the primary creamy body and foundational nutty flavor.

The “Accent” (Aged Comté or Surchoix): Comprising 10-15%, this cheese adds bursts of complex, savory flavor. Think of it as the aromatic herbs in a stew.

The “Balancer” (A younger Appenzeller or Vacherin): At about 10%, this ensures consistent smoothness and can introduce a pleasant pungency or creaminess that rounds out the blend.

A Sample Master Ratio

For a classic, deeply flavorful fondue for four, try this blend: 200g of 9-month Gruyère (workhorse), 50g of 15-month Comté (accent), 50g of 6-month Emmental (texture), and 25g of 5-month Appenzeller (balancer). This ratio leverages age for both stability and complexity.

Threat Management: Preventing Fondue Failure

A proactive approach protects your investment in aged cheese. Most fondue disasters are preventable with proper handling and a calm intervention plan.

Prevention: Storage and Handling

Store cheese in the refrigerator wrapped in parchment paper, then loosely in a plastic bag or airtight container. The goal is to allow it to breathe slightly without drying out. Most critical: grate your cheese and let it sit at room temperature for 1-2 hours before cooking. Cold cheese added to the pot will clump and melt unevenly.

Intervention: Saving the Emulsion

Quick-Identify Guide:

Greasy/Oily: Fat separating and pooling. Cause: Too high heat or wrong cheese.

Grainy/Sandy: Tiny curds in the liquid. Cause: Over-aged cheese or excessive heat.

Stringy/Rubbery: Cheese forms elastic strands. Cause: Overworked protein, often from vigorous stirring with cold cheese.

Tiered Response:

1. A dash of acid: A teaspoon of lemon juice or dry white wine can help re-bind fat and water.

2. A cornstarch slurry: Mix a teaspoon of cornstarch with a tablespoon of kirsch or wine, then whisk vigorously into the troubled fondue.

3. The “cheese doctor”: Spear a small piece of crustless bread or a raw potato wedge and stir in a figure-eight pattern; the starch can help rescue the emulsion.

The Action Plan: Your Fondue Calendar

Phase Primary Tasks What to Focus On
Sourcing (1 Week Before) Visit a specialty cheesemonger. Taste samples of Gruyère or Comté at different ages. Selecting 2-3 cheeses with complementary ages and flavors for your blend.
Preparation (Day Of) Hand-grate all cheese. Let it sit, covered, at room temperature for 1-2 hours. Ensuring even melting by equalizing the cheese temperature with your kitchen.
Execution (Fondue Night) Rub pot with garlic, add dry white wine, heat gently. Add cheese gradually, stirring constantly in a figure-eight pattern. Building the emulsion slowly and patiently over low to medium-low heat.
Enjoyment (The Meal) Maintain the lowest possible flame to keep fondue warm. Stir the pot occasionally between dips. Preventing the fondue from overcooking, settling, or breaking at the table.

The Conclusion: The Transformed Tradition

Aging is the transformative alchemy that turns simple curds into a complex, stable, and unforgettable fondue. It is the process that concentrates flavor, perfects texture, and turns a recipe into a ritual.

Your journey moves from selecting the right aged hardware, through understanding the core chemistry, to mastering the advanced art of the blend. This knowledge culminates in a pot of fondue that is impossibly smooth, richly aromatic, and resilient.

The final vision is profound satisfaction: the shared delight around a pot that is the centerpiece of a memorable gathering. This is the tangible difference that intention and mastery make. It transforms a simple meal into a crafted experience, where every dip is a celebration of depth, tradition, and perfect balance.


Related Articles

Try Our Free Tool: Use our Fondue Cheese Pairing Guide to discover the best cheese combinations for your fondue.

Fondue Separator Techniques: Fixing Split or Broken Fondue


The Vision of the Unflappable Host

Imagine the perfect scene: friends gathered, laughter in the air, the fondue pot bubbling gently at the center of the table. Then, you see it. The silky, unified cheese or chocolate has fractured into a greasy puddle and grainy clumps. The mood plummets. This moment of culinary heartbreak is universal, but your response defines you. Mastering the art of the rescue transforms panic into poise. It elevates you from a hopeful cook to a confident culinary conductor. Understanding and applying precise fondue separator techniques is your key to unshakable confidence, turning potential disasters into your most impressive performances.

The Foundation: Understanding Why Fondue Breaks

You cannot fix what you do not understand. A broken fondue is a failed emulsion, where fat and liquid divorce under stress. Your first mastery is diagnosing the cause.

The Science of the Split: Protein, Fat, and Emulsion

Cheese and chocolate fondue break for different, specific reasons. Cheese fondue is a protein network holding fat and wine in suspension. Overheat it, and the proteins tighten violently, squeezing out the fat and leaving you with rubbery strings in an oily pool. Chocolate fondue is a delicate balance of cocoa solids and cocoa butter. Introducing even a droplet of water or applying high heat causes the fats to seize and separate from the other components, creating a gritty, grainy mess.

The Common Culprits

Three primary offenders cause most fondue failures. Excessive or direct heat is the arch-nemesis, aggressively destroying emulsions. Incorrect ingredient types, like pre-shredded cheese (coated in cellulose) or low-quality chocolate with unstable fat content, provide a weak foundation. Finally, agitation or incorrect stirring—either too vigorous or not enough—fails to properly integrate the elements from the start.

The Core System: Proactive Fondue Management

Treat your fondue pot not as a simple dish, but as a dynamic system requiring active control. Master these two variables, and you will prevent most crises before they begin.

Variable 1: Temperature Control

The ideal range is low, indirect, and consistent heat—a gentle simmer, never a boil. The consequence of failure is guaranteed breaking. Your essential tool is a high-quality, heavy-bottomed caquelon (fondue pot) paired with a stable, adjustable heat source like a gel fuel burner or a low-output electric fondue maker. This setup provides even heat distribution and prevents scorching.

Variable 2: Acid and Starch Balance

Your target is a stable, smooth emulsion that clings to bread. The stabilizers are your insurance policy. Acid from lemon juice or white wine helps keep cheese proteins relaxed. Starch from cornstarch or flour acts as a binder, thickening the liquid and preventing separation. The method is critical: always toss grated cheese with a tablespoon of cornstarch before adding it, and incorporate your starch slurry (starch mixed with a cold liquid) off the heat to avoid lumps.

Component Category Options Key Characteristics
Cheese Foundation Gruyère, Emmental, Appenzeller, Comté Excellent melters; Low moisture content; Form stable emulsions with wine and starch.
Chocolate Foundation Couverture Chocolate, High-Quality Baking Bars High cocoa butter content; Consistent temper; Avoid chips (contain stabilizers that hinder melting).
Critical Stabilizer Cornstarch, All-Purpose Flour, Arrowroot Cornstarch is most effective; Create a slurry with wine or kirsch; Add off heat to prevent clumping.

Advanced Recovery: Fondue Separator Techniques in Action

Despite your best efforts, a split may occur. This is your moment to shine. Apply these techniques with calm precision.

The First Response: Immediate Intervention

Your first two actions are non-negotiable. First, remove the pot from heat instantly to stop the cooking process. Second, add a small amount of cold liquid—a splash of white wine, kirsch, or cold cream—and stir gently. This can sometimes shock the emulsion back together. If it doesn’t, escalate to a targeted technique.

Technique 1: The Cornstarch Slurry Savior (For Cheese Fondue)

This is your primary recovery tool. Mix one tablespoon of cornstarch with two tablespoons of cold wine, kirsch, or lemon juice in a separate bowl to form a smooth slurry. Take your broken fondue off the heat. Whisk in the slurry vigorously until fully incorporated. Return the pot to very low heat and stir constantly with a figure-eight motion until the fondue thickens, re-emulsifies, and becomes smooth again. This method rebuilds the protein-starch network.

Technique 2: The Warm Cream Whisper (For Chocolate Fondue)

Chocolate requires a gentle, fatty touch. Heat a quarter cup of heavy cream or full-fat coconut milk until just warm, not boiling. Take your seized, broken chocolate off the heat. Gradually add the warm cream, one tablespoon at a time, stirring gently and constantly with a silicone spatula. The added fat and liquid will coax the cocoa butter back into a unified, silky state. Avoid adding cold liquid, which will worsen the seize.

Technique 3: The Blender Emergency Fix

For a fondue that is severely broken and other techniques have failed, this is your high-powered last resort. Carefully pour the broken fondue into a heat-safe blender. Add an extra tablespoon of your base liquid (wine for cheese, cream for chocolate). Place the lid on, cover it with a towel, and blend on medium-high for 30-60 seconds. The mechanical force can re-emulsify what gentle stirring cannot. Return to the pot and warm gently.

Threat Management: Prevention Over Cure

The master’s path focuses on creating an unbreakable protocol, making recovery techniques a seldom-used secret weapon.

The Unbreakable Protocol: Preparation

Your battle is won before the pot is heated. Choose the right cheeses: Gruyère and Emmental are classics for a reason. Use high-quality, dry chocolate bars, not chips. Always toss grated cheese with cornstarch before introducing it to the pot. This coats the cheese and ensures even dispersion of the stabilizer.

The Vigilant Practice: Execution

During cooking, your vigilance is paramount. Employ the “figure-eight” stir—it gently folds the fondue over itself for even heating and integration. Never, under any circumstances, let it boil. A bare simmer is your summit. Maintain the perfect serving consistency: it should coat the back of a spoon, not run off like water or stand like pudding.

The Fondue Master’s Action Plan

Phase Primary Tasks What to Focus On
Preparation Grate cheese; toss with cornstarch. Finely chop chocolate. Prepare all dipping items. Measure stabilizers and liquids. Mise en place. Ingredient quality and proper treatment. Having your recovery tools (starch, cream) ready.
Cooking Warm wine/acid base. Add cheese gradually, stirring in a figure-eight. Melt chocolate with cream over double boiler. Low, indirect, consistent heat. Patient, rhythmic stirring. Never reaching a boil.
Recovery (If Needed) Instantly remove from heat. Diagnose cheese vs. chocolate break. Apply the appropriate fondue separator technique. Calm, swift action. Using the correct targeted fix. Gentle reheating after recovery.

The Confident Host, Transformed

A split fondue is no longer a disaster; it is an invitation to demonstrate quiet expertise. You now understand the delicate science of the emulsion, command the core system of temperature and balance, and possess a toolkit of advanced recovery techniques. This knowledge transforms you. The profound satisfaction of rescuing a shared meal, of earning the genuine admiration of your guests, and of knowing that no broken pot can ever unsettle you again—this is the reward. Mastering fondue separator techniques enriches your culinary life with a deep, unshakable confidence that turns every gathering into a guaranteed success.


Related Articles

Try Our Free Tool: Use our Fondue Glossary to look up fondue techniques and troubleshooting terms.

Science of Fondue: Understanding Emulsification and Temperature Control


From Broken Mess to Silken Perfection

You’ve gathered friends, chosen fine cheeses, and prepared the bread. The pot is warm, the wine simmers, and anticipation fills the air. You add the first handful of cheese, stirring with hope. Then, it happens. Instead of melting into a creamy, unified pool, the mixture rebels. It separates into a greasy, grainy puddle of oily fat and clumpy protein. The fondue is broken. The moment is lost. This culinary disappointment is not a matter of bad luck or poor recipe. It is a fundamental failure of chemistry and physics. The good news? This science is not only knowable—it is masterable.

Transforming humble ingredients into a luxuriously smooth, stable fondue is an act of kitchen alchemy. The secret lies not in a magical ingredient, but in commanding two intertwined principles: the creation of a stable emulsion and the maintenance of precise thermal control. Mastering the science of fondue: understanding emulsification and temperature control is the single key that unlocks a world of consistent, spectacular results. It turns anxiety into confidence and transforms a simple dish into a guaranteed centerpiece of communal joy.

Foundational Choices—The Fondue “Hardware”

Your equipment is not merely a vessel for cooking; it is the foundational platform for your chemical experiment. The right choices create a stable, predictable environment where science can work in your favor. The wrong ones fight you at every turn, making perfect fondue a struggle against the odds.

Vessel Selection: The Conductivity Core

The classic caquelon, or fondue pot, is your first critical decision. Its material dictates how heat spreads and holds, directly impacting your control.

  • Enameled Cast Iron: The modern gold standard. It provides superb, even heat distribution and excellent retention, creating a forgiving buffer against temperature spikes. Its weight offers stability on the burner.
  • Ceramic or Stoneware: Beautiful and traditional, these pots heat slowly and evenly. They are less conductive than metal, which can be an advantage for gentle warming but requires more attentive pre-heating. Avoid thermal shock.
  • Traditional Clay: The most authentic choice, it offers porous, gentle heat. It often requires seasoning and careful handling but provides unmatched, even warmth for a classic texture.

The Heat Source: Precision vs. Tradition

Your ability to make fine adjustments to heat is non-negotiable. The burner is your control panel.

  • Adjustable Alcohol or Gel Burners: These offer the classic fondue experience with good control. Choose a burner with a wide, adjustable flame dial. Practice with water to understand its settings before your cheese debut.
  • Electric Fondue Pots: The laboratory-grade choice for precision. Many feature thermostatic controls, allowing you to dial in an exact temperature. They eliminate the open flame but provide unparalleled consistency, especially for beginners.

Component & Tool Table

Component Category Options Key Characteristics
Pot (Caquelon) Enameled Cast Iron, Ceramic, Traditional Clay Cast iron offers even heat and forgiveness. Ceramic provides gentle, slow warmth. Clay is authentic but requires seasoning. All must be fondue-specific for shape and heat resistance.
Heat Source Adjustable Alcohol/Gel Burner, Electric Pot Burners offer tradition and portability; seek precise control dials. Electric pots provide set-and-forget temperature accuracy, ideal for mastering the science.
Critical Utensils Wooden Spoon, Instant-Read Thermometer, Long-Stemmed Forks A wooden spoon prevents scratching and doesn’t conduct heat. An instant-read thermometer is your essential data tool. Forks keep hands safe from the pot and flame.

The Core System: Managing Emulsion and Heat

Fondue is not a static sauce. It is a dynamic, temporary emulsion—a suspension of one liquid in another—that you must actively sustain. Think of yourself as an engineer managing a delicate, delicious system with two primary control variables.

Variable 1: Temperature Control—The “Goldilocks Zone”

Heat is the energy that melts cheese and activates chemistry, but it must be precisely targeted. Your fondue must live in a narrow thermal band between 160°F and 175°F (71°C and 80°C). This is the fondue “Goldilocks Zone.”

Stray outside this zone and the system fails. Too hot (above 185°F/85°C), and the cheese proteins overcoagulate, squeezing out their fat and moisture. This creates a tight, grainy, rubbery mass floating in oil. Too cold, and the emulsion never properly forms; the fat remains separate, and the cheese simply sinks and congeals.

Control Tools & Methods: Your instant-read thermometer is your guide. Use it frequently during the initial melt. Learn visual cues: the perfect fondue should have tiny, lazy bubbles rising to the surface, not a vigorous simmer. The moment you see larger, active bubbles, reduce the heat immediately. With a burner, this means turning the dial down. With an electric pot, adjust the thermostat. This is active management, not passive cooking.

Variable 2: Emulsification—Building the Stable Bond

An emulsion is a mixture of two liquids that normally don’t mix, like oil and water. In fondue, the melted cheese fat is the “oil,” and the wine or broth is the “water.” To force them to combine into a creamy suspension, you need an emulsifier.

Cheese itself provides some emulsifiers—proteins and natural salts—but they are fragile. This is where science meets technique. The acid in wine helps keep proteins from clumping. The starch in flour or cornstarch is your emulsification insurance policy. Starch molecules swell in the hot liquid, creating a physical network that traps fat droplets and prevents them from coalescing and separating.

The consequence of ignoring this science is a “broken” fondue. Adding cheese too quickly overwhelms the liquid’s ability to incorporate it. Insufficient stirring fails to distribute heat and emulsifiers evenly. Skipping the starch leaves the emulsion vulnerable to the slightest temperature fluctuation. Every step in the process supports the emulsification reaction.

Advanced Practices: The Art of the Blend

With the system’s theory understood, you now refine the art. Your choices in ingredients and technique elevate your fondue from scientifically stable to sublimely delicious.

Ingredient Preparation: The Foundation of Flavor

Preparation is non-negotiable. Cheese must be grated or finely diced. Large chunks melt unevenly, creating cold spots that seize up and cause clumping. Select a blend of cheeses for flavor and function: a younger, high-moisture cheese like Gruyère for meltability, and an aged, flavorful one like Comté or Appenzeller for depth. The wine or acidic liquid (like dry cider or lemon juice-infused broth) is not just for flavor; its acidity helps keep cheese proteins dispersed and stable. Never use a sweet or non-acidic liquid as your base.

The Technique: Process and Motion

Two techniques are paramount. First, the “slurry” method: toss your grated cheese with a tablespoon of cornstarch or flour before adding it. This coats every strand, ensuring the starch is perfectly distributed to do its job. Second, the “figure-eight” stir. This is not a superstition. Stirring in a constant, lazy figure-eight pattern ensures every part of the pot base gets equal contact with heat and that the melting cheese integrates smoothly from the edges to the center. It is the motion of even incorporation.

Strategy for Success: Building the Pot

Follow this sequence to build an unbreakable emulsion:

  1. Flavor the Base: Rub the inside of the pot with a cut clove of garlic.
  2. Heat the Liquid: Add wine or broth and heat it just to a bare simmer in your Goldilocks Zone.
  3. Incorporate Gradually: Add a large handful of your starch-tossed cheese. Stir constantly in a figure-eight until fully melted and smooth before adding the next handful. This patience is critical.
  4. Finish and Season: Once all cheese is incorporated and the fondue is velvety, finish with a splash of kirsch (if using) and season with pepper or nutmeg. The kirsch isn’t just for flavor; its alcohol can help tighten the emulsion.

Threat Management: Saving and Preventing Breaks

Adopt a proactive commander’s mindset. Your goal is to prevent problems through disciplined practice. But even masters need a rescue plan.

Prevention: The Best Defense

Your three immutable rules are: gradual cheese addition, maintained temperature zone, and constant, gentle stirring. If you hold to these, a break is almost impossible. Ensure your dippers are room temperature, not cold from the fridge, to avoid shocking the pot when dipped.

Intervention: The Rescue Plans

If trouble strikes, diagnose first. Is the fondue grainy (too hot) or oily and separated (emulsion failed)? For graininess, immediately remove from heat and stir vigorously. Sometimes this can re-integrate the proteins. For separation, try this tiered response:

  1. Off-Heat Stir: Take the pot off the burner. Stir vigorously with a whisk to try to mechanically re-emulsify.
  2. Hot Liquid Splash: If stirring alone fails, add a tablespoon of hot wine or broth and whisk fiercely.
  3. Emergency Slurry: For a full break, mix one teaspoon of cornstarch with two teaspoons of cold wine or water. Bring your fondue back to a very low heat, whisk in the slurry, and stir constantly until it thickens and re-incorporates. This is your guaranteed fix.

The Action Plan: A Fondue Master’s Calendar

Follow this phased roadmap to guide your process from preparation to perfect service.

Phase Primary Tasks Focus On
Prep & Mise en Place Grate and starch-toss all cheese. Prepare all dippers (bread, vegetables). Measure wine, kirsch. Set up burner/station. Organization. Having everything ready and within arm’s reach is 50% of the battle.
Foundation Building Heat wine to a bare simmer (160-170°F). Add first batch of cheese. Stir until completely smooth. Gentle, even heat. Establishing the initial emulsion correctly.
Emulsion & Integration Add remaining cheese in small batches, stirring each to full smoothness. Adjust flame to maintain lazy bubbles. Patience and temperature vigilance. Maintaining the Goldilocks Zone.
Maintenance & Service Adjust flame for steady warmth. Encourage communal stirring with each dip. Monitor texture. Consistency. Keeping the fondue at the perfect dipping viscosity until the last bite.

The Mastered Pot—A Transformation

Fondue mastery is the elegant balance of emulsion science and precise thermal control. It is the journey from selecting the right conductive pot to commanding the steady, rhythmic stir that builds a silken bond. It transforms the act of cooking from following a recipe to conducting a delicious, predictable reaction.

When you internalize this science, the result is profound satisfaction. The anxiety of the broken pot vanishes, replaced by the confident calm of a chef in command. You create not just a dish, but an event—a communal pot that remains luxuriously smooth from the first crisp bite of bread to the coveted croûte at the bottom. This is the transformation: turning simple ingredients into an experience of guaranteed delight, where every dip is a perfect, creamy reward. Your table becomes a place of warmth, connection, and culinary triumph.


Related Articles

Try Our Free Tool: Use our Fondue Glossary to look up any fondue term or technique.

Fondue for Kids: Age-Appropriate Recipes and Safety Tips


Fondue for Kids: The Ultimate Guide to Safe, Messy, Magical Fun

Picture a typical weeknight dinner: plates are pushed around, conversation is minimal, and the goal is simply to finish. Now, reimagine that scene. Laughter fills the air. Little hands are carefully maneuvering colorful forks. Everyone is engaged, talking, and creating their perfect bite. This is the transformative power of fondue. It’s not merely a meal; it’s an interactive culinary event that builds fine motor skills, teaches patience, and forges lasting memories. Mastering fondue for kids is the key to unlocking this experience. It transforms mealtime from a routine into a celebrated family ritual, blending creative freedom with essential safety for superior, joyful results.

Foundational Choices: The Fondue “Command Center” Setup

Your success begins long before the cheese melts. The equipment and environment you choose form the non-negotiable foundation for a safe and seamless experience. Think of it as engineering your command center.

Part A: Selecting Your Fondue Pot

The pot is the heart of your operation. Your choice dictates control and safety.

Electric vs. Fuel-Based: For families, an electric fondue pot is the superior choice. It offers stable, adjustable temperature control without an open flame, drastically reducing risk. Traditional fuel-based pots (like sterno or gel) require constant, vigilant adult supervision and are better suited for older children in a highly controlled setting.

Size and Style: Choose a pot with a wide, stable base to prevent tipping. A 2-quart capacity is ideal for a family of four, allowing for a good variety of dippers without overwhelming the space. Ceramic or enameled pots are excellent for cheese and chocolate; metal pots are necessary for broth or oil.

Part B: The Strategic Dining Setup

Location is everything. Place the fondue pot at the absolute center of the table, directly in front of the supervising adult. Ensure it is on a stable, level surface, far from the edge and away from frequent elbow traffic. Create a fortified foundation: use a non-slip placemat under the pot and consider a wipeable vinyl tablecloth to define the “fondue zone” and contain inevitable drips.

Part C: Essential Tools & Safety Gear

The right tools are your best defense against chaos and accidents. Equip your table strategically.

Component Category Options Key Characteristics
Fondue Forks Color-Coded, Long-Handled, Blunt-Tipped
  • Color-coding is non-negotiable: Assign each person a color to prevent mix-ups.
  • Long handles keep small hands away from the heat.
  • Blunt tips are safer for kids than sharp, pointed ones.
Plates & Bowls Divided Plates, Non-Slip Bowls, Ramekins
  • Use divided plates or small bowls for individual portions of dippers.
  • Non-slip bottoms prevent sliding during enthusiastic dipping.
  • Provide a personal “cooling plate” for each child to place their dipped item before eating.
Extras & Safety Gear Aprons, Kitchen Shears, Damp Cloth “Wipe Station”
  • Aprons protect clothes from chocolate or cheese splatter.
  • Kitchen shears (used by an adult) safely cut food on a child’s plate.
  • A dedicated damp cloth within the adult’s reach allows for instant drip management.

The Core System: Managing Temperature and Flow

Fondue is a dynamic, interactive system. Your role is active manager, ensuring the environment remains safe and the experience smooth.

Temperature Control: The Heart of Safety

Precise heat management prevents burns and ensures perfect consistency.

Ideal Ranges: For cheese fondue, maintain a gentle bubble, around 160°F (71°C). Chocolate should be melted and warm, not hot, ideally between 120-130°F (49-54°C). Broth must be at a rolling simmer (212°F/100°C) to cook proteins safely.

Consequences of Error: Too hot risks immediate scalding. Too low, and cheese becomes a gluey mass, while broth won’t cook food, posing a bacterial risk.

Tools & Methods: Use an instant-read thermometer to check temperatures periodically. For electric pots, use the adjustable thermostat. Enforce the “cooling plate rule“: No food goes directly from the fondue fork into the mouth. It must be transferred to the personal plate first to cool.

Flow & Protocol: The Rules of Engagement

Clear, non-negotiable rules keep the experience hygienic and orderly. Announce these before the first dip.

The “One Dip” Rule: Each bite gets one dip into the communal pot. No double-dipping under any circumstances.

Fork Safety: Fondue forks are for dipping only. They are not eating utensils. This prevents burns and cross-contamination.

Dipping Station Logistics: Pre-cut all dippers into uniform, bite-sized pieces before sitting down. Use separate serving spoons or tongs for replenishing dipper plates. Manage drips by holding the fork over the pot for a three-count after lifting.

The Culinary Canvas: Age-Appropriate Recipes and Dippers

With your command center secure, focus shifts to the art—creating delicious, kid-friendly fondues and choosing dippers that match developmental skills.

Foundation Recipes: Simple & Nutritious Pots

Start with these foolproof, flavorful bases.

Classic Mild Cheddar Fondue: Sauté a minced garlic clove in butter, add a splash of whole milk or non-alcoholic beer, then gradually whisk in shredded sharp cheddar and a touch of cornstarch slurry until smooth. The mild, tangy flavor is a universal kid-pleaser.

Silky Dark Chocolate Fondue: Gently heat heavy cream until steaming, pour over finely chopped dark chocolate (at least 60% cocoa for less sugar), let sit for one minute, then whisk until glossy. The richer flavor is more satisfying and less cloying than milk chocolate.

Savory Broth Fondue (for older kids): Use a rich, low-sodium chicken or vegetable broth brought to a rolling simmer. This is for supervised tweens ready to cook their own bites.

Dipper Selection & Preparation Strategy

Tailor your dippers to age and dexterity. The goal is easy spearing and manageable bites.

Toddlers (2-4): Focus on soft, large-grip items. Think thick cubes of soft bread, large strawberry halves, banana chunks speared flat-side down, and steamed carrot coins.

Kids (5-8): Introduce more texture and fun. Pretzel rods, firm apple slices (tossed in lemon water), steamed broccoli and cauliflower florets, and pre-cooked chicken tender chunks are perfect.

Tweens+ (9+): Offer more sophisticated options. Cubed sausages (pre-cooked), bell pepper strips, crusty sourdough cubes, mushrooms, and marshmallows for dessert.

Preparation is Key: Blanch harder veggies like broccoli to soften slightly. Pre-skewer tricky items for younger children to make dipping effortless. Uniform sizing ensures even cooking and coating.

Threat Management: Preventing Problems Before They Start

Adopt a proactive, not reactive, stance. Your vigilance is the shield that allows the fun to happen.

Prevention: The First and Best Defense

Cleanliness: Mandate hand-washing before sitting down. Use separate cutting boards for raw meats (for broth fondue). Have all dippers prepped and ready.

Inspection: Before powering on, check pot stability. Route electrical cords away from foot traffic. If using fuel, confirm it’s securely placed and the lid is nearby to smother the flame.

Quarantine: Tie back long hair. Roll up loose sleeves. Establish a “no reaching” rule—kids must ask for items to be passed.

Intervention: The Tiered Response Plan

Despite best efforts, be ready with calm, practiced responses.

Minor Spills/Drips: Immediately enact the “wipe station” protocol using the dedicated damp cloth. No fuss, just quick cleanup.

Potential Burn Risk: Teach kids the “stop, drop, and cool” drill. If something hot touches their skin, they stop moving, drop the item, and immediately cool the area with a cool, damp cloth—not ice.

Major Safety Issue: For an electrical issue, calmly instruct everyone to step back, then unplug the pot at the outlet. For a fuel flame that needs extinguishing, use the lid or a metal baking sheet to smother it—never use water.

Your Year-Round Fondue Action Plan

Fondue is not just for winter. This calendar provides a roadmap for making it a versatile family tradition.

Season/Theme Primary Fondue & Dippers What to Focus On
Winter Cozy Classic Cheddar with sourdough, apples, steamed potatoes. Emphasizing warmth and sharing. Perfect for practicing the “cooling plate” rule with hot cheese.
Spring Fling Light Swiss cheese with asparagus, baby carrots, ham cubes. Celebrating fresh produce. A great time to introduce new vegetables as dippers.
Summer Party Dark Chocolate with berries, angel food cake, pretzels. Keeping it cool and simple. The pot can be set up outdoors (with an outlet), focusing on dessert fun.
Halloween Spooky Orange cheddar cheese (“Witch’s Brew”) with pretzel broomsticks, breadstick bones, pepper jack-o’-lanterns. Themed fun and creativity. Use food coloring in white chocolate for a “slime” dip. Heightened supervision for excited kids.

The Reward of Shared Mastery

True success in fondue for kids is found in the elegant balance between joyful freedom and structured safety. It’s the moment your child, with focused determination, successfully coats a piece of apple and transfers it to their plate, beaming with pride. You have journeyed from selecting the right pot to cultivating a table of confident, happy little dippers. The profound satisfaction lies in creating a unique family tradition where the meal itself is the adventure. This shared mastery—the laughter, the collaboration, the delicious results—enriches your family life with a connection that is, quite simply, unparalleled.


Related Articles

Try Our Free Tool: Use our Fondue Recipe Generator to generate a custom fondue recipe tailored to your taste.

Paleo Fondue Adaptations: Grain and Dairy Alternatives


Reclaiming the Shared Feast

Imagine the scene: laughter fills the air, friends gather around a table, and a pot of melted delight bubbles at the center. But you’re on the sidelines, navigating a separate plate. The communal ritual of fondue feels lost to dietary restrictions. This moment of isolation is the very pain point we eliminate. The tradition is not forfeit; it is an invitation for reinvention. Mastering Paleo Fondue Adaptations: Grain and Dairy Alternatives is the key to unlocking inclusive, deeply flavorful, and nourishing shared meals. You transform exclusion into celebration, honoring both culinary heritage and modern well-being.

Foundational Choices: The Vessel and the Base

Your success rests on two pillars: the hardware you cook with and the medium you create. These choices form the unshakable foundation for everything that follows.

Part A: Selecting Your Fondue Vessel

The right pot is your command center for temperature control. Classic ceramic caquelons excel at even, gentle heat retention, ideal for delicate dairy-free emulsions. Modern metal pots, often used with fuel burners, offer rapid responsiveness. For a Paleo setup, choose ceramic for its forgiving nature or a high-quality stainless steel pot if you prefer direct flame control. Size dictates social ease. A 1-quart pot comfortably serves two to three; scale up to 2-3 quarts for a group of six.

Part B: Building Your Dairy-Free Foundation

This is the heart of your system. A Paleo fondue base is not a mere substitute; it is a new architecture of flavor and texture, built from whole, nutrient-dense components.

Part C: Base Component Breakdown

Component Category Options Key Characteristics
Primary Liquid Full-Fat Coconut Milk, Unsweetened Nut Milk, Bone Broth
  • Coconut Milk: Rich and creamy; carries a subtle tropical note; perfect for decadent, cheese-style fondues.
  • Almond/Cashew Milk: Lighter and neutral; provides a clean canvas for robust herbs and garlic.
  • Bone Broth: Savory and nutrient-packed; creates a profound umami base for meat-forward or savory fondues.
Thickening & Binding Agents Arrowroot Powder, Tapioca Flour, Cassava Flour
  • Arrowroot: Creates a glossy, clear finish; excellent for lighter sauces. Always mix with cold liquid first to prevent clumping.
  • Tapioca Flour: Delivers a wonderfully stretchy, elastic texture reminiscent of melted cheese. The secret weapon for “pull.”
  • Cassava Flour: Offers a more robust, roux-like thickening power; use sparingly to avoid a gummy texture.
Flavor & “Cheese” Factor Nutritional Yeast, White Sweet Potato, Roasted Garlic
  • Nutritional Yeast: Non-negotiable for umami and cheesy flavor. Start with a quarter cup and adjust.
  • White Sweet Potato (puréed): Adds natural sweetness, body, and a velvety creaminess without overwhelming flavor.
  • Roasted Garlic: Provides a deep, caramelized sweetness and complexity that anchors the entire pot.

The Core System: Mastering Texture and Flavor Balance

A perfect Paleo fondue is a dynamic, live emulsion. You are not just making a sauce; you are conducting a reaction between heat, starch, and fat.

Variable 1: Heat Management

Your target is a consistent, gentle simmer—just a few lazy bubbles breaking the surface. Excessive heat is the enemy. It will scald your base, cause starches to clump, and force fats to separate. Control it with a reliable fondue burner or a stovetop set to low. Stir constantly with a figure-eight motion during the initial thickening phase. This distributes heat evenly and prevents hotspots.

Variable 2: The Emulsion

The target is a smooth, cohesive, and velvety sauce that coats a dipper perfectly. A broken emulsion appears oily and separated. Your primary control method is the slurry. Never add dry thickener directly to hot liquid. Always mix your arrowroot or tapioca flour with a few tablespoons of cold base liquid first, creating a smooth paste. Then, whisk this slurry vigorously into the simmering pot. For infallible results, combine all base ingredients in a high-speed blender until completely smooth before transferring to the pot to heat. This guarantees a seamless emulsion from the start.

Advanced Practices: Dippers and Accompaniments

Now, shift focus from the vessel to the complete experience. The dipper is the delivery system for your masterpiece.

Dipper Preparation: Beyond the Bread Cube

Your canvas is whole, real food. Select hearty vegetables that can withstand spearing and dipping: blanch broccoli florets and cauliflower for a tender-crisp bite, roast cubed sweet potato or parsnip until caramelized, or sear whole mushrooms for a meaty texture. Include crisp apple slices, pear wedges, and endive leaves for contrast. Add slices of grilled chicken, steak, or wrapped dates for luxurious bites. Prepare these elements ahead of time; organization is the mark of a master.

Flavor Strategy and Pairing

Build intentional flavor profiles. For a Herbes de Provence Fondue, use an almond milk base with nutritional yeast, roasted garlic, and a blend of rosemary, thyme, and lavender. Pair with roasted potatoes and lamb bites. For a Smoky Bacon & Chive Fondue, start with a coconut milk base, add smoked paprika, crumbled cooked bacon, and fresh chives. This pairs brilliantly with crisp apple slices and seared brussels sprout halves. Sequence your meal: begin with lighter, crisp dippers like apples and endive to cleanse the palate, then move to the richer, roasted vegetables and meats.

Threat Management: Saving a Broken Fondue

Adopt a proactive stance. Ninety percent of fondue issues are preventable with the techniques already outlined. But even masters face challenges. Here is your tiered response plan.

Prevention: The Rules of the Pot

Your first defense is technique. Maintain controlled, low heat. Always use a slurry for thickeners. Stir consistently during the initial warm-up phase. Ensure your dippers are thoroughly dried before dipping; excess water can thin the sauce and encourage separation.

Intervention: The Rescue Protocols

Problem: Sauce is too thin.
Solution: Create a new slurry with an additional teaspoon of your thickener and two tablespoons of cold base liquid. Remove the pot from direct heat, whisk in the slurry, and return to a gentle simmer for one minute.

Problem: Sauce has broken or separated.
Solution: Immediately remove the pot from heat. Add a single ice cube or a splash of cold base liquid. Using an immersion blender or whisking vigorously, blend until the sauce re-emulsifies into a smooth state. The rapid cooling and agitation can rescue the fat and water marriage.

The Action Plan: A Fondue Gathering Roadmap

Phase Primary Tasks What to Focus On
2 Days Before Shop for all ingredients; prepare bone broth or roast garlic if required. Sourcing quality, full-fat coconut milk and fresh, crisp vegetables. Preparation is the foundation of calm.
Day Of Wash, cut, and prepare all dipper components. Make the fondue base sauce. Set the table with forks, plates, and napkins. Mise en place. Having every component ready and organized turns cooking into a seamless performance.
During the Meal Light the burner for a gentle simmer. Stir the pot occasionally. Replenish dipper platters as needed. Cultivating the shared, leisurely experience. You are the steward of the pot, ensuring consistency so your guests can focus on connection.

The Transformation on Your Table

This journey redefines control. By mastering the emulsion of coconut milk and tapioca, the umami of nutritional yeast, and the balance of heat, you gain ultimate freedom. You reclaim a beloved tradition on your own terms. The final scene is transformed: everyone gathered, leaning in, spearing a piece of roasted sweet potato or crisp apple, and sharing it through a pot of creamy, indulgent sauce you created. The profound satisfaction comes not from mimicry, but from innovation—from knowing you built this shared joy, this personal culinary paradise, from the ground up. It is a mastery that nourishes both body and spirit, enriching your table and your life.


Related Articles

Try Our Free Tool: Use our Fondue Recipe Generator to generate a fondue recipe that fits your dietary needs.

Heart-Healthy Fondue: Omega-3 Rich Ingredients


Heart-Healthy Fondue: Omega-3 Rich Ingredients – The Art of Indulgent Nourishment

Imagine a fondue pot bubbling not with heavy cheese, but with a vibrant, savory broth. Picture dipping succulent salmon and artichokes, feeling the deep satisfaction of a luxurious meal that actively loves you back. This is not a compromise; it’s an evolution. By mastering the selection of Omega-3 rich ingredients, you transform fondue from an occasional treat into a cornerstone of celebratory, heart-smart dining. Mastering Heart-Healthy Fondue: Omega-3 Rich Ingredients is the key to unlocking a world where gourmet pleasure and cardiovascular wellness coexist in perfect, delicious harmony.

Part 1: The Foundation – Choosing Your Pot and Potion

Your success begins with the vessel and the base. These foundational choices determine flavor, cooking method, and the integrity of delicate nutrients.

A. The Pot: Material Matters

Your pot is your command center. The wrong choice can lead to scorched oils or uneven cooking. Select based on your primary fondue style.

Pot Type Best For Key Characteristics
Ceramic or Clay Broth-based and light cheese fondues. Gentle, even heat retention; ideal for delicate broths that should not boil. Requires a warmer stand.
Cast Iron (Enameled) Oil-based and robust broth fondues. Superior, consistent searing heat; perfect for quickly cooking fish cubes. Heavy and retains heat for hours.
Electric with Thermostat All types, especially for beginners. Precise temperature control is crucial for protecting Omega-3 oils from breaking down. Easy to use and clean.

B. The Base: Beyond Cheese – Building Flavor with Fats that Heal

Abandon the notion that fondue requires a thick, dairy-heavy base. The new foundation is built on healthy fats and aromatic liquids.

  • Omega-3 Infused Broth: Start with a low-sodium vegetable or dashi broth. Steep it with kombu (seaweed) and bonito flakes to naturally impart umami and minerals. This is your most nutrient-dense canvas.
  • Extra-Virgin Olive Oil Base: For a hot oil fondue, choose a high-quality, high-smoke-point olive oil. It adds monounsaturated fats and a fruity note that complements seafood beautifully.
  • Light Wine & Herb Broth: A dry white wine, diluted with water or light stock and packed with fresh herbs like thyme and tarragon, creates a fragrant poaching liquid that cooks without adding heavy fats.

Part 2: The Core System – Omega-3 Rich Ingredients, Decoded

This is the heart of the system. We move from a static list to a dynamic understanding of sourcing, preparing, and pairing these powerhouse ingredients.

A. The Stars: Premium Proteins (The Omega-3 Powerhouses)

Ideal Selection & Sourcing: Prioritize wild-caught, sustainable options. Wild-caught salmon, mackerel, sardines, arctic char, and troll-caught albacore tuna are your top-tier choices. Their Omega-3 content (EPA and DHA) is significantly higher than in farmed counterparts.

Consequences of Poor Choice: Farmed fish often have a lower Omega-3 profile and can contain unwanted additives. Improperly cut fish will disintegrate in the pot, ruining texture and clouding your broth.

Preparation Method: For broth or oil fondues, cut sashimi-grade fillets into 1-inch cubes. Pat them thoroughly dry. For a flavor boost, toss them briefly in a marinade of citrus zest, a touch of tamari, and grated ginger 15 minutes before serving.

B. The Supporting Cast: Vegetables and Legumes

These ingredients provide fiber, antioxidants, and texture, creating a balanced meal that enhances nutrient absorption.

  • Direct Omega-3 Sources (ALA): Use walnuts as a crunchy garnish or blend them into a dipping sauce. Stir a tablespoon of ground flaxseed into a yogurt-based sauce to thicken it and add a nutty flavor.
  • Perfect Dipping Vegetables: Choose vegetables that stand up to spearing and cook quickly: broccolini, Brussels sprout halves, asparagus spears, and shiitake mushrooms. Blanch harder veggies like carrots or green beans for 2 minutes first to ensure they cook through in the fondue.

C. The Synergy: Dipping Sauces and Accompaniments

Skip the mayonnaise and processed creams. Create synergistic sauces that add their own health benefits.

  • Herbed Avocado Cream: Blend ripe avocado with Greek yogurt, lemon juice, garlic, and fresh dill for a creamy, fiber-rich sauce with healthy monounsaturated fats.
  • Walnut & Miso Paste: Finely chop toasted walnuts and mix with white miso, rice vinegar, and a splash of water to create a savory, umami-packed paste.
  • Simple Citrus Ponzu: A light blend of low-sodium soy sauce, fresh lemon and lime juice, and a hint of mirin offers a bright, acidic contrast to rich fish.

Part 3: Advanced Practices – Composition and Flow

The art and science of the fondue meal. This is about strategy, timing, and creating a balanced, flowing experience.

A. Preparation Protocol: Maximizing Nutrient Retention

Keep your premium fish very cold until the moment it hits the pot. Never let it sit at room temperature. For vegetables, blanching (quick boiling then shocking in ice water) sets the color, perfects the texture, and reduces fondue cooking time, preserving more vitamins.

B. The Dipping Sequence: A Curated Journey

Orchestrate the meal to build flavor and prevent broth muddiness. Start with hearty vegetables like mushrooms and Brussels sprouts to build the broth’s flavor. Move to the delicate, quick-cooking fish cubes. Finish with any lean proteins or greens. This progression ensures each ingredient shines.

C. Beverage Pairing for Enhanced Benefit

Choose drinks that complement the healthy fats. Green tea, rich in antioxidants, aids digestion. A glass of pinot noir, with its heart-healthy resveratrol, pairs wonderfully with salmon. For a non-alcoholic option, sparkling water with a twist of lemon cleanses the palate between bites.

Part 4: Threat Management – Avoiding Common Pitfalls

Prevention: The Principles of Perfect Fondue

Your first defense is a disciplined setup. Mise en place is non-negotiable—have all ingredients pre-cut and sauces prepared. Maintain your broth at a gentle simmer, never a rolling boil, to protect the structure of Omega-3 fatty acids. Use separate colored fondue forks or small plates for raw fish to prevent cross-contamination.

Intervention: Saving the Meal

Even experts face challenges. Here is your tiered response plan.

  • Problem: Broth tastes flat. Tier 1 Fix: Immediately steep a fresh bundle of herbs (parsley, thyme, scallion) in the pot for 5 minutes. Add a strip of lemon zest.
  • Problem: Fish is overcooked and tough. Tier 1 Fix: Remove all fish. For remaining guests, emphasize quick-dipping (2-3 seconds) for new pieces. Tier 2 Recovery: Flake the overcooked fish and fold it into the herbed avocado cream to make a luxurious dip for crudités the next day.
  • Problem: Yogurt-based sauce breaks or separates. Tier 1 Fix: Whisk in a teaspoon of cold water or a few ice cubes vigorously to re-emulsify.

Part 5: The Action Plan – A Seasonal Fondue Calendar

Align your fondue with nature’s rhythm for peak flavor, nutrition, and variety throughout the year.

Season Primary Omega-3 Focus What to Focus On
Spring Wild salmon, fresh peas, asparagus. Light, herbal broths. Celebrate new growth with tender vegetables and a lemony dill sauce.
Summer Albacore tuna, zucchini, green beans. Cool, citrus-forward sauces. Use a light white wine broth and focus on quick, fresh dips.
Fall Mackerel, wild mushrooms, Brussels sprouts. Robust, earthy flavors. A mushroom-infused broth pairs perfectly. Incorporate toasted walnuts into sauces.
Winter Sardines, kale, hearty root vegetables. Comforting, rich bases. Use a miso-ginger broth. Focus on nutrient-dense, warming ingredients that sustain.

This journey redefines what fondue can be. The core principle is clear: fondue is a format, not a single recipe. By commanding the system of Heart-Healthy Fondue: Omega-3 Rich Ingredients, from selecting the right pot to orchestrating a seasonal menu, you claim the power to turn any gathering into an act of nourishing celebration. You move from following instructions to conducting a symphony of flavor and wellness. The profound satisfaction comes from sharing a meal that is as genuinely good for the heart as it is for the soul—a personal culinary paradise that enriches your life and the lives of your guests.


Related Articles

Try Our Free Tool: Use our Fondue Recipe Generator to generate a fondue recipe that fits your dietary needs.

Nut-Free Fondue Options for Allergy-Safe Entertaining


Reclaim the Shared Feast

Imagine the perfect gathering: laughter fills the air, friends lean in, and a communal pot bubbles with inviting warmth. This is the magic of fondue—until a guest mentions a life-threatening nut allergy. The mood shifts from relaxed to vigilant, and the host’s joy is replaced by worry. This common pain point doesn’t mean sacrificing tradition. It invites you to master a new, inclusive culinary art.

Mastering nut-free fondue for allergy-safe entertaining is the foundation for confident, luxurious gatherings. It transforms anxiety into abundance, ensuring every guest can dip without fear. This guide provides the system for that transformation.

Foundational Choices: The Nut-Free Fondue Pot & Setup

Your equipment and setup are the first line of defense. Think of them as the architecture of your safe zone, where every choice prevents cross-contact.

Pot Selection and Fuel: Choosing the Right Vessel

Match your pot to your fondue type. Ceramic or earthenware pots are ideal for cheese, distributing gentle heat. Traditional metal caquelons excel for cheese or chocolate. For broth or oil fondues, use a stable metal pot with a high flashpoint fuel. Electric fondue pots offer precise, flameless control—a superb choice for safety and consistency. Crucially, this pot must be dedicated. Even a thoroughly washed pot that once held a nut-based sauce can retain traces.

The Safe Zone: Layout and Contamination Prevention

Create a dedicated station. Wipe the table or counter with hot, soapy water before setup. Use color-coded skewers—green for nut-free, for example—and provide separate, clearly marked plates for guests with allergies. This isn’t just procedure; it’s a visible signal of your care that allows everyone to relax.

Base Ingredients: The Core Components

Your ingredients are the bedrock. This table outlines your nut-free pantry essentials.

Component Category Options Key Characteristics
Cheese Fondue Base Swiss Gruyère, Emmentaler, Comté, Sharp Cheddar, Fontina Naturally nut-free cheeses. Critical: Verify that the white wine or kirsch used contains no nut-derived flavorings or “may contain” warnings.
Chocolate Fondue Base High-quality dark chocolate bars (70%+), Semi-sweet chocolate chips, Dairy-free chocolate Never assume. You must check labels for “may contain tree nuts/peanuts.” Brands with dedicated nut-free facilities are safest. Dairy-free options often use coconut—verify guest allergies.
Broth/Oil for Savory Fondues Rich vegetable or chicken broth, Beef consommé, Avocado oil, Sunflower oil Inherently low-risk and excellent for severe allergies. Allows pure flavor from herbs, garlic, and citrus. Choose oils with high smoke points for safety.

The Core System: Building Flavor Without Nuts

A sublime fondue is a balanced system of texture and taste. We control these variables with precision, replacing traditional nut-based thickeners and flavors with brilliant alternatives.

Variable: Richness & Creaminess

Target: A luxuriously smooth, cohesive texture. Consequence of Error: Grainy, broken cheese or seized, clumpy chocolate.

Control Methods: For cheese fondue, cornstarch or potato starch is your indispensable ally. Toss grated cheese with starch before adding to warm wine—it prevents clumping. For chocolate, fat is key. Use full-fat coconut cream (if safe) or a ganache base made with verified-safe heavy cream. A tablespoon of light corn syrup can also stabilize melted chocolate beautifully.

Variable: Flavor Depth & Complexity

Target: A multi-layered, sophisticated taste profile. Consequence of Error: A one-dimensional, bland dip that disappoints.

Control Methods: Infuse your medium. Steep garlic cloves and herbs in your broth or warm wine for 20 minutes before removing. For cheese, a dash of mustard powder or smoked paprika adds depth. For chocolate, a pinch of flaky sea salt, orange zest, or a swirl of balsamic reduction creates gourmet complexity without a single nut.

Advanced Practices: Dippers, Pairings, and Presentation

Now, shift focus from the pot to the complete experience. This is where your safe fondue becomes a culinary event.

Dipping Strategy: A Symphony of Textures

Move beyond just bread. Offer a variety for contrast and delight. For cheese: crusty sourdough cubes, steamed baby potatoes, blanched asparagus, and crisp apple slices. For chocolate: firm pear, pretzel rods, marshmallows, and pound cake cubes. For broth: thinly sliced beef, shrimp, mushrooms, and bok choy. This variety ensures every dip is an adventure.

The Art of the Safe Accompaniment

Your sideboard must be as secure as your fondue. Charcuterie requires scrutiny—some salamis are processed with pistachios or walnut dust. Opt for verified-safe brands or create a stunning, inherently safe board: a rainbow of grapes and berries, bowls of olives and cornichons, and marinated artichoke hearts. It’s elegant and worry-free.

The Non-Negotiable Guarantee: Label Literacy

Mastering this is your ultimate skill. In many countries, “may contain nuts” is a voluntary advisory. You must treat it as law. Read every label, every time, even on staples like chocolate chips or starch. My rule is absolute: when in doubt, leave it out. The integrity of your meal depends on this discipline.

Threat Management: The Cross-Contact Prevention Protocol

Adopt a proactive, not reactive, stance. Safety is engineered into every step.

Prevention: The Golden Rules

Start with a scrupulously clean kitchen. Use new, unopened packages of key ingredients where possible. Communicate clearly with your allergic guest beforehand about your menu and precautions. Their trust is your most important ingredient.

Intervention: A Tiered Response Plan

Tier 1 (Permanent Tools): Have dedicated, color-coded utensils and pots used only for allergy-safe cooking.
Tier 2 (Service Protocol): Serve the nut-free fondue first, directly from its pot to plates. Never allow a used skewer to re-enter the communal pot.
Tier 3 (The Ultimate Mindset): Make the nut-free fondue the only fondue. Offering a separate nut-based option in the same space invites catastrophic risk. Elevate your nut-free creation to the star of the evening.

Your Allergy-Safe Fondue Party Timeline

Follow this actionable plan to execute a flawless, safe event.

Phase Primary Tasks Focus On
1 Week Before Confirm guest allergies. Plan final menu. Source and purchase all verified nut-free packaged ingredients. Label reading and secure procurement. No last-minute substitutions.
Day Before Shop for fresh dippers (bread, produce). Clean fondue pot and skewers thoroughly. Prep any make-ahead bases (e.g., herb-infused broth). Kitchen sanitation and advance prep to reduce day-of stress.
Day Of, 1 Hour Before Set up the dedicated “safe zone” station. Arrange dippers on platters. Grate cheese, portion chocolate. Staging and final safety check of your layout and ingredients.
During the Party Briefly explain the safety measures to all guests. Gently monitor skewer use. Replenish dippers. Confident, relaxed hosting. Your calm assurance sets the tone.

The Unparalleled Joy of Inclusive Gathering

Mastering nut-free fondue transforms a potential point of anxiety into a profound gesture of hospitality. You have moved from foundational safety choices—the dedicated pot, the label-literate shopping—to the advanced art of building deep, satisfying flavors without compromise. The bubbling pot becomes more than a meal; it is a symbol of trust and community. The ultimate luxury is no longer truffle oil or gold leaf, but the shared, unparalleled joy of a feast where every single guest can indulge freely and safely. This is the true art of entertaining.


Related Articles

Try Our Free Tool: Use our Fondue Recipe Generator to generate a fondue recipe that fits your dietary needs.

Diabetic-Friendly Fondue: Sugar-Free Chocolate and Low-Glycemic Dippers


Reclaiming the Joy of Indulgence

You watch the pot of glossy chocolate fondue pass you by, the laughter and dipping skewers a scene from which you feel distinctly separate. The internal calculation begins: the spike, the guilt, the “it’s not worth it.” This moment of exclusion, where managing your health feels like a sentence to miss out, is the very pain point we dismantle today. The misconception that blood sugar management requires sacrificing flavor and shared joy ends here. Mastering the art of diabetic-friendly fondue is the key to unlocking decadent, safe, and profoundly social desserts. It transforms dietary anxiety into confident, creative enjoyment.

Foundational Choices: The Chocolate & Pot

Superior results are built on superior foundations. Your initial choices in chocolate and equipment set the stage for everything that follows, determining flavor depth, texture, and the ease of your entire experience.

Part A: Selecting Your Sugar-Free Chocolate

This is your most critical decision. Not all sugar-free chocolates are created equal. You have two primary paths: high-cocoa dark chocolate and formulated sugar-free chips. A bar of chocolate with 85% cocoa or higher naturally contains minimal sugar, offering intense, complex flavor. Alternatively, sugar-free baking chips made with sweeteners like stevia, monk fruit, or erythritol provide a more traditional, sweeter base. Always scrutinize the label: prioritize options with a high cocoa percentage (for bars) and a low net carb count. Taste a few brands beforehand; some sweeteners can have cooling aftertastes that affect the final fondue.

Part B: Choosing Your Fondue Vessel

Your vessel dictates your control. A traditional electric fondue pot offers precise, adjustable heat—ideal for maintaining the delicate temperature sugar-free chocolate requires. Candle-heated pots are better for presentation but offer less control, risking seizing. For a simple approach, a double boiler (a heatproof bowl over a pot of simmering water) gives you maximum command during the melting phase before transferring to a serving dish.

Part C: The Essential Dipper Toolkit

Your dippers are the supporting cast that makes the star shine. Curate a platter with varied textures, flavors, and glycemic impacts to create a balanced, satisfying experience.

Component Category Options Key Characteristics
Fruit Strawberries, Raspberries, Blackberries, Orange Segments Low glycemic load; high fiber. Provide natural sweetness and acidity to balance richness. Ensure they are patted completely dry to prevent chocolate seizing.
Savory Roasted Sweet Potato Cubes, Avocado Slices, Toasted Coconut Chips Healthy fats and complex carbs. Offers a stunning contrast to sweet chocolate, creating a more sophisticated, filling profile. Roast sweet potato until just tender.
Other Angel Food Cake Cubes (small), Rice Cake Pieces, Walnut Halves Use sparingly for texture variation. Choose lighter, airy cakes and always account for the carbs. Nuts add crunch and healthy fat.

The Core System: Mastering Texture & Flavor Balance

Fondue is not a static sauce; it’s a dynamic emulsion of fat and cocoa solids. Managing its environment—heat and consistency—is the non-negotiable skill that separates a glossy masterpiece from a grainy disappointment.

Variable 1: Temperature Control

Your target is a consistent, low heat just warm enough to keep the fondue fluid. For serving, this is typically between 90°F and 110°F (32°C – 43°C). Overheating is the greatest threat. It can cause the cocoa solids to seize into a stiff mass and can break down alternative sweeteners, leading to off-flavors. Always melt your chocolate indirectly using a double boiler or the lowest electric setting. Never let it bubble. Constant, gentle stirring is your best tool for even heat distribution.

Variable 2: Consistency & Creaminess

You aim for a texture that is smooth, velvety, and clings perfectly to a dipper. A broken (oily) or grainy fondue results from overheating or improper emulsification. Your rescue tools are healthy fats and liquids. Begin by melting your chocolate with a source of rich fat, such as a few tablespoons of full-fat coconut cream, a dollop of almond butter, or a splash of sugar-free nut milk. This creates a stable base. If your fondue becomes too thick, incorporate another warm splash of your chosen liquid, one teaspoon at a time, while stirring vigorously.

Advanced Practices: The Art of the Dipper Spread

With your perfect fondue achieved, shift your focus to the plate. This is where you elevate the experience from simple dipping to a curated tasting journey.

Preparation: Cutting for Optimal Enjoyment

Cut dippers for function and aesthetics. Slice firm fruits like apples or pears into sturdy batons. Cut angel food cake into substantial cubes that won’t disintegrate. Break cauliflower or broccoli into small florets with a stem “handle.” Presenting dippers in uniform, dip-friendly sizes encourages neat enjoyment and ensures every bite is balanced.

Selection and Strategy: Building a Low-Glycemic Platter

Strategy prevents a platter of similar items. Aim for a quartet of attributes: Sweet, Savory, Crunchy, Creamy. Combine tart raspberries (sweet/tart) with an avocado slice (creamy/savory). Pair a crunchy walnut half with a soft roasted sweet potato cube. This variety keeps palates engaged, manages the overall glycemic impact of the meal, and showcases your thoughtful approach. A top-tier platter features a berry medley, segmented oranges, toasted coconut chips, and those essential roasted sweet potato cubes.

Threat Management: Preventing Common Pitfalls

Adopt a proactive chef’s mindset. Perfect fondue is about preventing problems before they require a solution.

Prevention: The Rules of the Pot

Your first and best defense is procedure. First, maintain low, consistent heat. Second, ensure every single dipper is thoroughly dried; a single drop of water can cause a batch of chocolate to seize. Third, institute a no-double-dipping rule. Provide each guest with a small plate or parchment paper to deposit their dipped morsel. This preserves the fondue’s texture and hygiene for all.

Intervention: Saving a Broken Fondue

If your fondue becomes grainy, oily, or clumpy, act immediately. First, remove it from the heat source. For a grainy texture, add a tablespoon of warm coconut cream or nut milk and whisk vigorously until it re-emulsifies. For an oily, separated fondue, add a teaspoon of a neutral oil (like avocado oil) or more warm cream and blend with an immersion blender if necessary. The goal is to recombine the fats and solids quickly.

Your Fondue Party Roadmap

Phase Primary Tasks What to Focus On
Prep Day Wash and thoroughly dry all fruit. Roast sweet potato cubes and cool. Cut all dippers and store in sealed containers. Measure chocolate and cream. Mise en place. Completing all prep work so party hour is about assembly and socializing, not frantic chopping.
Party Hour Arrange dipper platter. Melt chocolate slowly via double boiler. Transfer to fondue pot. Set up guest stations with skewers, plates, and napkins. Confident hosting. Briefly explain the dipper options and the no-double-dip rule, then let guests explore. Your role is to monitor the fondue’s consistency.
Post-Party Pour any leftover fondue onto parchment to make bark. Store unused dippers. Soak the fondue pot for easy cleaning. Efficient cleanup and zero waste. Leftover fondue bark becomes tomorrow’s treat.

The Transformation on Your Table

This journey revolves around a single, powerful principle: balance. Balance achieved not through restriction, but through intelligent ingredient choice and mastered technique. You began with the foundational selection of chocolate and vessel, built a stable system through temperature and consistency control, and advanced to the art of the curated platter. The result is more than a dessert; it is an experience of confident generosity. The profound satisfaction comes not from watching the pot pass by, but from being the one who presents it—sharing a luxurious, inclusive centerpiece that truly enriches your life and well-being, without a hint of compromise. The table is now yours.


Related Articles

Try Our Free Tool: Use our Fondue Dipping Ingredients Selector to discover the best dippers for your chocolate fondue.

Anti-Inflammatory Fondue Ingredients for Joint Health


The Art of Nourishment That Soothes

Picture this: a bubbling pot at the center of a table, surrounded by laughter and conversation. You spear a morsel, dip it, and savor it, knowing this indulgence is not a compromise but a contribution. Every delicious bite is actively supporting your mobility and easing the subtle, nagging discomfort that can shadow your days. This is the promise of a mastered kitchen practice. It moves beyond fleeting dietary trends and temporary fixes. By making strategic culinary choices, you can transform the ultimate comfort food into a powerful, daily tool for wellness. Mastering the selection of anti-inflammatory fondue ingredients for joint health is the foundational key to creating meals that are both deeply satisfying and therapeutically potent. It turns eating from a passive act into an intentional ritual of care.

Foundational Choices: Building Your Broth Base

Every great fondue begins with its liquid heart. This foundational broth does more than just cook your food; it infuses every bite with flavor and therapeutic compounds. Your choice here sets the entire tone for the meal’s health impact. Think of it as building the most supportive environment for your ingredients to shine.

Part A: Selection and Sizing – Choosing Your Core Liquid

Your base liquid is the primary carrier of flavor and nutrients. Bone broth is the gold standard for joint health, rich in gelatin and amino acids like proline and glycine that support cartilage and reduce inflammation. For a lighter, antioxidant-packed option, a robust green tea base delivers polyphenols. For a richer, non-broth alternative, a high-quality, cold-pressed avocado or extra virgin olive oil fondue provides monounsaturated fats that fight inflammation. Match the liquid volume to your pot: a 1-quart pot serves 2-3 people comfortably, while a 2-quart pot is ideal for 4-6.

Part B: Aromatics and Foundation – The Flavor & Function Layer

Before the liquid even hits the pot, you must build a flavor base with purpose. Gently sautéing minced garlic and grated ginger in a tablespoon of your chosen oil is non-negotiable. This process activates their anti-inflammatory compounds—allicin in garlic and gingerol in ginger. Always add a teaspoon of ground turmeric to the sauté, along with a crack of black pepper. The piperine in pepper boosts the bioavailability of turmeric’s potent curcumin by up to 2000%. This trio forms your mandatory, powerful foundation.

Part C: Broth Component Breakdown

Component Category Options Key Characteristics
Base Liquid Homemade Bone Broth, Strong Green Tea, High-Quality Oil Bone broth provides collagen-building blocks. Green tea offers antioxidant catechins. Oil delivers healthy fats and concentrated flavor.
Key Aromatics Garlic, Fresh Ginger, Turmeric Must be sautéed to activate anti-inflammatory properties. Turmeric requires black pepper for absorption.
Potent Add-Ins Apple Cider Vinegar, Citrus Zest, Fresh Herbs A tablespoon of apple cider vinegar can help extract minerals from bone broth. Citrus zest adds vitamin C and brightness. Herbs like thyme add phytonutrients.

The Core System: Dipping Ingredients for Maximum Impact

The broth is your medium, but the dippers are your active delivery system. This is where you directly load your body with the building blocks for repair and the compounds that quell inflammation. Managing this system requires intentional selection across three critical variables.

Variable 1: Omega-3 Rich Proteins

Your protein targets are fatty, cold-water fish. Opt for chunks of wild-caught salmon, mackerel, or lightly grilled sardines. These are rich in EPA and DHA, omega-3 fatty acids that are powerfully anti-inflammatory. The consequence of the wrong choice—such as conventional grain-fed red meat or processed sausages—is introducing saturated fats and potential pro-inflammatory compounds. Control this variable by sourcing sustainable, wild-caught seafood and preparing it simply: pat dry, season, and quickly sear or bake to just cooked through for perfect fondue dipping.

Variable 2: Phytonutrient-Dense Vegetables

Aim for a rainbow of color. Ideal targets include dark leafy greens (kale, chard), cruciferous vegetables (broccoli, cauliflower florets), and bright bell peppers. These are loaded with antioxidants like quercetin and sulforaphane that combat oxidative stress in joints. Missing this variable means forfeiting essential fiber and micronutrients. Control texture and ensure even cooking by pre-blanching harder vegetables. Drop broccoli or cauliflower into boiling water for 60 seconds, then immediately into ice water. This preserves vibrant color, perfect tenderness, and nutrient integrity.

Variable 3: Complex Carbohydrate Vehicles

Choose carbohydrates that provide steady energy without spiking blood sugar, which can promote inflammation. Your best vehicles are cubed sweet potato, parsnip, or dense, whole-grain sourdough bread. Refined white bread or standard potatoes can cause rapid glucose spikes. Master this variable by roasting your root vegetables. Toss sweet potato cubes with a touch of avocado oil, rosemary, and sea salt, then roast at 400°F (200°C) until caramelized at the edges. This deepens flavor and creates a sturdy dipper.

Advanced Practices: The Finishing Touches of Flavor & Function

With your foundation and core system set, shift to the artful details that elevate your fondue from functional to extraordinary. This is where you layer in complexity and personalization, turning nutrition into a captivating culinary experience.

Preparation: Cultivating Anti-Inflammatory Dipping Sauces

Complement your broth with targeted side sauces. A Greek yogurt and tahini blend creates a creamy, protein-rich dip with calcium and sesame lignans. For a dairy-free option, blend ripe avocado with lime juice, cilantro, and a pinch of cumin for a cream rich in vitamins E and K. These sauces aren’t just toppings; they’re secondary nutrient delivery systems that add textural contrast and further anti-inflammatory power.

Ongoing Inputs: Herb & Spice Integration

Efficiently integrate fresh, potent herbs and spices throughout the meal. Keep a small bowl of finely chopped fresh rosemary and oregano to sprinkle over dipped items. Their rosmarinic acid and carvacrol are potent inflammation fighters. For a metabolic and circulatory boost, offer a side dish of high-quality cayenne pepper or crushed red pepper flakes. The capsaicin they contain provides a warming sensation that can distract from joint discomfort and promote blood flow.

Selection and Strategy: Building a Balanced Fondue Board

Compose your board with strategic ratios for sustained energy and satiety. I follow a simple visual rule: half the board should be phytonutrient-dense vegetables, one-quarter should be omega-3 proteins, and one-quarter complex carbohydrates. Add small vessels for your functional sauces. This balance ensures a steady release of nutrients, prevents over-reliance on any single ingredient, and creates a visually stunning centerpiece that promises both health and pleasure.

Threat Management: Avoiding Inflammatory Pitfalls

A proactive stance in the kitchen prevents problems before they reach the table. The goal is to create a meal so inherently balanced that corrective measures are rarely needed.

Prevention: Ingredient Scrutiny & Smart Swaps

Your first and best defense is label reading. Avoid broths or stocks with hidden MSG or industrial seed oils like canola, soybean, and corn oil. These oils are high in pro-inflammatory omega-6 fatty acids. If using dairy, choose full-fat, organic versions from grass-fed sources; the higher fat content often means fewer additives and more conjugated linoleic acid (CLA), which has anti-inflammatory properties. For a guaranteed clean swap, use coconut milk or a homemade nut milk as a creamy base instead of processed cream.

Intervention: Correcting Common Mistakes

Even with care, imbalances happen. Identify them quickly: a broth that’s too salty, a cheese-based fondue that’s too rich and congealing, or a overall flavor that’s too bland. Implement a tiered response. For over-salted broth, add a squeeze of fresh lemon juice or a peeled, raw potato chunk to simmer and absorb excess salt. For a too-rich or thickening cheese fondue, a splash of dry white wine or lemon juice can cut through and re-emulsify. For blandness, don’t just add salt; stir in a tablespoon of your pre-prepared garlic-ginger-turmeric paste or a handful of fresh herbs to build complexity.

The Action Plan: A Seasonal Fondue Calendar

Season Primary Ingredients Wellness Focus
Spring Asparagus, fresh peas, wild salmon, green garlic, lemon zest. Antioxidant Boost & Detoxification. Light, cleansing foods to reduce systemic inflammation.
Summer Zucchini, bell peppers, cherry tomatoes, shrimp, basil, oregano. Phytonutrient Diversity. Maximize intake of varied, sun-ripened antioxidants.
Fall Butternut squash, mushrooms, kale, mackerel, sage, rosemary. Immune & Joint Support. Heartier ingredients with immune-modulating and warming spices.
Winter Sweet potato, Brussels sprouts, grass-fed beef (sparingly), bone broth, thyme. Deep Collagen & Mineral Support. Focus on restorative, mineral-rich broths and grounding vegetables.

The Transformation at Your Table

This journey from a thoughtfully built broth to a masterfully composed dipping board revolves around one core principle: intentional selection. Every element, from the turmeric in your sauté to the wild salmon on your fork, is a conscious choice for well-being. You have moved from simply eating to strategically nourishing. The profound satisfaction comes not just in the eased comfort you may feel, but in the empowered act of creation. You host gatherings that delight the senses and genuinely fortify the body. You turn a shared meal into a ritual of care, crafting a personal paradise of flavor and function that truly enriches your life. This is the mastered art of nourishment, and it simmers patiently, waiting for you at your own table.


Related Articles

Try Our Free Tool: Use our Fondue Recipe Generator to generate a fondue recipe that fits your dietary needs.

Affiliate Disclosure: FondueCooking.com is a participant in the Amazon Services LLC Associates Program, an affiliate advertising program designed to provide a means for sites to earn advertising fees by advertising and linking to Amazon.com. As an Amazon Associate we earn from qualifying purchases. Learn more