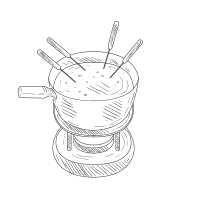
Japanese-Inspired Miso Fondue Recipe


Beyond Cheese—The Umami Revelation

You know the scene: a pot of thick, congealing cheese, a basket of bread, and a lingering heaviness that ends the evening rather than enlivens it. This is the fondue fatigue—a one-note experience where richness overwhelms nuance. But imagine a different centerpiece: a pot of fragrant, steaming broth, alive with savory depth, where each dip is a discovery. This is the promise of the Japanese-inspired miso fondue. It is not a mere substitute; it is a sophisticated evolution. Mastering this recipe is the key to unlocking interactive, elegant dining that centers on the profound, layered symphony of umami, not just fat.

Foundational Choices: The Broth & Vessel

Your success is built before the first ingredient hits the pot. The quality of your base components and your physical setup forms the unshakable foundation for everything that follows.

Part A: Crafting the Core Broth

Your miso and dashi are the soul of the fondue. White (Shiro) Miso is mild, sweet, and forgiving, perfect for delicate dippers like seafood and tofu. Red (Aka) Miso is bold, salty, and fermented, ideal for heartier meats and root vegetables. For ultimate balance, use a blended approach, mixing two parts white to one part red. For the dashi, a quality store-bought awase dashi (kombu and bonito) is acceptable, but a 20-minute homemade batch is the transformative choice that adds a clean, oceanic backbone no powder can match.

Part B: The Fondue Vessel & Heat

This is live-fire cooking at the table. Use a stable, level surface for your tabletop burner—butane or alcohol gel are reliable. Your vessel choice dictates heat retention and presentation. A traditional ceramic donabe offers beautiful, even heat and rustic charm but requires a diffuser to prevent cracking. Enameled cast iron is a superb all-rounder, retaining a steady simmer beautifully. A stainless steel pot is lightweight and responsive, perfect for quick adjustments.

Part C: Broth Component Breakdown

Component Category Options Key Characteristics
Miso Type White (Shiro), Red (Aka), Blended White: Sweet, mild, fast-fermented. Red: Salty, robust, long-fermented. Blended: Offers the perfect balance of depth and approachability.
Dashi Base Homemade Awase Dashi, Quality Store-Bought Liquid Homemade: Provides unparalleled clarity and layered umami. Store-bought: A consistent, time-saving foundation; avoid powdered single-serve packets for best results.
Aromatic Infusions Sake, Mirin, Fresh Ginger, Garlic Sake adds alcohol-soluble flavors and depth. Mirin contributes a gentle sweetness and gloss. Fresh ginger and garlic should be lightly crushed to perfume, not overpower, the broth.
Richness Agents Toasted Sesame Oil, Chicken Stock (optional) A few drops of toasted sesame oil finish the broth with nutty fragrance. Substituting up to half the dashi with a light chicken stock can add body for meat-heavy gatherings.

The Core System: Balancing the Broth

The fondue pot is not a static soup; it is a dynamic flavor ecosystem you manage in real-time. Your control over three key variables determines the success of every dip.

Variable 1: Umami & Salt Concentration

Ideal Target: A deeply savory, sippable broth that enhances, not masks, the natural flavor of your dippers. It should whisper umami, not shout salt.
Control Methods: Always dissolve miso in a ladle of warm dashi first before swirling it into the pot—this prevents clumping. If the broth becomes too salty from reducing, dilute with plain hot dashi or water. Balance a sharp salt edge with a teaspoon of mirin. Taste the broth between each round of dippers; this is your most important tool.

Variable 2: Temperature & Simmer

Ideal Target: A gentle, steady simmer with lazy bubbles, just below a boil (around 190°F/88°C).
Control Methods: Adjust your burner to the lowest setting that maintains this simmer. A rolling boil is your enemy—it will cloud the broth, make proteins tough, and, crucially, destroy the delicate enzymes and aromas in the miso, resulting in a flat, bitter taste.

Variable 3: Broth Enrichment & Refresh

This is the magic of the shared pot. As proteins and vegetables cook, they leave behind traces of their essence, building the broth’s complexity. After two or three rounds of hearty dippers, the broth will be profoundly flavorful but may contain sediment. This is the time for a partial refresh. Ladle out one-third of the spent broth, replace it with fresh, seasoned dashi, and swirl in a fresh spoonful of miso to recalibrate. You are cultivating flavor, not just consuming it.

Advanced Practices: Dippers & The Art of Dipping

Elevate the practice from cooking food in broth to a curated culinary journey. This is where your mise en place transforms into theater.

Preparation: The Dipper Pantry

Think in terms of texture and cooking time. Proteins: Paper-thin slices of beef (ribeye or sirloin), bite-sized chicken thigh, shell-on shrimp. Vegetables: Quick-cooking mushrooms (shimeji, enoki), baby bok choy, lengths of negi (Japanese leek). Starches & More: Pre-cooked udon noodles, cubes of lightly grilled mochi, and absorbent tofu puffs (atsuage) are essential for the finale.

Ongoing Inputs: The Dipping Sequence

Strategy is everything. Begin with mild vegetables and mushrooms to build a vegetal sweetness in the broth. Introduce seafood and white-meat poultry next, allowing their delicate flavors to shine in the now-seasoned pot. Add heartier red meats in the middle phase, where their richness can meld. Save dense, absorbent starches like udon, mochi, and tofu puffs for last, letting them soak up the now-decadent, fully realized broth.

Selection and Strategy: Condiments & Finishes

Offer small dishes of condiments for personalized finishing touches: a squeeze of ponzu for citrusy brightness, a dab of yuzu kosho for spicy-citrus punch, toasted sesame seeds, and finely sliced scallions. The grand finale, the shime, is non-negotiable. Add cooked rice or udon noodles directly to the remaining, intensely flavorful broth, simmer for a minute, and serve it as a shared soup. It is the triumphant, satisfying conclusion to the journey.

Threat Management: Avoiding Common Pitfalls

Adopt a proactive stance. The best solution is preventing the problem before it arises in the communal pot.

Prevention: The Proactive Stance

Your mantra: never boil miso. Always incorporate it off direct, rolling heat. Ensure all dippers are cut to uniform, bite-sized pieces for even cooking and to prevent overcrowding. Designate a tasting spoon and use it frequently to monitor the broth’s evolution after each dip cycle.

Intervention: Problem-Solving

If the broth becomes too salty, gradually dilute with hot dashi or water. If it tastes too weak or flat, dissolve an extra tablespoon of miso in a ladle of broth and swirl it in. If the broth turns cloudy or bitter from accidental boiling, do not try to save it. It has lost its delicate soul. Instead, quietly start a fresh side batch with reserved dashi and miso, and combine them once the new base is ready.

The Action Plan: A Fondue Gathering Roadmap

Phase Primary Tasks What to Focus On
Phase 1: Prep (Day Of/Before) Prepare dashi. Slice all proteins and vegetables. Arrange dippers on platters. Make condiment dishes. Mise en place. A calm host is a successful host. Having everything prepped and within reach is 80% of the battle.
Phase 2: Foundation (30 Min Before) Gently heat dashi. In a separate bowl, whisk miso with some hot dashi to form a smooth paste. Set up burner, vessel, and table. Gentle broth base. Building a perfectly seasoned, lump-free foundation. This is your last quiet moment.
Phase 3: Cultivation (During Meal) Guide the dipper sequence. Manage the simmer flame. Taste and refresh the broth as needed. Engage guests. Guest interaction & flavor building. You are the conductor of the umami orchestra, balancing the pot’s dynamics with the table’s energy.
Phase 4: Completion (The Finish) Introduce the shime—add noodles or rice to the leftover broth. Ladle the final soup into bowls. The grand finale. This shared bowl is the culmination of your entire meal, a deeply satisfying ritual that honors the broth you built together.

The Shared Umami Hearth

Mastery of this fondue is the mastery of balance—between salt and sweet, simmer and boil, individual taste and shared experience. It is a journey that begins with the deliberate choice of miso and culminates in the communal savoring of the final, profound broth. You move from being a cook to a curator of an interactive, flavorful event. This is the true transformation: turning a simple meal into a memorable, shared ritual, centered around the warm, comforting, and endlessly captivating depth of your own mastered Japanese-inspired miso fondue.


Related Articles

Try Our Free Tool: Use our Fondue Recipe Generator to generate a custom fondue recipe tailored to your taste.

German Beer Cheese Fondue Variations by Region


The Art of German Beer Cheese Fondue Variations by Region: Your Guide to Authentic Mastery

Imagine a rich, savory fondue that transports you directly to a cozy Bavarian pub, a rustic Black Forest farmhouse, or a bustling Cologne brewery. Now, recall the disappointment of a bland, one-note cheese dip that merely hints at this potential. That gap between a generic pot and an authentic experience is closed not by a single recipe, but by understanding the regional dialects of German beer cheese fondue. The choice of local beer and cheese isn’t just an ingredient swap—it’s the soul of the dish. Mastering these variations is the key to transforming a simple party food into a profound culinary journey through Germany’s diverse flavors and traditions.

The Foundational Duo: Selecting Your Regional “Hardware”

Your journey begins with two non-negotiable choices that form the flavor foundation: the cheese and the beer. Their regional pairing is everything. Think of them as the architectural blueprint for your fondue; the right combination ensures structural integrity and authentic character.

Part A: Cheese Selection – The Heart of the Matter

German fondue cheese falls into distinct regional families. A robust, aged Alpine cheese like Allgäu Bergkäse is ideal for a hearty, nutty foundation in the south. A tangy sour milk cheese like Harzer Roller creates a sharp, pungent profile central to some regional variations. For a creamy, spreadable base, you might use the components of Obatzda, Bavaria’s famous beer cheese spread. Your choice here dictates the fondue’s primary texture and intensity.

Part B: Beer Selection – The Liquid Catalyst

Beer is far more than just liquid; it’s the catalyst that unlocks and carries flavor. A malty Bavarian Helles or Dunkel will lend sweet, bready notes. A Franconian Rauchbier (smoked beer) injects intense, bacony depth. The light, crisp Kölsch of Cologne yields an elegant, subtle backdrop. Each beer style steers the fondue’s character decisively.

Part C: Regional Pairing Matrix

This table is your essential field guide. It matches region, cheese, and beer to predict the flavor profile you will create.

Region Classic Cheese(s) Classic Beer Style Key Characteristics
Bavaria Emmentaler, Camembert (for Obatzda-style), Bergkäse Helles or Dunkel Malty, smooth, and crowd-pleasing. Often garlicky with sweet paprika.
Franconia Weisslacker, intensely aged Gouda Rauchbier (Smoked Beer) Bold, smoky, and pungent. A powerful combination for adventurous palates.
Rhineland (Cologne) Aged Gouda, Mature Havarti Kölsch Light, crisp, and elegant. The cheese shines with a clean, hoppy lift.
Black Forest/Swabia Comté, Gruyère, Local Hard Cheeses Schwarzbier (Black Beer) or Dunkel Deep, roasty, and nutty. Often accented with a pinch of nutmeg or kirsch.

The Core System: Technique and Balance

A perfect regional fondue is a delicate, hot emulsion you must actively manage. Mastering these three control variables prevents disaster and guarantees a silky, luxurious texture that carries your chosen flavors perfectly.

Control Variable 1: The Melt – Low and Slow

Ideal Target: Gentle, indirect heat. Consequence of Error: High heat causes proteins to tighten and fats to separate, creating a grainy, rubbery, or broken mess. Method: Always use a double boiler or a fondue pot with a precisely adjustable flame. Grate your cheese finely for an even, clump-free melt that integrates smoothly with the beer.

Control Variable 2: The Bind – Acid and Starch

Ideal Target: A stable, glossy emulsion. Consequence of Error: A greasy pool of separated oil and cheese solids. Method: Acid (mustard or lemon juice) helps proteins blend smoothly. Starch (rye flour, all-purpose flour, or cornstarch) stabilizes the mixture. For a Franconian touch, I always use a tablespoon of rye flour—it thickens and adds an earthy flavor that complements smoked beer beautifully.

Control Variable 3: The Seasoning – Regional Accents

Ideal Target: Enhanced, not masked, regional flavors. Consequence of Error: A homogenized, indistinct taste that loses its sense of place. Method: This is where you dial in the locale. Bavaria calls for sweet paprika and a hint of garlic. Franconia might use hot paprika and marjoram. The Black Forest often prefers a whisper of nutmeg. Your garnishes—chives, fried onions, or crispy bacon bits—should also reflect the region.

Advanced Practices: The Art of Cultivation & Serving

With your foundation set, shift focus from mere preparation to curating the complete experience. This is where your fondue becomes a true regional showcase.

Preparation: The Dipping Battalion

Move beyond simple bread cubes. Your dipping selections should complement the regional theme. Serve classic Bavarian pretzels or rye bread with a Bavarian fondue. Offer slices of smoked Franconian sausage with the Rauchbier version. For a Black Forest or Swabian pot, include boiled baby potatoes and roasted root vegetables. These choices complete the culinary picture.

The Ritual and Strategy

Maintain the fondue’s perfect consistency throughout the meal with constant, gentle figure-eight stirring. Regulate the heat to keep it just hot enough to bubble lazily. Your beverage pairing strategy is crucial: encourage guests to sip the same beer used in the pot to create a harmonious flavor loop, or offer a contrasting regional white wine from the Rhineland to cleanse the palate.

Threat Management: Saving the Fondue

Adopt a proactive stance. The best solution is always prevention through controlled heat and proper binding. However, even experts face challenges—a quick, calm response is your best tool.

Prevention: The Proactive Defense

Ensure your grated cheese is at room temperature and not damp. Stir constantly during the initial melt. Never, under any circumstances, let the fondue reach a rolling boil. This is the golden rule for emulsion stability.

Intervention: The Rescue Protocols

Problem: Too Thick. Solution: Immediately whisk in a splash of warm beer until the desired consistency returns.
Problem: Beginning to Separate (oily sheen). Solution: Remove from heat instantly. Whisk in a teaspoon of fresh lemon juice or prepared mustard vigorously to re-emulsify.
Problem: Broken/Curdled. Solution: Execute the “emergency bind.” Combine a tablespoon of cornstarch with two tablespoons of cold beer into a slurry. Remove the fondue from heat, whisk in the slurry thoroughly, then return to very low heat, whisking non-stop until smooth and unified.

The Seasonal Action Plan: A Year of Fondue

Regional fondue is not just for winter. This practical roadmap shows you how to let the seasons guide your exploration of Germany’s flavors.

Season/Phase Primary Tasks Focus On
Fall Explore hearty Rauchbier & smoked cheese fondue. Incorporate roasted mushrooms and squash for dipping. Bold, warming flavors that match the crisp air.
Winter Master the classic Bavarian Helles & Emmentaler base. Perfect your technique for holiday gatherings. Tradition, comfort, and crowd-pleasing simplicity.
Spring Experiment with light Kölsch & young Gouda. Use fresh chives and asparagus spears as dippers. Lighter, celebratory profiles that echo the new season.
Summer Try an informal “Obatzda-Fondue” for outdoor gatherings. Keep it spreadable and pair with radishes and pretzels. Casual, no-cook variations perfect for balmy evenings.

True mastery of German beer cheese fondue is found in the elegant balance of authentic regional ingredients and precise, controlled technique. Your journey moves from selecting a meaningful pairing from the matrix to commanding the pot with confidence. The profound satisfaction comes from hosting a tasting journey at your own table, creating not just a meal, but an unforgettable experience that enriches your understanding and delights your guests. This is the unparalleled joy of culinary mastery—one perfect, regional bite at a time.


Related Articles

Try Our Free Tool: Use our Fondue Cheese Pairing Guide to discover the best cheese combinations for your fondue.

Italian Fontina Fondue with Truffle Oil


The Art of Italian Fontina Fondue with Truffle Oil: Your Blueprint for Effortless Elegance

You envision a centerpiece: a pot of fondue, creamy and inviting, its aroma promising deep, nutty cheese and the earthy whisper of truffle. The reality is often a gamble—a sauce that seizes into a rubbery mass, separates into a greasy pool, or simply tastes bland. This disappointment stems from treating fondue as mere melted cheese. In truth, it is a delicate, emulsified sauce, a culinary system demanding precision. Mastering the Italian Fontina Fondue with Truffle Oil is your key to transforming simple ingredients into an indisputable icon of comfort and sophistication, a guaranteed catalyst for memorable gatherings.

Foundational Choices: Selecting Your “Hardware”

Superior fondue begins long before the pot heats. Your initial selections form the non-negotiable foundation for flavor and texture. Compromise here, and no technique can fully compensate.

Part A: The Cheese Selection & Balance

The star must be authentic Italian Fontina Val d’Aosta. Its flavor profile—distinctly buttery, nutty, with a subtle fruity tang—is irreplaceable. Generic “Fontina” lacks this depth. For optimal melt and structure, blend it. A touch of young Gruyère adds backbone without overpowering, while a small amount of finely grated Parmigiano-Reggiano introduces a powerful umami kick. A reliable ratio is 70% Fontina, 20% Gruyère, and 10% Parmigiano-Reggiano by weight.

Part B: The Liquid Base & Aromatics

Your liquid is the solvent and flavor agent. A dry, crisp white wine like Pinot Grigio is classic; its acidity helps stabilize the emulsion. For a richer note, a lager-style beer works beautifully. For a non-alcoholic version, use a light vegetable broth with a teaspoon of lemon juice. For aromatics, rub your pot with a halved garlic clove—it imparts a hint of flavor without the harsh bite of minced garlic. A tablespoon of kirsch (cherry brandy) or fresh lemon juice added later is your secret weapon for brightness and emulsion security.

Part C: The Equipment Table

The right tools are not optional; they are control mechanisms. This comparison clarifies your best choices.

Component Category Options Key Characteristics
Fondue Pot (Caquelon) Enameled Cast Iron; Ceramic (Clay); Stainless Steel
  • Enameled Cast Iron: Superior, even heat retention; prevents scorching; ideal for all heat sources.
  • Ceramic: Traditional and attractive; requires a flame diffuser to prevent cracking; heats less evenly.
  • Stainless Steel: Lightweight and responsive; can create hot spots; best for electric fondue sets.
Starch Thickener Cornstarch; All-Purpose Flour; Potato Starch
  • Cornstarch: The professional’s choice. Creates a glossy, silky texture; must be mixed into a cold slurry first.
  • All-Purpose Flour: Can impart a slight pasty taste; requires longer cooking to lose “raw” flavor.
  • Potato Starch: A good gluten-free alternative; similar performance to cornstarch.
Essential Utensils Heavy Saucepan; Wooden Spoon; Flame Diffuser
  • Heavy Saucepan: Mandatory for the initial cooking phase. A thin pan will cause immediate burning.
  • Wooden Spoon or Silicone Spatula: For constant stirring without scratching your pot.
  • Flame Diffuser: Critical for maintaining the perfect, gentle simmer at the table, especially with direct heat sources.

The Core System: The Science of the Emulsion

Fondue is not melted cheese; it is a hot fat-in-water emulsion, meticulously managed. Control these three variables to guarantee a silken, stable result.

Control Variable 1: Temperature Management

Apply the “low and slow” imperative. High heat causes cheese proteins to coagulate violently, squeezing out fat and creating a grainy, broken sauce. Begin by warming your wine or broth over medium-low heat until steaming but not boiling. When adding cheese, ensure the liquid is below a simmer. Maintain this gentle heat throughout.

Control Variable 2: The Thickening Protocol

Never sprinkle dry starch into the hot pot. Always use the slurry method: combine your cornstarch with a tablespoon of kirsch or cold water in a small bowl, mixing until completely smooth. Stir this slurry into your warmed base liquid before adding any cheese. This ensures even dispersion and prevents clumps, creating the velvety foundation that will hold the cheese in suspension.

Control Variable 3: The Finishing Touch – Truffle Oil

Heat destroys the delicate, aromatic compounds in truffle oil. Add it last, off the direct heat. After your fondue is perfectly smooth and transferred to the tabletop pot, drizzle in one to two teaspoons of high-quality white or black truffle oil and stir gently. This final flourish preserves its intoxicating aroma, letting it perfume each bite rather than evaporate during cooking.

Advanced Practices: Technique and Refinement

With your foundation set, refine your process. This is where consistent execution becomes artistry.

Preparation: The Mise en Place Mandate

Grate all cheese and let it sit at room temperature for 30 minutes. Toss it with the cornstarch called for in the slurry—this extra coating prevents clumping. Have your “rescue” ingredients measured and ready: extra warm liquid in a pitcher, and lemon juice or kirsch in a small dish. This preparation turns potential crises into simple adjustments.

The Stirring Technique: Constant, Figure-Eight Motion

Stirring is mechanical emulsification. Once your base is thickened with the slurry, begin adding cheese by the handful, stirring constantly with a wooden spoon in a slow, deliberate figure-eight pattern. This motion covers the entire bottom of the pot, preventing hot spots and encouraging the cheese to melt evenly into the liquid, not on top of it. Do not add the next handful until the previous one is fully incorporated.

Dipping Strategy & Accompaniments

Choose dippers for structure and contrast. Use a day-old, crusty bread like ciabatta or baguette, cut into cubes with some crust on each to prevent falling off the fork. Blanch broccoli florets or cauliflower for a fresh, crisp contrast. Include slices of cured meat like fennel salami or prosciutto. The goal is a platter that offers varying textures and flavors to complement the rich, umami-rich fondue.

Threat Management: Saving and Reviving Your Fondue

Adopt a proactive stance. Most fondue failures are preventable, and all are fixable if you understand the system.

Prevention: The Principles of Stability

Your primary defense is consistent, very low heat. Use that flame diffuser. Never let the fondue boil. Avoid introducing cold cheese or wet dippers, as a sudden temperature drop or excess moisture can shock the emulsion.

Intervention: The Rescue Protocols

Problem: Fondue is too thick or clumpy.
Solution: Immediately whisk in a splash of your reserved warm wine, broth, or even a touch of cream. Add it gradually until the desired consistency returns.

Problem: Fondue is breaking (oily and separated).
Solution: Remove the pot from heat. Vigorously whisk in a teaspoon of lemon juice or a fresh, small cornstarch slurry. The acid or new starch can often re-bind the emulsion.

Problem: Fondue is too thin and runny.
Solution: Combine a teaspoon of cornstarch with a tablespoon of cold liquid. Bring the fondue to the barest simmer, whisk in the slurry, and cook for one minute until thickened.

The Action Plan: A Fondue Hosting Timeline

Follow this roadmap to execute a flawless fondue event without stress.

Timeline Primary Tasks Focus Goal
The Day Before Purchase all cheeses. Cube bread, leave uncovered overnight to stale slightly. Ingredient readiness and optimal bread texture.
2 Hours Before Grate cheeses; let come to room temp. Toss with cornstarch. Prepare all dipping items (blanch veggies, slice meats). Complete mise en place. No last-minute grating.
30 Minutes Before Arrange dipping platter. Measure wine, prepare starch slurry and “rescue” ingredients. Set the table with fondue gear. Final assembly and staging for a smooth cooking sequence.
During the Meal Cook fondue on stove per technique. Transfer to tabletop pot with diffuser. Drizzle with truffle oil. Monitor heat, stir occasionally. Maintaining the perfect consistency and temperature for the duration.

The journey from selecting a wedge of true Fontina Val d’Aosta to the final, aromatic drizzle of truffle oil is a lesson in culinary control. You are not just making a dish; you are orchestrating a stable emulsion, balancing fat, liquid, acid, and heat. This mastery delivers a profound reward: the confident presentation of a bubbling, silken pot that becomes the heart of the table. It transforms a simple meal into a shared experience, creating warmth, conversation, and the unparalleled joy of a perfect bite, repeatedly rediscovered.


Related Articles

Try Our Free Tool: Use our Fondue Cheese Pairing Guide to discover the best cheese combinations for your fondue.

French Fondue Bourguignonne: Beyond the Basics


From Sizzle to Symphony

You know the scene: a crowded pot of shimmering oil, a tangle of forks, and a platter of beef cubes that all emerge tasting the same—slightly greasy, uniformly cooked, a shadow of their potential. This is the fate of a Fondue Bourguignonne stuck at the basics. It becomes a rushed, utilitarian meal, not the interactive culinary event it was meant to be. True mastery transforms this classic from a simple hot-oil dip into a refined, controlled, and deeply satisfying experience. Elevating your Bourguignonne requires moving beyond the starter kit to command three core pillars: the foundational hardware, the precise management of the cooking environment, and the artful curation of every element on the table.

Part 1: Foundational Choices – The Hardware of Refinement

Your equipment is the control center for temperature, safety, and social flow. Compromising here undermines everything that follows.

The Vessel and Heat Source: Stability is Everything

This duo forms the non-negotiable foundation of your fondue system.

Part A: The Pot. A heavy-bottomed, enameled cast iron or thick stainless steel pot is essential. It maintains a steady, even heat, preventing the drastic temperature swings that cause food to absorb oil. Lightweight pots or ceramic alternatives cannot perform this critical function.

Part B: The Fuel. Your choice dictates your control. Butane cartridge burners offer precise, adjustable, and sustained high heat—ideal for maintaining the crucial 375°F. Liquid fuel (ethanol/gel) burners are often less adjustable and can struggle to keep pace, leading to a cooling pot and greasy results.

The Tools of Engagement

Superior tools enhance safety and enjoyment. Seek long-handled fondue forks (8+ inches) with pronounced tines to secure meat. Color-coded ends prevent confusion. Provide ample fork rests to prevent hot handles from scorching your table, and consider a simple splatter guard for ultimate control.

Part 2: The Core System: Mastering the Cooking Environment

This is not about boiling oil. It is about managing a pristine, high-heat medium for perfect searing.

The Oil: Selection and Thermodynamics

The oil is your cooking environment. You must select and control it with intention.

Selection: Use oils with a high smoke point (above 400°F/205°C). My personal favorite is refined avocado oil for its neutral flavor and exceptional stability. Peanut and high-oleic sunflower oils are also excellent. A blend can be beneficial for cost and flavor balance.

Control: The ideal temperature range is a narrow 350-375°F (175-190°C). Below this, food soaks up oil and becomes greasy. Above it, the oil degrades, smokes, and imparts bitter flavors. Using a deep-fry or quality candy thermometer is not a suggestion—it is mandatory for consistent results.

Safety and Atmosphere as Managed Variables

Mastery extends beyond the pot. Ensure absolute stability on a level, heat-proof surface. Keep the setup away from curtains and overhead cabinets. For a flare-up, calmly place the lid on the pot to smother flames—never use water. Socially, guide your guests: encourage cooking in small batches to maintain oil temperature, and establish the “one-bite-per-dip” rule to keep the experience elegant and paced.

Part 3: Advanced Practices: The Art of Curation and Preparation

Here, your role shifts from active cook to expert curator. The quality of your preparation defines the experience.

The Protein Canvas: Beyond Basic Beef

Move beyond generic “stew meat.” Seek well-marbled, tender cuts that can withstand quick searing.

Cut of Beef Key Characteristics
Filet Mignon (Tenderloin) Exceptionally tender and lean; a luxurious choice that benefits from flavorful sauces.
Ribeye Cap Intensely marbled and flavorful; offers a rich, buttery texture that stands up beautifully to high heat.
Strip Loin (New York Strip) Excellent balance of robust beef flavor and tender texture; a reliable, crowd-pleasing choice.

Cut all meat into consistent 1-inch cubes and pat them thoroughly dry with paper towels. Any surface moisture will cause violent oil splatter. For strategic variety, add cubes of lamb loin, duck breast, or large scallops to create a symphony of textures and flavors.

The Symphony of Sauces and Dips

Store-bought sauces are your greatest limitation. Homemade sauces transform each bite into a personalized creation. Prepare these ahead of time:

  • Béarnaise: The classic, rich partner for beef.
  • Roquefort Cream: A pungent, tangy blue cheese sauce for bold palates.
  • Chimichurri: A vibrant, herbal Argentinian sauce that cuts through richness.
  • Ginger-Scallion: A bright, Asian-inspired oil perfect for duck or seafood.

Present sauces in small bowls on a dedicated tray or in a multi-compartment server for an organized, elegant station.

The Supporting Cast: Salads and Accompaniments

Balance the richness with crisp, acidic elements. A simple frisée salad with a sharp vinaigrette is perfect. Provide crusty bread for saucing and blistered vegetables like mushrooms or asparagus for dipping variety.

Part 4: Threat Management: Problem Prevention and Solution

A flawless evening is achieved by anticipating issues. Adopt a proactive stance.

Prevention: The Proactive Stance

Enforce three cardinal rules: 1) No water on ingredients—pat proteins and vegetables completely dry. 2) Controlled portioning—add only 4-5 pieces to the pot at a time to avoid a temperature crash. 3) Be prepared—keep the pot lid and a kitchen fire extinguisher within reach, just in case.

Intervention: The Tiered Response Plan

Problem Immediate Solution
Oil temperature dropping Pause cooking. Temporarily increase heat on the burner and wait for the thermometer to recover to 375°F before resuming with smaller batches.
Oil smoking excessively Immediately remove the pot from heat. Allow it to cool completely, then replace with fresh oil. This oil has degraded.
Cross-contamination or lost forks Enforce color-coding. Provide extra serving forks for transferring cooked meat to plates, keeping fondue forks solely for cooking.

Part 5: The Action Plan: A Timeline for Effortless Elegance

This schedule eliminates day-of stress, allowing you to be a present host.

Timeline Primary Tasks Focus On
2-3 Days Before Source and order premium meats. Purchase oils, fuel, and all pantry items for sauces. Advance sourcing and planning to secure the best ingredients.
The Day Before Prepare all sauces; store in airtight containers. Wash and prepare salad greens; make vinaigrette separately. Maximizing make-ahead components. Flavors meld and improve overnight.
Day Of, 3 Hours Before Cut all meats and proteins; pat dry thoroughly. Arrange on platters, cover, and refrigerate. Set the table, including the sauce station. Complete mise en place and staging. The kitchen is ready before guests arrive.
30 Minutes Before Guests Arrive Fill the pot and light the burner. Pre-heat oil to 375°F. Do a final arrangement of all platters. Achieving the perfect starting temperature. You greet guests with everything poised for perfection.

The Mastered Experience

French Fondue Bourguignonne, mastered, is the ultimate balance of precise control and generous hospitality. It is the journey from selecting a heavy pot to presenting a curated, interactive feast where every element has purpose. The profound satisfaction comes not from cooking for your guests, but in creating an environment where they craft their own perfect bites—a symphony of seared meat, vibrant sauces, and shared conversation. This is the true, elevated art of the fondue experience, an unparalleled joy that transforms a simple meal into a memorable event.


Related Articles

Try Our Free Tool: Use our Fondue Recipe Generator to generate an authentic regional fondue recipe.

Fourth of July Patriotic Fondue Display with Red, White, and Blue Ingredients


The Ultimate Fourth of July Patriotic Fondue Display with Red, White, and Blue Ingredients

Picture the typical Independence Day gathering. The sun beats down on a crowded grill. Plates sag with predictable sides. The celebration feels more like a logistical challenge than a joyous event. Now, imagine a different scene. Guests gather around a stunning, interactive centerpiece—a bubbling pot flanked by vibrant platters of red, white, and blue. Laughter replaces waiting in line. This is the power of presentation and participation. Mastering the Fourth of July Patriotic Fondue Display with Red, White, and Blue Ingredients is your key to this transformation. It moves hosting from stressful service to creating a shared, memorable experience, an edible flag that becomes the heart of your celebration.

Foundational Choices: The Fondue Command Center

Your hardware choices form the non-negotiable foundation for a flawless event. The right setup ensures safety, maintains perfect fondue consistency, and showcases your patriotic spread.

Selecting Your Pot & Fuel Source

Match your pot to your chosen fondue type. A classic ceramic or enameled cast iron pot is ideal for cheese, retaining gentle, even heat. A lighter ceramic or metal bowl works for chocolate, often used over a tea light. For broth fondue, a stainless steel or electric pot with precise temperature control is best. Choose a pot size that holds at least one cup of fondue per three guests. Your fuel source is critical. Ethanol or candle burners offer subtle heat for chocolate only. Gel or liquid fuel cans provide the stronger, adjustable flame needed for cheese. Electric fondue pots offer the ultimate control, eliminating open flames—a wise choice for busy patios.

Location & Setup for Maximum Impact

Place your fondue station on a stable, heat-resistant table away from foot traffic and curious children. Position it as a focal point, perhaps against a backdrop of your patriotic decor, to create a natural photo opportunity. Ensure you have ample space for the fondue pot, all ingredient platters, and room for guests to maneuver with their skewers safely.

Component & Servingware Breakdown

Component Category Options Key Characteristics
Fondue Pot Ceramic, Cast Iron, Stainless Steel, Electric Ceramic/Cast Iron: Excellent heat retention for cheese. Stainless Steel: Lightweight, good for broth. Electric: Offers precise, flameless temperature control.
Fuel Ethanol/Candle, Gel/Liquid Fuel, Electric Cord Ethanol: Low heat for chocolate only. Gel Fuel: Adjustable, portable flame for cheese or broth. Electric: Consistent and safest for indoor/outdoor use.
Fondue Forks Long-Stemmed Metal, Color-Coded Sets, Alternative Skewers Long stems keep hands safe from heat. Color-coded ends help guests identify their fork. Have wooden skewers on hand for guests with metal allergies or for double-dipping prevention.
Serving Platters Large Boards, Tiered Stands, Multiple Small Bowls Use separate platters for each color group to create a bold “flag” effect. Tiered stands add visual height and save table space. Small bowls are perfect for loose items like berries.

The Core System: Mastering the Fondue Mediums

Think of your cheese, chocolate, or broth as a dynamic, living system. Your control over heat and texture directly dictates the success of the entire experience.

The Cheese Foundation: Your Savory Star

Your cheese fondue is the savory anchor. Aim for a smooth, velvety texture that clings perfectly to dippers. Use a blend like Gruyère and sharp white cheddar for superior flavor and meltability—this is your foundational “white” element. The science is simple: prevent separation. Always toss your shredded cheese with a tablespoon of cornstarch before adding it to your warmed, acidic liquid like white wine or lemon juice. Stir constantly in a low, steady figure-8 motion until luxuriously smooth. A heavy-bottomed saucepan for melting and a fondue pot that maintains a consistent, low heat are your essential tools.

The Chocolate Cascade: The Sweet Finale

Your chocolate fondue should be a silky, glossy cascade. The target is a fluid state that sets slightly on a cool strawberry. The consequence of error is seized or grainy chocolate, often caused by overheating or introducing moisture. Maintain absolute control by using gentle, indirect heat. Melt high-quality chocolate with your “white” liquid—heavy cream, coconut milk, or even a patriotic white chocolate base—in a bowl over a pot of simmering water, not in the fondue pot itself. Once melted and combined, transfer it to your serving pot over a very low flame or tea light.

The Flavorful Broth: The Savory Adventure

A clear, aromatic broth serves as a versatile “white” or neutral canvas for cooking proteins and vegetables. Use a rich chicken, beef, or vegetable stock infused with herbs. Your goal is to maintain a perfect, gentle simmer—never a rolling boil, which can cloud the broth and overcook delicate items. Throughout the event, be prepared to replenish both the liquid volume and the flavor. Keep a pot of hot, seasoned broth nearby to top off the fondue as needed.

Advanced Practices: Crafting the Patriotic Display

With your medium mastered, shift focus to the art of the display. This is where your edible flag comes to life through strategic curation and arrangement.

Preparation & Ingredient Curation

Select ingredients that offer visual impact, varied textures, and complementary flavors within the color theme.

  • The “White” Battalion: Cubed sourdough bread, roasted baby potatoes, blanched cauliflower florets, pearl onions, white cheddar cheese cubes, large marshmallows, and cubed pound cake.
  • The “Red” Regiment: Cherry tomatoes, strawberries, raspberries, red apple slices (brushed with lemon juice), red bell pepper strips, cured meats like salami or pepperoni, and radishes.
  • The “Blue” Brigade: Blueberries, blackberries (dust with powdered sugar for a “frosted” look), blue potato chips, blue corn tortilla strips, purple potato chunks, and figs.

The Arrangement Strategy

Think in blocks and stripes. Arrange your platters and bowls to mimic the flag’s layout. Place a large platter of “white” ingredients (like bread and potatoes) on the left. Create horizontal stripes to the right using alternating platters of “red” (strawberries, meats) and “white” (cheese, cauliflower). Cluster your “blue” ingredients (berries, blue chips) in a bowl or section in the upper left corner as your “star field.” Use tiered stands to create visual height and ensure all items are easily accessible.

Pro Tips for Flow & Experience

Label ingredients with small flags for guests with allergies or curiosity. Provide alternative dipping options like wooden skewers. Set up a discreet “replenishment station” in the kitchen with backup ingredients and fondue fuel. This allows you to refresh the display seamlessly, without interrupting the party’s flow.

Threat Management: Fondue Disaster Prevention

Adopt a proactive stance. Your best defense is meticulous preparation and constant, gentle heat.

Prevention is Your First Defense

Practice mise en place—have every ingredient measured, chopped, and within reach before you start cooking. Never leave your fondue unattended while melting. Stir cheese and chocolate frequently. Keep your raw ingredient platters chilled until moments before serving to maintain freshness, especially for fruits and meats.

Intervention & Rescue Protocols

Even experts face challenges. Have these solutions ready:
Broken Cheese Sauce: Immediately stir in a splash of hot liquid (wine, broth, lemon juice) and whisk vigorously over low heat. Seized Chocolate: Remove from heat and instantly stir in a tablespoon of neutral oil or warm cream until smooth again. Crowded Pot or Lost Food: Provide extra fondue forks and a designated “rescue” bowl for guests to place retrieved morsels. A slotted spoon is also a handy tool for broth fondue rescues.

Your July 4th Fondue Action Plan

Timeline (Phase) Primary Tasks What to Focus On
2 Days Before (Prep) Shop for all non-perishable ingredients, fuels, and servingware. Wash and dry all berries. Prepare and cube bread; store in bags. Organization. Eliminate last-minute shopping stress.
Morning of July 4th (Assembly) Chop vegetables, cube cheeses and cake, slice meats and fruits. Prepare broth base if using. Arrange all ingredients on platters, cover, and refrigerate. Precision. Completing all cutting and arranging while fresh.
1 Hour Before Guests (Setup) Set up the fondue station table. Place platters (keep chilled until the last minute). Prepare the fondue pot with fuel. Measure fondue ingredients into separate bowls. Staging. Creating the visual display and ensuring your cooking station is ready.
Party Time (Execution) Bring out chilled platters. Make the fondue in front of guests for drama, or have it ready to go. Light the fuel, maintain heat, stir occasionally, and enjoy. Hosting. Engaging with guests, managing the pot, and replenishing ingredients gracefully.
Post-Party (Cleanup) Extinguish fuel completely. Let pot cool before washing. Soak fondue forks in hot, soapy water to loosen cheese or chocolate. Safety & Preservation. Proper care ensures your command center is ready for next year.

The perfect Fourth of July fondue display balances flawless technique with breathtaking patriotic presentation. It begins with choosing the right command center and mastering the temperamental nature of melted cheese or chocolate. It culminates in the strategic arrangement of red, white, and blue ingredients into an edible work of art. When you see your guests gather, laugh, and celebrate around this interactive centerpiece, you’ll understand the transformation. You have not just served food; you have created a shared memory, a culinary fireworks finale that elevates your hosting into an unforgettable experience.


Related Articles

Try Our Free Tool: Use our Fondue Party Planner to plan your seasonal fondue gathering with a custom checklist and timeline.

Christmas Cookie Dipping Fondue Station Ideas


The Christmas Cookie Dipping Fondue Station: Your Secret to Unforgettable Holiday Magic

Picture the final moments of a typical holiday cookie swap. The platters are a landscape of crumbs and broken halves. Guests are politely nibbling, but the energy has faded into a sugary slump. The culinary effort feels disconnected from the experience. Now, reimagine that scene. A beautiful, interactive centerpiece commands the room. Laughter bubbles as friends and family become creators, transforming simple cookies into personalized works of art. Every bite is a perfect, deliberate delight. This is the power of a masterfully executed station. Mastering the Christmas Cookie Dipping Fondue Station is the key to elevating your holiday hosting from a stressful obligation to a spectacular, memory-making event.

Foundational Choices: Building Your Station’s Framework

Your initial hardware choices form the unshakable foundation for a flawless event. This is not about mere decoration; it is about engineering a functional, intuitive system for creativity.

Part A: Vessel Selection and Layout

Your heating vessel dictates the pace and quality of your event. An electric fondue pot offers precise, consistent heat—non-negotiable for real chocolate. A candle warmer is portable and charming but better suited for pre-melted candy coatings. For ultimate variety, a multi-compartment buffet server lets you run dark, white, and flavored melts simultaneously. Size your pots for your guest list: one standard fondue pot comfortably serves 4-6 active dippers. Layout is critical. Design a logical flow: a starting point with cookies, a central dipping zone, a landing area for excess coating to drip, and a final decorating station. This prevents traffic jams and messy accidents.

Part B: Location and Setup for Flow

Place your station centrally to encourage gathering, or position it as the crown jewel of a buffet line. Wherever it lands, create dedicated zones. The Dipping Zone needs clear access to all melts. The Draining Zone requires parchment-lined trays or racks. The Decorating Zone demands small bowls of toppings and tools. Foundational supplies are your silent allies: use a washable tablecloth or a protective vinyl runner, provide stacks of napkins within arm’s reach, and employ strategic lighting (a small lamp or fairy lights) to make your melts shimmer.

Part C: Core Components and Materials

The right materials separate a professional result from a amateur endeavor. Your choices here define the entire experience.

Component Category Options Key Characteristics
Heating Vessel Electric Fondue Pot, Candle Warmer, Multi-Compartment Server Electric offers precise, consistent heat for control. Candle warmers are portable but less powerful, best for candy melts. Buffet servers allow for multiple flavors without cross-contamination.
Dipping Mediums Chocolate, Candy Melts, Royal Icing, Sweet Glazes Real chocolate requires tempering for a glossy snap but offers superior flavor. Candy melts are user-friendly and colorful. Royal icing hardens completely for stacking; glazes stay soft and luscious.
Utensils Fondue Forks, Skewers, Tongs, Spatulas Long fondue forks are traditional. Sturdy skewers work for thick cookies like biscotti. Tongs are essential for guests to serve themselves cookies without touching. A small spatula helps stir and rescue fallen pieces.

The Core System: Managing Your Melts and Textures

This station is a dynamic environment of temperature and viscosity. Mastery here is the difference between a velvety cascade and a grainy, seized mass.

Temperature Control: The Heart of the Operation

Each coating has a sweet spot. For real chocolate, maintain a dipping temperature between 90-110°F (32-43°C). Candy melts typically require 120-130°F (49-54°C). Stray outside these ranges and you face disaster: overheated chocolate seizes into a stiff paste; overheated candy melts become oily. Underheated coatings clump and create a thick, ugly shell. Your essential tool is a reliable digital thermometer. For delicate chocolate, use a double boiler or the pot’s water bath setting to apply gentle, indirect heat.

Consistency is King: Achieving the Perfect Dip

The ideal viscosity is that of warm honey—coating smoothly but dripping off cleanly. Perform the “drip test”: dip a spoon, lift it, and count. A coating that falls in a thin, steady ribbon over 2-3 seconds is perfect. To thin a melt, incorporate fat drop by drop: refined coconut oil, vegetable oil, or food-grade paramount crystals for candy melts. To thicken a runny glaze, whisk in sifted powdered sugar. Your goal is a smooth, velvety flow that embraces the cookie without drowning it.

Advanced Practices: The Art of Flavor and Decoration

With your system humming, shift focus to the culinary artistry. This is where you imprint your personal signature on the event.

Cookie Preparation: Choosing the Perfect Canvas

Not all cookies are created equal. You need a sturdy canvas. My personal favorites are classic shortbread, gingerbread, sturdy sugar cookies, and biscotti. Ensure every cookie is completely cooled to room temperature; a warm cookie will melt its coating. For optimal adhesion, you can lightly brush cookies with a simple syrup or even a neutral spirit like vodka and let it dry—this creates a tacky surface for the coating to grip.

The Flavor Matrix: Building Your Fondue Menu

Create a balanced, intriguing menu. Offer a trio: a deep, sophisticated dark chocolate; a creamy, crowd-pleasing milk chocolate; and a bright white chocolate ready for infusion. Infuse flavors directly into the warm melt: stir in orange zest and a dash of Grand Marnier, peppermint extract, espresso powder, or a pinch of cayenne and cinnamon. Label each pot clearly. This guided exploration elevates the activity from simple dipping to a flavor journey.

The Decorating Arsenal: From Simple to Spectacular

Organize toppings in small, manageable bowls with dedicated spoons. Create texture with crushed peppermints, toffee bits, or chopped nuts. Add color with festive sprinkles, sanding sugar, and freeze-dried fruit powders. Provide contrast with flaky sea salt. For advanced techniques, set up a drizzling station with squeeze bottles of contrasting colored melts. Teach the marbling technique: dip a cookie in white chocolate, then immediately drag a forkful of dark chocolate through it. The key is an efficient, organized station that invites creativity without chaos.

Threat Management: Preventing a Sticky Situation

Adopt a proactive host’s mindset. Anticipate problems and engineer them out of existence.

Prevention: The First Line of Defense

Your greatest tool is meticulous mise en place. Have every topping pre-portioned, every tool laid out, and backups within reach. Enforce the “one fork per guest, per pot” rule to prevent flavor muddling—color-code forks if necessary. Place small trash bowls for used skewers and wet cloths at strategic intervals for quick finger-wiping. This invisible preparation is what allows visible, effortless fun.

Intervention: Solving Common Dipping Dilemmas

Despite best efforts, issues arise. Identify and act swiftly. Seized Chocolate: It appears grainy and thick. Immediately remove from heat and stir in a teaspoon of warm oil or shortening until smooth. Grainy Icing: Often from undissolved sugar. Whisk in a few drops of hot water or simple syrup. Soggy Cookies: A sign of improper draining or a too-thin cookie. Remove the batch, provide a sturdier alternative, and ensure your draining zone has proper airflow. Have a backup batch of melt ready to deploy if a fix fails.

The Action Plan: Your Holiday Countdown Calendar

Follow this phased roadmap to execute your station with calm, strategic precision.

Phase Primary Tasks What to Focus On
1-2 Weeks Before Bake and freeze sturdy, dip-friendly cookies. Procure or confirm fondue pots, utensils, and platters. Source high-quality chocolate, candy melts, and toppings. Foundation and procurement. Do a test melt to check consistency and flavor.
2-3 Days Before Thaw cookies. Portion all toppings into small serving bowls. Create infusion plans and pre-measure any flavorings or oils. Organization and advanced prep. Visualize and set up your decoration station layout.
Day Of / Setup Set up the physical table layout with clear zones. Melt coatings using proper tempering or low-heat methods. Arrange cookies, toppings, and utensils in the planned logical flow. Final assembly and temperature management. Creating an inviting, intuitive path through your Christmas Cookie Dipping Fondue Station.
During the Event Monitor pot temperatures with your thermometer. Gently stir melts every 15 minutes. Replenish toppings and cookies before they empty. Circulate and encourage creativity. Hosting and system facilitation. Your role shifts from builder to conductor, keeping the symphony of dipping running smoothly.

From Chaotic Crumbs to Culinary Centerpiece

The magic lies in the balance: the rigorous control of your systems granting the freedom for pure creative joy. You have journeyed from selecting the right pot to orchestrating an interactive masterpiece. The chaotic cookie swap is now a distant memory, replaced by the vibrant scene you engineered—a room alive with laughter, focused creativity, and the shared, unparalleled joy of a perfectly dipped, personalized treat. Mastering this station is more than a hosting tactic; it is a gift that transforms tradition and enriches your holiday, one delicious, glittering bite at a time.


Related Articles

Try Our Free Tool: Use our Fondue Party Planner to plan your seasonal fondue gathering with a custom checklist and timeline.

New Year’s Eve Champagne Fondue Recipes


New Year’s Eve Champagne Fondue Recipes: Your Blueprint for an Unforgettable Celebration

Picture the final moments of the year. The room is abuzz, but you are serene, presiding over a gleaming pot of molten, golden luxury. Guests gather, not with mere flutes, but with eager skewers, ready to partake in a ritual that is both decadent and delightfully communal. This is the promise of a masterfully executed Champagne fondue. It transforms a simple gathering into a curated event, making you not just a host, but a creator of memorable experience.

Forget heavy, one-dimensional cheese dips. A true Champagne fondue is an edible celebration—a perfect balance of rich, nutty cheese lifted by vibrant acidity and effervescence. Mastering this dish is the cornerstone of a seamless, impressive evening. It’s about understanding the delicate alchemy that turns simple ingredients into a sparkling centerpiece, one that captivates from the first dip to the last toast.

Foundational Choices: The Hardware of Your Fondue

Your success is built before the first grate of cheese. Selecting the right tools and core ingredients forms the non-negotiable foundation for a silky, stable, and spectacular fondue.

The Vessel: Choosing Your Fondue Pot

The pot is your command center. For a cheese fondue, heat distribution and retention are paramount. A classic ceramic caquelon is traditional and provides gentle, even heat, ideal for maintaining a steady simmer over a tea light or gel fuel. Enameled cast iron is a superb modern alternative, holding temperature exceptionally well and often working on both stovetop and stand. I avoid thin metal pots, as they frequently lead to hot spots and scorching.

Your fuel source dictates control. Ethanol (liquid) burners offer adjustable flames but require caution. Gel fuel cans are simpler and safer, providing consistent, moderate heat. For ultimate control, especially for beginners, an electric fondue pot with a thermostat is foolproof, though it may sacrifice some rustic ambiance.

The Core Components: Ingredient Selection

Quality here is non-negotiable. Your cheese blend needs structure and flavor. I rely on a base of Swiss Gruyère for its deeply savory, slightly salty notes, combined with Emmental for its superb meltability and mild, buttery flavor. A touch of Comté adds complex nuttiness. Always buy a block and grate it yourself; pre-shredded cheese contains anti-caking agents that ruin the texture.

Your Champagne is both ingredient and inspiration. Choose a dry Brut (not Extra Dry, which is actually sweeter). Its crisp acidity cuts the fat and prevents stringiness. A moderately priced, good-quality bottle is perfect—you’ll use most for cooking, saving a final splash for garnish. The thickener is your safety net. Cornstarch is my champion; it creates a glossier, more stable emulsion than flour. Kirsch (cherry brandy) is traditional and serves a dual role: its alcohol helps stabilize the emulsion while imparting a subtle, aromatic fruitiness.

Component Category Primary Options Key Characteristics
Cheese Base Gruyère, Emmental, Comté Gruyère provides savory depth. Emmental ensures creamy melt. Comté adds nutty complexity. Always grate fresh from a block.
Champagne Type Dry Brut Champagne Crisp acidity balances richness and prevents stringiness. A good-quality, non-vintage Brut is ideal for both cooking and finishing.
Thickening Agent Cornstarch, Kirsch Cornstarch creates a glossy, stable base. Kirsch adds subtle aroma and further stabilizes the emulsion. Often used together.
Aromatic Boosters Garlic, Nutmeg, Black Pepper A garlic-rubbed pot provides foundational flavor. Freshly grated nutmeg and white pepper add warmth and complexity without overpowering.

The Core System: Mastering Texture & Flavor

A great fondue is not a sauce; it’s a temporary, delicate emulsion you must actively manage. Precision with temperature and technique separates a luxurious dip from a broken, oily mess.

Temperature Control: The Science of the Simmer

Your target is a gentle, steady bubble, barely perceptible. High heat is the enemy—it will cause the proteins to tighten and the fats to separate, leaving you with a rubbery mass floating in oil. I maintain control by starting the base on the stovetop over low heat, then transferring it to a pre-warmed fondue pot over the lowest possible flame. Vigilant, constant stirring is your best tool.

The Emulsion: Technique is Everything

This is where mastery shows. First, toss your grated cheese with cornstarch. This coats every strand, preventing them from clumping together as they melt. In your pot, gently heat the Champagne and a splash of lemon juice until just simmering. Then, add the cheese in handfuls, stirring constantly in a slow, steady figure-eight pattern. This motion incorporates everything evenly. Wait until one addition is fully melted and smooth before adding the next. Patience here guarantees a velvety, lump-free result.

Moisture & Acidity Balance

The Champagne and lemon juice are your balancing agents. They provide the necessary liquid and acidity to keep the cheese proteins from seizing. If your fondue becomes too thick during service, stir in a tablespoon of warm Champagne. If it threatens to separate, a quick whisk with a splash of cold Champagne or lemon juice will often bring it back.

Advanced Practices: Elevation & Dipping Strategy

With the fondue perfected, shift your focus to crafting the complete, elevated experience. The dippers and accompaniments are your supporting cast.

The Dipping Battalion: Composition & Preparation

Texture variety is crucial. For crunch, use day-old, crusty artisan bread (like a baguette or sourdough), cut into hearty cubes with some crust on each. For freshness, offer crisp vegetables that can stand up to the heat: blanched broccoli florets, endive spears, and fennel slices. For indulgence, include seared steak tips, roasted baby potatoes, and slices of crisp, tart apple like Granny Smith. Prepare all elements ahead and arrange them artfully on large platters.

Flavor Optimization & The Complete Experience

Before adding any liquid, rub the interior of your fondue pot with a cut clove of garlic for a subtle, aromatic base. Just before serving, stir in a final ounce of fresh Champagne and a grating of fresh nutmeg. Serve with a classic garnish tray of cornichons, pickled pearl onions, and sliced cured meats like salami or prosciutto. These sharp, salty bites reset the palate between rich dips.

Threat Management: Saving the Celebration

A proactive approach prevents most disasters. Ensure your grated cheese is at room temperature and your bread is slightly stale and dry; moisture is the enemy of a stable fondue. Always use a non-reactive pot (ceramic, enameled cast iron, stainless steel).

Intervention: Fondue Rescue Missions

Even experts face challenges. If your fondue breaks and becomes oily, immediately remove it from heat. Add a tablespoon of cold Champagne or lemon juice and whisk vigorously. It should re-emulsify. If it’s too thick, whisk in warm Champagne, a tablespoon at a time. If it’s too thin, create a slurry with a teaspoon of cornstarch and a tablespoon of Kirsch, then whisk it into the simmering fondue until thickened.

Your New Year’s Eve Timeline

This phased roadmap eliminates last-minute stress, ensuring you are celebrating alongside your guests.

Timeline Primary Tasks Focus On
2 Days Before Shop for cheese, Champagne, and all dipper ingredients. Cube bread and leave it uncovered to stale slightly. Procurement & Foundation
Morning Of Grate all cheese, toss with cornstarch, and store covered. Prep vegetables (wash, cut). Set the fondue table. Mise en Place & Setup
1 Hour Before Guests Blanch hard vegetables. Arrange all dippers and garnishes on serving platters. Open Champagne. Assembly & Readiness
30 Minutes Before Serving On the stovetop, create the fondue base up to the point of adding cheese. Bring pot to the table and complete the final melting and stirring in front of guests. The Grand Finale

Mastering the New Year’s Eve Champagne fondue is an exercise in joyful precision. It’s the understanding that luxury and levity can coexist in a single pot. You have moved from selecting the right Gruyère to orchestrating a moment of shared, interactive delight. As the clock strikes midnight and you raise a glass, the fondue pot will still be warm, a testament to a celebration crafted with intention. This is more than a recipe—it’s a tradition in the making, an experience that enriches the night and creates memories that linger long after the last bubble has popped.


Related Articles

Try Our Free Tool: Use our Fondue Party Planner to plan your seasonal fondue gathering with a custom checklist and timeline.

Thanksgiving Leftover Fondue: Creative Turkey and Stuffing Combinations


Thanksgiving Leftover Fondue: The Ultimate Guide to Creative Turkey and Stuffing Combinations

The fourth turkey sandwich sits uneaten, a monument to diminishing returns. The fridge groans with containers of drying meat and crumbling stuffing, a post-feast burden that sparks more dread than delight. This is the universal pain point of Thanksgiving weekend: culinary fatigue. But it is also an extraordinary opportunity. With one strategic pivot, you can transform those premium leftovers into the centerpiece of a second, spectacular celebration. The key lies not in reheating, but in reimagining—through the interactive, communal magic of fondue.

Mastering Thanksgiving Leftover Fondue is your gateway to a superior post-holiday experience. This guide moves beyond simple dipping to teach you the art of flavor architecture, turning your turkey and stuffing into the stars of a creative, sophisticated feast that friends and family will request every year.

Foundational Choices: The Fondue “Hardware” & Base

Your success is built on two non-negotiable pillars: the right equipment to maintain perfect temperature and the foundational base that will carry your flavors.

Selecting Your Fondue Vessel

Your pot is your command center. The classic ceramic caquelon is ideal for traditional cheese fondues over a flame, promoting a deliciously caramelized crust at the bottom. For precise, worry-free control—especially for broth or chocolate—a modern electric fondue pot is unmatched. Choose a size based on your guest count: a 1-quart pot comfortably serves 2-4, while a 2-3 quart pot is necessary for a group of 6 or more.

Crafting the Foundation – The Fondue Base

This choice defines the entire experience. You are either building a rich, emulsified cheese sauce for dipping or creating an aromatic broth for cooking.

Base Type Best For Key Characteristics
Cheese Fondue A rich, indulgent dipping experience. Creamy and decadent; pairs perfectly with bread, vegetables, and cooked turkey bites. Use a blend like Gruyère (for nuttiness), Fontina (for meltability), and a sharp aged Cheddar (for punch).
Broth Fondue (Court-Bouillon) A lighter, interactive cooking experience. Clear, aromatic, and deeply flavorful; used to poach or cook raw turkey pieces and vegetables directly at the table. Infuse with Thanksgiving herbs like sage, thyme, and a bay leaf.

The Core System: Component Preparation & Flavor Architecture

Think of your leftovers not as scraps, but as components in a balanced flavor system. Each must be prepared to optimize texture and taste.

The Turkey – Beyond Dry Chunks

Never serve dry, cold turkey. For cheese fondue, slice leftover breast meat thinly against the grain into bite-sized strips. For broth fondue, cut turkey into ¾-inch cubes. Rejuvenate it by briefly warming the pieces in a splash of gravy or stock, just until heated through—this restores moisture without overcooking.

The Stuffing – From Crumbly to Dippable

Transform loose stuffing into dippable units. Moisten your hands and roll the stuffing into firm, one-inch balls. For a superior texture, pan-fry these balls in a little butter until they develop a crisp, golden crust. This creates a flavorful vessel that can hold its own on a fondue fork.

The Supporting Cast (Crucial Variables)

Balance the richness with fresh, textured elements. Blanched broccoli florets, roasted Brussels sprout halves, and chunks of acorn squash are essential. For starch, move beyond bread to roasted potato wedges, crispy sweet potato fries, or even pretzel rolls for a salty contrast.

Advanced Practices: Creative Combination Themes

This is where you graduate from dipping to curating. Guide your guests with these themed pairing suggestions for a memorable flavor journey.

The “Classic Dinner” Fondue

Skewer a piece of sage-infused stuffing ball and a slice of turkey. Dip into a creamy cheese fondue, then immediately into a side dish of whole-berry cranberry sauce. This single bite captures the entire Thanksgiving plate.

The “Harvest Crunch” Fondue

Take a cornbread stuffing ball, dip it into your cheese pot, and then roll it in a plate of finely chopped toasted pecans or walnuts. The contrast of creamy, soft, and crunchy is exceptional.

The “Open-Faced Sandwich” Fondue

For a broth fondue, create a composed bite on your plate: place a slice of roasted squash as the “bread,” top with a broth-poached turkey cube, and drizzle with a gravy-thickened reduction of the fondue broth itself.

Threat Management: Fondue Failure Prevention

A proactive stance ensures a seamless experience. The two greatest threats are a broken cheese sauce and a flavorless broth.

Prevention (The Best Defense)

For cheese fondues, always grate your own cheese (pre-shredded contains anti-caking agents that can seize), toss it with cornstarch, and add it gradually to warm wine or cider over medium-low heat, stirring constantly in a figure-eight motion. Never let it boil.

Intervention (Saving the Sauce)

If your cheese sauce breaks and becomes grainy, immediately remove it from heat. Add a tablespoon of fresh lemon juice or a splash of hot liquid (wine, broth) and whisk vigorously. It should re-emulsify. For a bland broth, have instant umami boosters ready: a dash of soy sauce, Worcestershire, or a spoonful of mushroom powder.

Your Post-Thanksgiving Fondue Calendar

Phase Primary Tasks What to Focus On
Day-After Prep (Friday) Portion and refresh turkey; form and pan-fry stuffing balls; chop vegetable dippers; grate cheese for fondue. Mise en place. Having all components ready turns the event into an effortless assembly.
Weekend Celebration (Saturday/Sunday) Prepare your chosen fondue base; set up the station with forks, plates, and themed pairing suggestions; gently warm turkey and stuffing components. Interactive dining and creative pairing. Your role is now host and guide, not short-order cook.

The true mastery of Thanksgiving leftovers is not just avoiding waste, but creating new joy. By applying the principles of foundational preparation, systematic flavor balancing, and creative combination, you shift the paradigm entirely. The cluttered fridge becomes a treasure trove. The fondue pot, bubbling at the center of the table, becomes a beacon of warmth and shared discovery. This is more than a meal; it is a new tradition that enriches your holiday and ensures that every leftover is met with anticipation, not apathy. Your second feast awaits.


Related Articles

Try Our Free Tool: Use our Fondue Party Planner to plan your seasonal fondue gathering with a custom checklist and timeline.

Halloween Candy Fondue Bar for Kids and Adults


The Ultimate Halloween Centerpiece

Picture the typical Halloween party scene: a whirlwind of over-sugared children, adults navigating a minefield of discarded wrappers, and a sense of culinary chaos. Now, replace that image with a mesmerizing, interactive focal point where laughter replaces frenzy and every guest—from tiny goblins to sophisticated witches—finds their perfect treat. This is the power of the mastered Halloween Candy Fondue Bar. It transcends dessert to become the heart of your celebration, an experience that artfully channels the night’s energy and caters to every palate. Mastering this centerpiece is your key to transforming a hectic gathering into a seamless, memorable event where the treat itself becomes the main attraction.

Foundational Choices: The Fondue Framework

Your fondue bar’s success is built upon a few critical, practical decisions. These choices form the unshakable foundation for everything that follows.

Vessel Selection & Station Setup

Your heating vessel dictates safety and flow. For a mixed-age crowd, electric fondue pots with adjustable thermostats offer superior control and safety, eliminating open flames. Candle-lit burners (tealights) work for small, adult-focused setups but struggle to maintain consistent heat for milk or dark chocolate. Design your station to prevent bottlenecks. I recommend creating distinct “dip zones”—one for classic milk chocolate, another for a dark option, perhaps a third for a seasonal white chocolate—each with its own dedicated warmer, tools, and dipper selection. This simple layout triples your station’s capacity and keeps the line moving.

The Core Components: Melts & Dippers

The soul of your bar lies in the balance of what you melt and what you dip. Your choices here define the experience for both kids and adults.

Component Category Options Key Characteristics
Chocolate & Melts Dark, Milk, White, Candy Melts Dark offers adult sophistication with less sweetness; pairs with sea salt or chili. Milk is the universal, crowd-pleasing workhorse. White chocolate is your blank canvas for orange food coloring or extracts. Candy Melts are foolproof for color but offer a sweeter, less nuanced flavor.
Kid-Focused Dippers Fresh Fruit, Pretzels, Marshmallows, Graham Crackers Focus on familiar, fun textures: the crunch of a pretzel rod, the soft give of a marshmallow, the fresh contrast of strawberry “fingers” or banana chips. These are low-fuss, high-reward items.
Adult-Focused Dippers Pound Cake, Salty Pretzels, Dried Fruit, Biscotti, Espresso Beans Introduce complexity and contrast: dense pound cake cubes, tart dried apricots, bitter espresso beans, or robust biscotti. These dippers stand up to bold, dark chocolate and invite savoring.

The Core System: Flavor Management & Control

Think of your fondue bar not as a static display, but as a dynamic flavor ecosystem. Mastery requires active curation of temperature, texture, and theme.

Temperature Control: The Non-Negotiable

Chocolate is temperamental. The ideal holding temperature for a smooth, dip-able consistency is between 115°F and 120°F (46°C to 49°C). Exceeding 130°F (54°C) risks burning and seizing. Your primary tool is an adjustable electric warmer. Always have a backup fuel source—extra tealights or a second warming base—to avoid a mid-party meltdown. A simple infrared thermometer provides instant peace of mind.

Flavor & Consistency Engineering

The perfect fondue texture is glossy and coats a dipper without immediately sliding off. Achieve this by thinning your melted chocolate with a warm liquid. For every 10 ounces of chocolate, stir in 2-3 tablespoons of heavy cream, coconut milk, or even a flavored liqueur for adults. If your fondue becomes too thick, whisk in more warm liquid, one teaspoon at a time. If it’s too thin, add a handful of finely chopped chocolate to help it seize back to the right consistency.

Thematic Flavor Enhancement

Infuse the Halloween spirit directly into the fondue. Stir orange oil-based food coloring into white chocolate for a vibrant “pumpkin” dip. Add a drop of peppermint extract to white chocolate for a “ghostly” chill. For a “witches’ cauldron” effect, fold crushed toffee bits or peanut butter cups into milk chocolate for texture and surprise. These small touches transform standard chocolate into a thematic experience.

Advanced Practices: Curation & Presentation

With the system under control, elevate your bar to an art form through intentional presentation and strategic curation.

Themed Presentation & Staging

Your display should enchant before the first dip. Use tiered stands to create visual height and maximize space. Hollow out small pumpkins or gourds to serve as bowls for dry dippers like pretzels. Label each fondue pot with spooky calligraphy on aged paper tags: “Vampire’s Dark Brew,” “Mummy’s Milky Wrap.” Provide long-handled forks or skewers with themed toppers—plastic spiders, miniature broomsticks—to complete the immersion.

Strategic Dipper Organization & Zoning

Organize dippers logically. Group all fresh fruit together on a chilled platter. Keep dry, crunchy items separate to maintain their texture. I always include a “palate cleanser” station with crisp, tart Granny Smith apple slices and small cups of sparkling cider or ginger ale. This resets taste buds and prevents flavor fatigue. For larger parties, subtly create zones: a “Gourmet Goblins” corner with sea salt, chili-infused dark chocolate and sophisticated dippers for adults, and a “Monster Mash” zone with rainbow sprinkles, candy eyes, and playful dippers for kids.

Threat Management: Problem Prevention & Solutions

A master anticipates issues. Your goal is a proactive defense, not a reactive scramble.

Prevention: The First and Best Defense

Place parchment paper “placemats” under each fondue pot and dipper station to catch inevitable drips, allowing for quick mid-party swaps. To manage allergies, clearly label fondues containing nuts or peanut butter. Have a pre-melted backup batch of your primary chocolate in a thermos or a slow cooker on the “warm” setting, ready to refill a pot in seconds.

Intervention: A Tiered Response Plan

When problems arise, act methodically. For seized chocolate (grainy and thick), immediately whisk in a tablespoon of warm cream or vegetable oil until smooth again. If a fondue overheats, transfer it to a cool bowl to stop the cooking, then stir in fresh, chopped chocolate to lower the temperature. To manage over-enthusiastic dippers, keep a damp, warm cloth tucked nearby to quickly wipe down fork handles and pot rims, maintaining a clean and inviting station.

Your Master Plan: The Countdown Calendar

Execution is everything. Follow this phased roadmap to ensure a flawless, stress-free reveal.

Phase/Time Primary Tasks What to Focus On
1 Week Before Procure all non-perishables: fondue fuel, chocolate, sprinkles, dried goods, serving platters. Test one fondue recipe to confirm flavor and texture. Inventory and recipe confidence. Eliminate last-minute store runs.
Day Before Chop pound cake, brownies, and sturdy fruits. Prepare any infused oils or flavored salts. Set out all tableware, warmers, and décor. Advance prep. Your party day should be about assembly, not labor.
Party Day (2 Hours Before) Melt fondue bases using a double boiler. Arrange dippers artfully on platters. Light warmers and fill pots 30 minutes before guests arrive. Creating a visually stunning, ready-to-enjoy display that welcomes your first guests.

The Transformation Complete

A masterful Halloween Candy Fondue Bar achieves a powerful balance: meticulous planning fuels effortless, playful creativity. You have moved from selecting the right pots to engineering perfect textures, and from organizing dippers to staging an immersive spectacle. The true reward is the scene it creates—the profound satisfaction of watching guests of all ages gather, laugh, and collaboratively craft their perfect Halloween bite. The chaotic energy of the holiday is now channeled into a single, joyful, and delicious focal point. You haven’t just served dessert; you’ve curated a memory, transforming potential sugar-fueled chaos into the heart of a celebration that everyone will remember.


Related Articles

Try Our Free Tool: Use our Fondue Party Planner to plan your seasonal fondue gathering with a custom checklist and timeline.

Easter Brunch Fondue: Sweet and Savory Options for Spring Celebrations


Easter Brunch Fondue: The Transformative Centerpiece

Picture a typical Easter brunch: platters grow cold, guests are stranded at the buffet, and you’re tethered to the kitchen. The celebration feels fragmented. Now, envision a single, elegant vessel at the heart of your table, drawing everyone together in a shared, interactive feast. This is the power of the fondue pot. Mastering the art of Easter Brunch Fondue is your key to a seamless, engaging, and deliciously memorable spring gathering. It transforms hosting from a chore into a celebrated performance.

Foundational Choices: The Fondue “Hardware”

Your equipment is the non-negotiable foundation for safety, style, and success. The right setup prevents disasters and elevates the experience from a novelty to a refined ritual.

Part A: Selecting Your Fondue Pot

Your first critical choice is the pot and its heat source. This decision dictates what you can cook and how easily you control it.

  • Fuel Type: Traditional Liquid Fuel (e.g., gel ethanol) offers authentic charm and intense, direct heat, ideal for keeping broth at a vigorous simmer. Electric Fondue Pots provide precise, consistent, and adjustable temperature control—the superior choice for delicate cheese and chocolate fondues where a steady low heat is paramount.
  • Pot Material: Ceramic or Clay pots excel with cheese fondue; they distribute gentle, residual heat that prevents scorching. Metal Pots (enameled cast iron or stainless steel) are highly responsive, making them perfect for chocolate or broth fondues where you need quick adjustment.
  • Sizing: A 1-quart pot comfortably serves 2-4 guests. For a brunch of 6-8, opt for a 2-3 quart pot or plan to use multiple pots for different fondue types.

Part B: The Essential Toolkit

The pot is just the start. These supporting tools ensure smooth operation.

  • Fondue Forks: Use color-coded forks to avoid mix-ups. Long handles keep hands safe from the heat. Etiquette is simple: the fork is for dipping only, not eating.
  • Heat-Safe Surface: A sturdy trivet or cork pad is mandatory to protect your table from intense heat.
  • Mise en Place Stations: Set up small bowls for all prepped dippers and garnishes. Organization is the host’s secret weapon for a calm presentation.
Component Category Options Key Characteristics
Heat Source Liquid Fuel (Gel) High, direct heat. Authentic ambiance. Best for broth. Requires careful fueling and extinguishing.
Electric Element Precise, adjustable temperature control. Consistent, even heat. Ideal for cheese and chocolate. Safest for indoor use.
Pot Material Ceramic / Clay Retains gentle, even heat. Prevents scorching delicate cheeses. Often heavier and more fragile.
Metal (Cast Iron/Stainless) Heats and cools quickly. Excellent for responsive temperature management. Durable and easy to clean.

The Core System: Managing Your Melts

Fondue is not a set-it-and-forget-it dish. It’s a live culinary system where active management of temperature and texture defines success.

Variable 1: Temperature Control

Straying from the ideal temperature range leads directly to culinary failure.

  • Ideal Ranges: Cheese: 120-140°F (warm and fluid). Chocolate: 110-115°F (just melted). Broth: A gentle simmer, never a rolling boil.
  • Consequences of Error: Too hot, and cheese will separate into a greasy, rubbery mess, while chocolate will scorch and seize. Too cool, and fondues become stiff and unsafe, with broth failing to cook proteins.
  • Tools & Methods: Use an instant-read thermometer. For electric pots, dial in the setting. For fuel pots, adjust the flame. For cheese, a cornstarch slurry (1 tbsp cornstarch + 1 tbsp cold liquid per pound of cheese) is your essential stabilizer, added after the cheese melts to lock in the perfect texture.

Variable 2: Texture & Consistency

This is the art within the science. Each fondue type has its own perfect texture.

  • Cheese Emulsion: The magic happens when melted fat (cheese) binds with liquid (wine, beer) and starch. Always grate your cheese finely, add it gradually over low heat, and stir in a figure-eight motion for a smooth, velvety result.
  • Silky Chocolate: Chop chocolate uniformly. Warm your cream or liquid first, then pour it over the chocolate to melt it gently. This “seeding” method prevents graininess.
  • Clear Broth: Start with a high-quality stock. Skim off any foam during the initial simmer. Season the broth aggressively with herbs, spices, and aromatics, as the dippers will absorb its flavor.

Advanced Practices: The Sweet and Savory Menus

Now, elevate your practice from basic melting to curated artistry. This is where your Easter brunch theme shines.

The Savory Foundation: Cheese & Broth

Begin the meal with these satisfying, interactive options.

  • Preparation: For a classic Swiss Fondue, use a 2:1 ratio of Gruyère (for depth) to Emmentaler (for creaminess). Rub the pot with garlic, add dry white wine, and finish with a splash of kirsch. For a Spring Herb Broth, simmer vegetable broth with fresh lemon slices, whole peppercorns, and bundles of dill and chives.
  • Dippers & Strategy: Offer a strategic array of textures and flavors:
    • Vegetables: Blanched asparagus spears, roasted fingerling potatoes, crisp sugar snap peas.
    • Proteins: Cubed applewood-smoked ham, seared steak tips, poached shrimp (for broth).
    • Starches: Dense sourdough cubes, soft pretzel bites, rye breadsticks.

The Sweet Finale: Chocolate & Beyond

Conclude with a celebratory flourish that delights all ages.

  • Preparation: Choose high-quality chocolate bars, not chips. For a Dark Chocolate Orange Fondue, melt 70% dark chocolate with heavy cream and fresh orange zest. For a White Chocolate Berry Swirl, melt white chocolate with cream and fold in a puree of macerated raspberries.
  • Dippers & Strategy: Create a seasonal spring selection:
    • Fresh Fruit: Strawberries, pineapple chunks, dried apricots.
    • Seasonal Treats: Marshmallow Peeps®, pieces of hot cross buns, lemon-poppyseed loaf cake.
    • Accents: Meringue cookies, graham crackers, salty potato chips for contrast.

Threat Management: Preventing Fondue Fails

Adopt a proactive stance. Most fondue disasters are preventable with simple precautions.

Prevention is Paramount

  • Always apply heat low and slow. Rushing the melt is the primary cause of breaking.
  • Ensure all dippers, especially bread and fruit, are completely dry to prevent splatter and chocolate seizing.
  • For broth fondue, enforce a strict rule: one fork per protein item, which then goes into a separate “cooked” bowl. Never return a fork used for raw meat to the communal pot.

Intervention & Rescue

When issues arise, act swiftly with this diagnostic guide.

Problem Likely Cause Tiered Response
Cheese is “broken” (oily, clumpy) Overheating or adding cheese too fast. 1. Remove from heat. 2. Whisk in 1 tsp fresh lemon juice or a splash of cold wine. 3. If needed, whisk in a new cornstarch slurry (1 tsp each cornstarch and water).
Chocolate is grainy or seized Moisture introduced or overheated. 1. Immediately whisk in a tablespoon of warm cream, butter, or neutral oil. 2. Continue adding warm liquid, a spoonful at a time, until smooth.
Broth is cloudy or weak Over-simmering or underseasoned. 1. Strain through a fine-mesh sieve. 2. Re-season with salt, a bouillon cube, or a sachet of fresh herbs. Serve as is—it will still be flavorful.

Your Easter Brunch Action Plan

This phased roadmap ensures you execute with the calm of a professional, leaving you free to enjoy your guests.

Phase Primary Tasks Focus On
Week Before Finalize menu; shop for non-perishables, fuels, and chocolate; test equipment. Strategy & Procurement. Eliminate last-minute store runs.
Day Before Cube all breads and cakes; grate cheeses; chop vegetables and proteins; make any infused sauces or garnishes. Mise en Place. Transform cooking day into simple assembly.
Morning Of Arrange dippers on platters; set up fondue stations with trivets, forks, and napkins; prepare bases (e.g., heat broth, measure wine). Assembly & Presentation. Create an inviting, ready-to-go tableau.
During Brunch Light flames 10 mins before serving; manage pot temperatures; replenish dipper platters; encourage guests to explore. Engagement & Flow. You are the conductor, not the short-order cook.

The Celebration, Perfected

Easter Brunch Fondue transcends mere food. It is a tool for connection, a catalyst for laughter, and a guarantee of warmth at your table. By choosing the right hardware, mastering the system of the melt, curating a spring-inspired menu, and following a disciplined plan, you transform hosting anxiety into hosting artistry. The final vision is clear: a table where guests are united, conversation flows as freely as the chocolate, and the profound satisfaction of a celebration executed with grace and flavor lingers long after the last Peep® is dipped. This is the joy of a spring gathering, perfected.


Related Articles

Try Our Free Tool: Use our Fondue Party Planner to plan your seasonal fondue gathering with a custom checklist and timeline.

Affiliate Disclosure: FondueCooking.com is a participant in the Amazon Services LLC Associates Program, an affiliate advertising program designed to provide a means for sites to earn advertising fees by advertising and linking to Amazon.com. As an Amazon Associate we earn from qualifying purchases. Learn more