The Christmas Cookie Dipping Fondue Station: Your Secret to Unforgettable Holiday Magic
Picture the final moments of a typical holiday cookie swap. The platters are a landscape of crumbs and broken halves. Guests are politely nibbling, but the energy has faded into a sugary slump. The culinary effort feels disconnected from the experience. Now, reimagine that scene. A beautiful, interactive centerpiece commands the room. Laughter bubbles as friends and family become creators, transforming simple cookies into personalized works of art. Every bite is a perfect, deliberate delight. This is the power of a masterfully executed station. Mastering the Christmas Cookie Dipping Fondue Station is the key to elevating your holiday hosting from a stressful obligation to a spectacular, memory-making event.
Foundational Choices: Building Your Station’s Framework
Your initial hardware choices form the unshakable foundation for a flawless event. This is not about mere decoration; it is about engineering a functional, intuitive system for creativity.
Part A: Vessel Selection and Layout
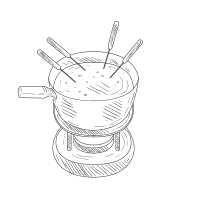
Your heating vessel dictates the pace and quality of your event. An electric fondue pot offers precise, consistent heat—non-negotiable for real chocolate. A candle warmer is portable and charming but better suited for pre-melted candy coatings. For ultimate variety, a multi-compartment buffet server lets you run dark, white, and flavored melts simultaneously. Size your pots for your guest list: one standard fondue pot comfortably serves 4-6 active dippers. Layout is critical. Design a logical flow: a starting point with cookies, a central dipping zone, a landing area for excess coating to drip, and a final decorating station. This prevents traffic jams and messy accidents.
Part B: Location and Setup for Flow
Place your station centrally to encourage gathering, or position it as the crown jewel of a buffet line. Wherever it lands, create dedicated zones. The Dipping Zone needs clear access to all melts. The Draining Zone requires parchment-lined trays or racks. The Decorating Zone demands small bowls of toppings and tools. Foundational supplies are your silent allies: use a washable tablecloth or a protective vinyl runner, provide stacks of napkins within arm’s reach, and employ strategic lighting (a small lamp or fairy lights) to make your melts shimmer.
Part C: Core Components and Materials
The right materials separate a professional result from a amateur endeavor. Your choices here define the entire experience.
| Component Category | Options | Key Characteristics |
|---|---|---|
| Heating Vessel | Electric Fondue Pot, Candle Warmer, Multi-Compartment Server | Electric offers precise, consistent heat for control. Candle warmers are portable but less powerful, best for candy melts. Buffet servers allow for multiple flavors without cross-contamination. |
| Dipping Mediums | Chocolate, Candy Melts, Royal Icing, Sweet Glazes | Real chocolate requires tempering for a glossy snap but offers superior flavor. Candy melts are user-friendly and colorful. Royal icing hardens completely for stacking; glazes stay soft and luscious. |
| Utensils | Fondue Forks, Skewers, Tongs, Spatulas | Long fondue forks are traditional. Sturdy skewers work for thick cookies like biscotti. Tongs are essential for guests to serve themselves cookies without touching. A small spatula helps stir and rescue fallen pieces. |
The Core System: Managing Your Melts and Textures
This station is a dynamic environment of temperature and viscosity. Mastery here is the difference between a velvety cascade and a grainy, seized mass.
Temperature Control: The Heart of the Operation
Each coating has a sweet spot. For real chocolate, maintain a dipping temperature between 90-110°F (32-43°C). Candy melts typically require 120-130°F (49-54°C). Stray outside these ranges and you face disaster: overheated chocolate seizes into a stiff paste; overheated candy melts become oily. Underheated coatings clump and create a thick, ugly shell. Your essential tool is a reliable digital thermometer. For delicate chocolate, use a double boiler or the pot’s water bath setting to apply gentle, indirect heat.
Consistency is King: Achieving the Perfect Dip
The ideal viscosity is that of warm honey—coating smoothly but dripping off cleanly. Perform the “drip test”: dip a spoon, lift it, and count. A coating that falls in a thin, steady ribbon over 2-3 seconds is perfect. To thin a melt, incorporate fat drop by drop: refined coconut oil, vegetable oil, or food-grade paramount crystals for candy melts. To thicken a runny glaze, whisk in sifted powdered sugar. Your goal is a smooth, velvety flow that embraces the cookie without drowning it.
Advanced Practices: The Art of Flavor and Decoration
With your system humming, shift focus to the culinary artistry. This is where you imprint your personal signature on the event.
Cookie Preparation: Choosing the Perfect Canvas
Not all cookies are created equal. You need a sturdy canvas. My personal favorites are classic shortbread, gingerbread, sturdy sugar cookies, and biscotti. Ensure every cookie is completely cooled to room temperature; a warm cookie will melt its coating. For optimal adhesion, you can lightly brush cookies with a simple syrup or even a neutral spirit like vodka and let it dry—this creates a tacky surface for the coating to grip.
The Flavor Matrix: Building Your Fondue Menu
Create a balanced, intriguing menu. Offer a trio: a deep, sophisticated dark chocolate; a creamy, crowd-pleasing milk chocolate; and a bright white chocolate ready for infusion. Infuse flavors directly into the warm melt: stir in orange zest and a dash of Grand Marnier, peppermint extract, espresso powder, or a pinch of cayenne and cinnamon. Label each pot clearly. This guided exploration elevates the activity from simple dipping to a flavor journey.
The Decorating Arsenal: From Simple to Spectacular
Organize toppings in small, manageable bowls with dedicated spoons. Create texture with crushed peppermints, toffee bits, or chopped nuts. Add color with festive sprinkles, sanding sugar, and freeze-dried fruit powders. Provide contrast with flaky sea salt. For advanced techniques, set up a drizzling station with squeeze bottles of contrasting colored melts. Teach the marbling technique: dip a cookie in white chocolate, then immediately drag a forkful of dark chocolate through it. The key is an efficient, organized station that invites creativity without chaos.
Threat Management: Preventing a Sticky Situation
Adopt a proactive host’s mindset. Anticipate problems and engineer them out of existence.
Prevention: The First Line of Defense
Your greatest tool is meticulous mise en place. Have every topping pre-portioned, every tool laid out, and backups within reach. Enforce the “one fork per guest, per pot” rule to prevent flavor muddling—color-code forks if necessary. Place small trash bowls for used skewers and wet cloths at strategic intervals for quick finger-wiping. This invisible preparation is what allows visible, effortless fun.
Intervention: Solving Common Dipping Dilemmas
Despite best efforts, issues arise. Identify and act swiftly. Seized Chocolate: It appears grainy and thick. Immediately remove from heat and stir in a teaspoon of warm oil or shortening until smooth. Grainy Icing: Often from undissolved sugar. Whisk in a few drops of hot water or simple syrup. Soggy Cookies: A sign of improper draining or a too-thin cookie. Remove the batch, provide a sturdier alternative, and ensure your draining zone has proper airflow. Have a backup batch of melt ready to deploy if a fix fails.
The Action Plan: Your Holiday Countdown Calendar
Follow this phased roadmap to execute your station with calm, strategic precision.
| Phase | Primary Tasks | What to Focus On |
|---|---|---|
| 1-2 Weeks Before | Bake and freeze sturdy, dip-friendly cookies. Procure or confirm fondue pots, utensils, and platters. Source high-quality chocolate, candy melts, and toppings. | Foundation and procurement. Do a test melt to check consistency and flavor. |
| 2-3 Days Before | Thaw cookies. Portion all toppings into small serving bowls. Create infusion plans and pre-measure any flavorings or oils. | Organization and advanced prep. Visualize and set up your decoration station layout. |
| Day Of / Setup | Set up the physical table layout with clear zones. Melt coatings using proper tempering or low-heat methods. Arrange cookies, toppings, and utensils in the planned logical flow. | Final assembly and temperature management. Creating an inviting, intuitive path through your Christmas Cookie Dipping Fondue Station. |
| During the Event | Monitor pot temperatures with your thermometer. Gently stir melts every 15 minutes. Replenish toppings and cookies before they empty. Circulate and encourage creativity. | Hosting and system facilitation. Your role shifts from builder to conductor, keeping the symphony of dipping running smoothly. |
From Chaotic Crumbs to Culinary Centerpiece
The magic lies in the balance: the rigorous control of your systems granting the freedom for pure creative joy. You have journeyed from selecting the right pot to orchestrating an interactive masterpiece. The chaotic cookie swap is now a distant memory, replaced by the vibrant scene you engineered—a room alive with laughter, focused creativity, and the shared, unparalleled joy of a perfectly dipped, personalized treat. Mastering this station is more than a hosting tactic; it is a gift that transforms tradition and enriches your holiday, one delicious, glittering bite at a time.
Related Articles
- Summer BBQ Fondue: Grilled Meats and Outdoor Fondue Ideas
- Outdoor Winter Fondue Parties: Heating and Setup Tips
- Fondue and Game Night Pairings: Best Board Games for Fondue Parties
- Diabetic-Friendly Fondue: Sugar-Free Chocolate and Low-Glycemic Dippers