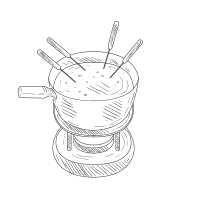
Protein-Packed Fondue for Athletes and Fitness Enthusiasts


Protein-Packed Fondue for Athletes and Fitness Enthusiasts: The Ultimate Recovery Feast

You know the feeling. You’ve just crushed a heavy lift or finished a punishing metcon. Your muscles are signaling their urgent need for fuel, but the thought of another bland meal or gritty shake is utterly demotivating. This post-exercise letdown is where recovery protocols fail. Now, imagine a different scene: a simmering pot of savory, protein-rich fondue at the center of your table, surrounded by vibrant, crisp vegetables and lean meats. This isn’t indulgence; it’s strategic nutrition. Mastering Protein-Packed Fondue is the key to transforming obligatory refueling into a high-performance ritual. It turns precise nutrient timing into a customizable, social, and deeply satisfying feast that accelerates recovery and reignites culinary joy.

The Foundation: Building Your Performance Fondue Pot

Your equipment and base ingredients form the non-negotiable hardware of this system. The right choices here determine everything from protein quality to meal consistency.

Pot Selection: Fueling Your Fire

Your pot is your command center. For consistent, safe heat, an electric fondue pot is superior. It maintains a steady, low temperature crucial for preventing proteins from overcooking or separating. A 2-quart size is perfect for 1-2 athletes; opt for 3-4 quarts for a post-team-training gathering. Traditional ceramic pots over a flame require constant vigilance and are better suited for stable oil fondues, not our delicate protein-based emulsions.

The Core Liquid: Choosing Your Protein-Packed Base

This is your foundational macro source. Select based on your dietary strategy and recovery window.

  • Bone Broth or Collagen-Infused Broth: My top recommendation. It provides 8-10g of protein per cup, is rich in glycine for joint recovery, and is incredibly light and digestible. Ideal for late-evening recovery.
  • Greek Yogurt & Skim Milk Base: A powerhouse blend. Thick, strained Greek yogurt mixed with milk can deliver 20+ grams of protein per cup. It creates a creamy, tangy fondue perfect for post-workout when casein’s slow release is beneficial.
  • Lentil or White Bean Purée: The plant-based champion. Blended legumes create a thick, velvety base packed with protein and complex carbohydrates for dual-phase glycogen and muscle repair.
Component Category Options Key Characteristics
Base Liquid Bone Broth; Greek Yogurt/Milk; Legume Purée • Bone Broth: High in collagen, ultra-digestible, excellent for hydration.
• Greek Yogurt/Milk: Highest protein density, creamy texture, rich in calcium.
• Legume Purée: High in fiber and complex carbs, vegan-friendly, very satiating.
Thickener Cornstarch; Tapioca Flour; Pureed Vegetables • Cornstarch: Neutral flavor, creates a glossy finish, use sparingly (1 tbsp per cup).
• Tapioca Flour: Creates a stretchy, stable texture, good for dairy-free bases.
• Vegetable Purée (cauliflower, white beans): Adds micronutrients and fiber, boosts volume.
Primary Protein Add-Ins Diced Chicken Breast; Extra-Firm Tofu; Shrimp; Lean Ground Turkey • Diced Chicken: Lean, versatile, cooks quickly in the hot base.
• Extra-Firm Tofu: Excellent plant-based carrier, absorbs flavors, high in calcium.
• Shrimp: Very low-fat, provides iodine and selenium, cooks in seconds.

The Macronutrient Matrix: Engineering the Perfect Dip

Fondue is not a free-for-all. It’s a precision-engineered delivery system for recovery nutrients. You control every macro that goes into the pot and onto your fork.

Protein: The Recovery Catalyst

Prioritize lean, fast-digesting proteins like chicken, turkey, or white fish directly in the pot for immediate muscle synthesis. For a longer-lasting anabolic effect, incorporate a slow-digesting element like cubed, marinated tempeh or use a Greek yogurt base. Aim for a minimum of 30-40 grams of total protein in the fondue pot itself for a complete meal.

Fats & Carbs: The Balancing Act

Healthy fats are for satiety and hormone function—add them via a swirl of avocado oil into the base or through dippers like avocado slices. Carbohydrates are for glycogen. Your dipping vessels are the perfect vehicle: sweet potato cubes, whole-grain sourdough bread, or par-cooked potato wedges. This separation allows you to customize each bite’s carb ratio based on your session’s demands.

Flavor Without Compromise

Throw out the high-sodium flavor packets. Build depth with aromatics: sautéed garlic, onion, and ginger added to the base. Use robust herbs like rosemary, thyme, and smoked paprika. Acid is your secret weapon—a splash of lemon juice or apple cider vinegar brightens the entire pot and can enhance mineral absorption from your vegetable dippers.

Advanced Dipping Strategy: From Ingredients to Optimization

This is where culinary skill meets nutritional science. What you dip is as critical as what you dip into.

Dipping Vessel Preparation

Don’t dip raw, cold vegetables. Blanch your broccoli, cauliflower, and green beans for 60 seconds in boiling water, then shock in ice water. This softens fiber for easier digestion, sets vibrant color, and ensures a warm bite. For lean meat dippers like steak strips, pre-sear them quickly to develop flavor and guarantee food safety—the fondue pot then just warms them through.

The Dipping Protocol

Sequence your eating for maximum efficiency. Start with a protein-focused bite: a piece of chicken from the pot. Follow with a carb-replenishing bite: a sweet potato cube dipped in the protein-rich base. Finish with a fat-and-fiber bite: an avocado slice on a pepper strip. This rotational method ensures a steady stream of mixed macros, mimics a “balanced plate,” and keeps your palate engaged.

Strategic Variety

Plan your dipper spread like you plan your training week. Cover the micronutrient spectrum: red bell peppers for vitamin C (aids iron absorption), dark leafy greens for magnesium (supports muscle relaxation), and mushrooms for selenium (antioxidant support). This variety prevents flavor fatigue and delivers a broad spectrum of recovery co-factors.

Threat Management: Preventing Performance Pitfalls

Proactive control prevents ruined meals and wasted nutrients. Your goal is a flawless, safe, and effective fondue every time.

Prevention: The First Line of Defense

Temperature control is paramount. Keep your electric pot between 160-180°F (71-82°C). This is hot enough to keep food safe and proteins fluid, but not so hot that they coagulate into rubbery bits. To manage sodium, use low-sodium broths and rely on the natural umami from mushrooms, nutritional yeast, and the fondue’s own reduced proteins.

Intervention: Quick Fixes for Common Issues

If a cheese or yogurt base “breaks” and becomes grainy, immediately remove from heat and whisk in an ice cube or a tablespoon of cold lemon juice. The rapid cooling can re-emulsify the fats. For a broth that’s too thin, create a “slurry” by mixing a tablespoon of your chosen starch with two tablespoons of cold broth, then whisk it vigorously into the simmering pot. It will thicken in under a minute.

Season/Training Phase Primary Tasks & Recipes Nutritional Focus
Winter/Off-Season Strength Hearty Greek Yogurt & Herb Fondue with lean beef and root vegetables. Use full-fat yogurt for sustained energy. Higher caloric density, increased healthy fats for hormone support, emphasis on muscle repair.
Spring/Pre-Season Conditioning Light Lemon-Herb Chicken Broth Fondue with shrimp, asparagus, and artichokes. Lean protein, hydration, anti-inflammatory ingredients. Lower calorie, high-volume vegetables.
Summer/Peak Performance Quick-digesting Whey-Infused Tomato Broth Fondue with cod and zucchini noodles. (Stir unflavored whey isolate in at the end, off heat). Rapid protein synthesis, high-electrolyte hydration via broth, easy digestion before competition.
Fall/Recovery & Transition Immune-supportive Turmeric Ginger Bone Broth Fondue with turkey and roasted squash. Gut health, collagen for joint recovery, spices for immune modulation and reducing systemic inflammation.

The journey from a simple pot to a mastered performance feast redefines what it means to eat for results. This is the transformation on your plate: a meal that is simultaneously analytical and joyful, solitary or communal. It proves that discipline does not require deprivation. The profound satisfaction comes not just from optimized recovery, but from the shared experience of a meal that tastes like victory. It turns the daily discipline of refueling into a sustained delight, enriching your fitness journey with flavor, community, and unparalleled nutritional precision.


Related Articles

Try Our Free Tool: Use our Fondue Recipe Generator to generate a fondue recipe that fits your dietary needs.

Lactose-Intolerant Fondue Solutions: Best Dairy-Free Cheeses


The Ultimate Guide to Lactose-Intolerant Fondue Solutions: Best Dairy-Free Cheeses

Imagine the scene: a convivial table, laughter in the air, and a communal pot of creamy, bubbling fondue at its heart. Now, picture the quiet disappointment of having to pass the pot, sidelined by lactose intolerance. That era of exclusion is over. The belief that rich, melty, communal fondue is forever off-limits is a culinary myth. Mastering the selection and use of the best dairy-free cheeses is the foundational key to creating a flawless, inclusive fondue experience that rivals—and often surpasses—any traditional version. This guide is your blueprint for reclaiming the shared pot.

Foundational Choices: The Dairy-Free Cheese Arsenal

Your fondue’s destiny is decided before the pot even warms. The cheeses you choose form the immutable foundation for texture and flavor. Think of this not as finding a single substitute, but as assembling a versatile toolkit where each component has a specific role.

Part A: Selection by Profile – Flavor and Function

Do not grab the first vegan block you see. Select cheeses with intention. Choose a sharp, aged cheddar-style cheese for depth and tang. Pick a creamy Gouda or mozzarella-style for superior melt and stretch. For complex, restaurant-quality nuance, incorporate a nut-based cheese. Each profile serves a distinct purpose in your final blend.

Part B: The Art of the Blend

Using a single dairy-free cheese is the most common beginner mistake. Blending two or three varieties is non-negotiable. A blend balances flavors, masks any individual aftertastes, and combines melting properties to create a cohesive, luxurious texture. I never make fondue with less than two cheeses.

Part C: Material Breakdown – The Core Categories

Understanding the base ingredients of your dairy-free cheeses is critical for predicting their behavior in the pot. Here is your essential comparison guide.

Category Common Options Key Characteristics for Fondue
Coconut Oil-Based Daiya, Violife, Follow Your Heart Melts reliably and smoothly; widely available; has a neutral base flavor. Can become oily if overheated or used alone. Best when blended.
Nut & Seed-Based (Cashew, Almond) Miyoko’s Creamery, artisanal brands, homemade Offers rich, creamy, and complex flavors; feels more “authentic.” May require extra starch for thickening. Provides a premium, gourmet result.
Starch & Vegetable-Based (Potato, Tapioca) Specific vegan “fondue” kits, some store brands Engineered for exceptional melt and stretch; often very stable. Flavor can be mild, requiring aggressive seasoning. Excellent for texture.

The Core System: Mastering Melt and Consistency

A perfect fondue is not a static sauce; it is a dynamic emulsion you actively manage. You control three critical variables: heat, liquid, and binders. Master this system, and you master the pot.

Variable 1: Heat Management

Ideal Target: Low, consistent, indirect heat.
Consequence of Error: High or direct heat is the enemy. It causes proteins and oils to separate, creating a greasy, broken, or burned mess.
Control Method: Always use a fondue pot with a tea light or a double boiler on the stove. The fondue should never boil—just maintain a gentle, steady warmth.

Variable 2: Liquid and Acidity Balance

Ideal Target: A smooth, cohesive emulsion that coats the back of a spoon.
Consequence of Error: Using water or the wrong liquid leads to a grainy, seized texture. The cheese will not integrate properly.
Control Method: Use an acidic, flavorful liquid as your base. A dry white wine, lager beer, or even vegetable broth with a squeeze of lemon juice provides necessary acidity for a smooth melt. Incorporate your grated cheese into the warm liquid gradually, one handful at a time.

Variable 3: The Essential Binders

Ideal Target: A velvety, stable sauce that clings to bread without being gluey.
Consequence of Error: Without a binder, your fondue may remain thin, separate, or fail to achieve the classic fondue “drape.”
Control Method: This is your secret weapon. Toss your grated dairy-free cheese with one tablespoon of cornstarch or tapioca flour per cup of cheese before adding it to the pot. Alternatively, start with a simple roux (butter and flour) for your base. This step is mandatory for professional results.

Advanced Practices: Optimization for Superior Flavor

Once you control the melt, shift your focus to the art of flavor. This is where your fondue transforms from good to unforgettable.

Preparation: The Flavor Foundation

Do not just heat liquid. Build a foundation. First, rub your pot with a cut garlic clove. Then, sauté finely minced shallots or garlic in a little vegan butter or oil. Deglaze with your chosen liquid, allowing it to reduce slightly. This creates a profound depth of flavor that pre-packaged sauces cannot match.

Ongoing Inputs: The Stirring and Seasoning Protocol

Constant, gentle stirring in a figure-eight motion is non-negotiable law. It ensures even heating and emulsification. Dairy-free cheeses often need bold seasoning. After emulsifying, season aggressively. A quarter teaspoon each of mustard powder and smoked paprika, a pinch of nutmeg, and a tablespoon of nutritional yeast for umami will elevate your blend dramatically.

Selection and Strategy: Building Complexity

Here is a fail-safe strategy for a classic, crowd-pleasing blend. Use a ratio of: 1 part sharp vegan cheddar-style (for body and tang) + 1 part creamy vegan Gouda or mozzarella-style (for melt and stretch) + ½ part nutritional yeast or a nut-based parmesan (for savory, umami depth). This combination provides balance, flavor, and perfect texture every time.

Threat Management: Preventing and Solving Common Issues

Adopt a proactive stance. Perfect technique prevents most problems, but have a rescue plan ready.

Prevention: The Rules of the Pot

Your first defense is procedure. Always use low heat. Shred or grate all cheese finely and bring it to room temperature. Have all your ingredients measured and ready. A calm cook makes a calm fondue.

Intervention: The Rescue Plan

Problem: Grainy Texture.
Solution: Immediately remove from heat. Add a splash of hot liquid (wine, broth) and use an immersion blender for 10-15 seconds to re-emulsify.

Problem: Oil Separation.
Solution: Take the pot off the heat. Combine a teaspoon of starch with a tablespoon of cold water to make a slurry. Whisk this vigorously into the fondue.

Problem: Too Thick.
Solution: Thin gradually with small additions of warm (not hot) liquid, whisking thoroughly between each addition until the desired consistency is reached.

The Action Plan: Your Fondue Journey Calendar

Follow this phased roadmap for a seamless, stress-free fondue experience from planning to the last delicious dip.

Phase Primary Tasks What to Focus On
Prep & Selection Choose your 2-3 cheese blend. Grate all cheese finely. Measure starch, liquid, and seasonings. Prepare dippers. Mise en place. Having every component prepared and within reach is 90% of your success. This phase prevents panic.
Cooking & Emulsifying Heat liquid with aromatics. Gradually add starch-tossed cheese, one handful at a time, stirring constantly. Adjust final seasoning. Patience and rhythm. Slow, steady incorporation creates the stable emulsion. Rushing causes breakage.
Serving & Sustaining Transfer to a fondue warmer. Provide diverse dippers (bread, veggies, apples). Stir occasionally at the table. Community and consistency. Your goal is to maintain the perfect dipping texture for the entire, joyful meal.

The journey from cautious exclusion to confident hosting is complete. The core principle is clear: mastery over melt and flavor comes from informed cheese choice and precise technique. You are no longer working around a limitation; you are engineering a superior, inclusive experience. The profound joy now is in gathering everyone around the shared pot, knowing you offer unparalleled lactose-intolerant fondue solutions with the best dairy-free cheeses. You have not just reclaimed a dish—you have transformed your table into a place of connection and delicious, guilt-free memory.


Related Articles

Try Our Free Tool: Use our Fondue Cheese Pairing Guide to discover the best cheese combinations for your fondue.

Gluten-Free Fondue Party: Safe Ingredients and Cross-Contamination Tips


The Ultimate Gluten-Free Fondue Party: Your Guide to Safe, Shared Indulgence

Picture the perfect gathering: a bubbling pot at the center of the table, laughter in the air, and the simple joy of shared food. Now, imagine the subtle tension as a guest hesitates, unsure if this communal feast is safe for them. That moment of anxiety is the barrier between a good party and a great one. It is also completely unnecessary. Transforming fondue—the quintessential shared meal—into a secure, inclusive experience is not just possible; it is your gateway to becoming a host of unparalleled confidence and care. The key lies in a single, non-negotiable principle: mastering safe ingredients and rigorous cross-contamination protocols is the foundation for a flawless, worry-free gluten-free fondue party that delights every single guest.

Part 1: The Foundation – Selecting and Sourcing Safe Ingredients

Your ingredients are the hardware of your party. Just as you would not build a house on sand, you cannot build a safe fondue experience on uncertain components. This step is non-negotiable. Every item you select must pass a strict verification process, creating a trusted inventory from which to build.

The Core Components – Cheese, Chocolate, and Broth

The fondue pot’s contents set the stage. A single misstep here compromises the entire event. For cheese fondue, thickeners are the critical variable. You must use cornstarch or potato starch. Traditional recipes calling for wheat flour are off-limits. Your wine or kirsch must be verified gluten-free, as some processing methods can introduce gluten. With chocolate fondue, purity is paramount. Choose pure chocolate bars or chips labeled gluten-free. Avoid compound coatings or “dipping chocolates,” which often contain wheat-based stabilizers. For a broth or oil fondue (like Fondue Bourguignonne), start with certified gluten-free broths and pure, high-heat oils like avocado or peanut oil.

The Dipping Arsenal – Breads, Proteins, and Produce

This is where your strategy becomes tangible. The bread dilemma is your central challenge. Sourcing a high-quality, dedicated gluten-free baguette or loaf is essential. I always toast my gluten-free bread cubes lightly; it provides crucial structural integrity for dipping. For proteins and produce, focus on naturally gluten-free whole foods: apple slices, pear chunks, blanched broccoli, cherry tomatoes, and cubed steak or chicken. Prepare all these items on your clean, dedicated gluten-free workspace.

Ingredient Verification – The Trust-But-Verify System

Assume nothing. Read every label, every time. This checklist is your pre-party audit tool.

Component Category Safe Choice Examples Red Flags & Hidden Gluten
Cheese Block cheese shredded at home, cheeses labeled gluten-free. Pre-shredded cheese (anti-caking agents like wheat starch), beer-washed rinds.
Dipping Bread Certified GF baguette, homemade GF bread cubes. Bread from a shared bakery case, croutons, stuffing cubes.
Condiments & Sauces Tamari (GF soy sauce), pure mustard, single-ingredient spices. Soy sauce, malt vinegar, pre-made marinades, spice blends.
Broth & Stock Certified gluten-free broths, homemade stock. Unlabeled bouillon cubes or powders, canned broths without a GF claim.

Part 2: The Control System – Mastering Cross-Contamination Protocols

With safe ingredients secured, you now shift to active environmental management. Your kitchen and dining area become a controlled system where you maintain a pristine gluten-free zone. This is where confidence is operationalized.

Control Variable 1: The Dedicated Workspace

Before any prep begins, deep-clean all countertops, drawers, and handles. Designate specific, clearly marked tools for gluten-free work only. I use a green cutting board and knives with green tape on the handles. These tools do not touch gluten for the entire event lifecycle, from prep to cleanup.

Control Variable 2: The Serving Ritual

This is your most critical control point. Enforce the “One Pot” Rule: the fondue pot itself, its fuel source, and the spoon or fork used to stir it must be 100% gluten-free. There are no exceptions. For serving, provide your gluten-free guests with distinctly colored plates and fondue forks. Verbally establish the “Dip Once” rule: once a piece of food touches a fondue fork, it goes straight to the guest’s plate. It must never re-enter the communal pot.

Control Variable 3: Guest Management

Clear communication prevents accidents. When inviting guests, kindly note you are hosting a gluten-aware fondue and ask about dietary needs. During the party, a simple, friendly reminder as you pass out the color-coded forks—”Green forks for our gluten-free dippers, please!”—sets a clear, positive tone. Arrange seating and the dipping station layout to create natural separation between gluten-free and gluten-containing items.

Part 3: Advanced Practices – Optimization for Flavor and Flow

With safety locked down, you can focus on the art of the party—elevating flavor and ensuring seamless enjoyment.

Preparation & Flavor Layering

Go beyond store-bought. Making your own gluten-free bread cubes from a sturdy recipe gives you superior texture and flavor. For a broth fondue, infuse your oil with rosemary and garlic beforehand. These small touches signal deep care and result in a markedly better experience.

The Dipping Station Strategy

Do not mix dippers. Create two logically organized platters: one exclusively for gluten-free items, another for any gluten-containing breads others may bring. Place the gluten-free platter closest to the fondue pot and the gluten-free guest. Curate complementary flavors: crisp apples with cheese fondue, pineapple with chocolate, mushrooms with broth.

Beverage and Accompaniment Pairing

Complete the experience with safe, thoughtful pairings. Offer gluten-free beers, ciders, or wines. Have a bowl of certified gluten-free crackers or pretzels on the side for those who want an extra crunch. This attention to detail ensures every element of the party is considered.

Part 4: Threat Management – Proactive Problem Solving

Adopt the mindset of a safety engineer. Your goal is to design failures out of the system before the party begins.

Prevention: The Pre-Party Audit

Conduct a final sweep. Check every condiment bottle. Transfer shared items like mustard or ketchup into squeeze bottles to prevent knife-double-dipping. Enforce a “clean spoon for every dish” rule for side sauces. This eliminates the most common vectors for accidental gluten introduction.

Intervention: The “What If” Plan

Have a contingency. Keep a small plate of dedicated gluten-free snacks—cheese, fruit, nuts—in reserve. If a guest accidentally contaminates a fork or plate, you can calmly replace it without fuss. Practice a polite, firm correction: “Oh, let me grab you a green fork for that—this one is for the gluten-free dippers!” This protects your guest while maintaining the party’s flow.

Part 5: The Action Plan – Your Gluten-Free Fondue Party Timeline

This phased roadmap turns planning into a simple, stress-free process.

Phase/Time Primary Tasks Focus On
1 Week Before Source GF bread & verify all labels. Confirm GF status of wines/spirits. Communicate with guests about dietary needs. Ingredient Sourcing & Communication
Day Before Deep clean kitchen surfaces. Label GF-only utensils and cutting boards. Prep GF dippers (cube bread, chop veggies). Environment Control & Prep
Party Day (Setup) Set up physically separated dipping stations. Place color-coded plates & forks. Do a final condiment check. Guest Communication & Spatial Flow

The transformation is complete. You have moved from anxiety to authority, from worry to welcome. By marrying joyful sharing with rigorous safety protocols, you unlock the true potential of gathering around a shared pot. The profound satisfaction comes not just from a delicious meal, but from the knowledge that you have created a space where connection is the only thing everyone shares. The laughter is easier, the conversation flows freely, and the fondue pot becomes a symbol of your confidence and care—a centerpiece that truly serves all.


Related Articles

Try Our Free Tool: Use our Fondue Party Planner to plan your perfect fondue party with a custom shopping list, equipment checklist, and timeline.

Keto-Friendly Fondue Recipes: Low-Carb Dipping Options


Reclaiming the Shared Feast

You know the scene. A bubbling pot of cheese or glossy chocolate sits at the center of the table, surrounded by laughter and platters of bread and fruit. For a moment, it feels like everyone is connected—except you. Your commitment to keto leaves you with an empty fork and a sense of isolation. That moment ends now. Fondue, the ultimate communal dish, does not belong to carbohydrates alone. With intelligent adaptation, it becomes the perfect keto-friendly centerpiece: decadent, deeply satisfying, and inherently social. Mastering keto-friendly fondue recipes and low-carb dipping options is the key that unlocks guilt-free indulgence. It transforms a potential diet pitfall into your most impressive culinary asset, turning exclusion into invitation.

The Foundation: Crafting Your Keto Fondue Pot

Every masterpiece requires the right tools and materials. Your fondue pot and its contents are the essential hardware. The choices you make here form the unshakable foundation for a successful, stable, and delicious experience. We will break down the core components, from selecting the ideal base to understanding the philosophy of the perfect dip.

Part A: Selecting Your Fondue Base

The base is your canvas. For cheese fondue, choose aged, naturally low-carb cheeses that melt into velvety smoothness. Classic Gruyère and Emmental are perfect, complemented by a sharp aged cheddar for depth. Use a dry white wine or a rich bone broth as your liquid acid, and thicken with a pinch of xanthan gum instead of flour. For chocolate fondue, select a high-cacao, sugar-free chocolate bar (85% or higher). Create a luxuriously silky base with heavy cream and a pat of butter or coconut oil for flawless consistency.

Part B: The Dipping Vehicle Philosophy

Abandon the notion of empty carbohydrate vessels. On keto, your dippers are nutrient-dense components that actively enhance the meal. They provide structural integrity, contrasting textures, and complementary flavors. Think of them as edible utensils designed to deliver joy and fuel.

Part C: Material & Component Guide

Fondue Type Core Ingredients Key Characteristics Ideal Low-Carb Pairing
Classic Cheese Gruyère, Emmental, Dry White Wine, Garlic, Xanthan Gum Savory, nutty, and rich; requires constant gentle heat; wine adds acidity that prevents stringiness. Crunchy vegetables, pepperoni chips, chaffle wedges.
Decadent Chocolate Sugar-Free Dark Chocolate, Heavy Cream, Butter, Vanilla Extract Deep, bittersweet, and luxuriously smooth; sensitive to high heat which can cause seizing. Fresh berries, keto brownie bites, toasted coconut clusters.
Savory Garlic-Herb Cream Cheese, Heavy Cream, Parmesan, Roasted Garlic, Fresh Herbs Creamy, pungent, and versatile; a thicker base that clings well; easy to customize with herbs. Grilled chicken skewers, crisp bacon strips, celery hearts.

The Dipping Pantheon: Your Low-Carb Arsenal

This is where your keto fondue transcends imitation and achieves excellence. Build a system of textures and flavors from these categories to create a visually stunning and satisfying spread.

The Crunch Factor: Vegetable Crudités

Choose vegetables with structural integrity and mild flavors that won’t overpower the fondue. Radishes, halved Belgian endive leaves, thick strips of bell pepper, and broccoli florets are champions. For a flavor boost, quickly pickle cucumber slices or asparagus spears in apple cider vinegar for 30 minutes to add a bright, tangy contrast.

Savory & Substantial: Meat and Protein Vessels

Turn proteins into edible spoons. Bake pepperoni slices until crisp for salty chips. Create sturdy bacon strips or weave them into cups. Skewer bite-sized pieces of grilled chicken or seared steak. These dippers add heft and make the fondue a complete, macro-balanced meal.

Rich and Decadent: Fat-Based Dippers

Incorporate keto baking triumphs. Chaffles (cheese and egg waffles) cut into wedges offer bread-like satisfaction. Cloud bread, while delicate, provides a soft, pillowy vehicle. Simple Parmesan crisps baked until golden deliver an intense, crunchy cheese-on-cheese experience.

Sweet Endings: Dessert Fondue Companions

For chocolate fondue, focus on low-sugar fruits and keto treats. Raspberries, blackberries, and strawberries are classic. Add homemade keto brownie bites, clusters of toasted nuts and coconut flakes, or mini cheesecake fat bombs for an unforgettable dessert experience.

Advanced Execution: Balancing Flavor and Macros

With your components selected, the art and science of perfect execution begins. This is where you move from following a recipe to commanding the process.

Preparation & Technique: Preventing Breakage and Seizing

For cheese fondue, always grate your cheese finely and toss it with your xanthan gum. Heat your wine or broth gently, then add the cheese in small handfuls, stirring constantly in a figure-eight pattern until melted before adding more. This ensures a smooth, stable emulsion. For chocolate, chop it uniformly. Heat the cream until just simmering, pour it over the chocolate, let it sit for two minutes, then stir gently from the center outward to achieve a glossy temper.

Flavor Optimization: Herbs, Spices, and Enhancers

Elevate your base with strategic additions. A teaspoon of Dijon mustard or a dash of nutmeg deepens cheese fondue. For chocolate, a pinch of espresso powder intensifies the cocoa notes, or a tablespoon of sugar-free peanut butter or a splash of rum extract adds complexity. Always taste and adjust.

Strategic Serving: Layout and Logistics

Arrange your dippers on a large board or platter by category—crunchy vegetables together, proteins in their own section, sweet items grouped. This creates visual appeal and allows guests to intuitively navigate their macro choices. Keep fondue pots over stable, low heat sources to maintain perfect consistency throughout the meal.

Threat Management: Common Pitfalls and Solutions

Adopt a proactive stance. The most common fondue issues are preventable, and when they occur, they are almost always fixable.

Prevention: The Keys to Consistency

Your greatest allies are low, even heat and constant stirring. High heat is the enemy, causing cheese to become rubbery and oil to separate, and chocolate to seize into a grainy mass. Use a fondue pot or a heavy saucepan over the lowest possible flame that maintains a gentle bubble. Stir frequently to distribute heat evenly.

Intervention: Saving a Broken Fondue

If your cheese fondue separates, immediately remove it from heat. Add a tablespoon of cold cream or lemon juice and whisk vigorously. It will often re-emulsify. For a seized chocolate fondue, remedy it by whisking in a tablespoon of warm cream or coconut oil at a time until smoothness returns. Do not add more liquid all at once.

The Keto Fondue Year: A Seasonal Action Plan

Season Fondue Focus Featured Low-Carb Dippers
Spring Herbed Goat Cheese & Lemon Blanched asparagus, sugar snap peas, radish roses, grilled lamb bites.
Summer Cool Buffalo Blue Cheese Celery sticks, cucumber rounds, chilled grilled chicken strips, cauliflower florets.
Fall Sharp Cheddar & Stout (using keto-friendly beer) Roasted Brussels sprout halves, sautéed mushroom caps, sausage coins, chaffle wedges.
Winter Dark Chocolate & Orange Spice Pomegranate arils (sparingly), keto gingerbread cookies, toasted pecans, starfruit slices.

The Mastered Centerpiece

With this framework, keto-friendly fondue recipes and low-carb dipping options cease to be a novelty and become second nature. You have journeyed from feeling restricted at the table to confidently hosting its most sought-after dish. You now command the foundation, curate the perfect dipping arsenal, execute with flawless technique, and navigate any challenge with ease. The final vision is one of profound satisfaction: gathering friends and family around a shared pot, the warm glow of the flame reflecting in their eyes, fully participating in the laughter and connection without a single compromise. This is the effortless elegance of mastery, enriching your life one delicious, communal dip at a time.


Related Articles

Try Our Free Tool: Use our Fondue Dipping Ingredients Selector to find the perfect dipping combinations for your fondue.

Greek Saganaki-Style Flambé Fondue


From Simple Appetizer to Culinary Spectacle

You place a cheese plate on the table. It’s polite. It’s fine. But it doesn’t command the room. Now, imagine the alternative: the hiss of cheese hitting a blistering pan, the dramatic flare of a blue flame, and the triumphant presentation of a sizzling, aromatic masterpiece that draws everyone in. This transformation is not reserved for restaurant kitchens. It is achieved by mastering the technique of Greek Saganaki-Style Flambé Fondue.

This method moves far beyond a recipe. It is a precise culinary operation where heat management and fearless execution unlock incredible flavor. Understanding the core principles of cheese science, pan thermodynamics, and controlled combustion is your key to consistently creating a show-stopping, authentic experience that turns eating into an event.

Foundational Choices: The Cheese and Vessel

Your initial selections form the bedrock of this dish. The right cheese and pan determine its structural integrity, final texture, and theatrical potential. Compromise here, and you compromise the entire spectacle.

Part A: Cheese Selection and Preparation

The guiding principle is simple: choose a cheese that confidently holds its shape under intense heat while melting into a luscious, creamy interior. Soft, young cheeses will dissolve into a greasy puddle. You need a warrior of a cheese.

Kasseri is the authentic choice—a semi-hard sheep’s milk cheese with a perfect balance of salinity and melt. Halloumi is famously resilient, offering a satisfying squeak. Kefalograviera provides a sharper, robust flavor. For a more accessible option, a firm, low-moisture mozzarella block works surprisingly well.

Preparation is non-negotiable. Slice into ½-inch thick slabs. Pat them completely dry with paper towels. A light dredge in all-purpose flour creates a superior golden crust by absorbing surface moisture and promoting Maillard browning.

Part B: The Critical Cooking Vessel

This is not a job for a non-stick skillet or a ceramic dish. You require a small, heavy-gauge metal pan. A traditional two-handled saganaki pan is ideal, but a 6-8 inch cast iron or stainless steel skillet is perfect.

The material matters for thermal mass. It must get screaming hot and stay hot when the cold cheese hits it, ensuring a proper sear. This heavy vessel is also your safety tool, containing the flambé flame securely.

Part C: Flambé Fuel & Flavor Agents

These components dictate the flavor profile and the reliability of your flame. Choose with purpose.

Component Options Key Characteristics
High-Proof Spirit Ouzo, Metaxa, Brandy, 80-proof+ Vodka Ouzo is authentic, imparting a distinctive anise flavor. Metaxa (a Greek spirit brandy) adds aromatic warmth. Brandy offers rich, caramel notes. Vodka is a neutral, reliable choice. All must be at least 80-proof (40% ABV) to ignite properly.
Aromatic Fat Extra Virgin Olive Oil, Butter, or a combination Olive oil provides authentic Greek flavor and a high smoke point for the sear. Butter contributes richness and color but can burn more easily. I often use a mix: oil for heat stability, with a small pat of butter for flavor.

The Core System: Heat Management and Flambé Control

This dish is a rapid-fire sequence of precise thermal stages. Mastery lies in commanding the transition from sear to flame to finish.

Variable 1: The Sear – Creating the Foundation

Target: A rippling-hot pan (over medium-high to high heat) that creates a deep golden-brown crust in 60-90 seconds per side, without fully melting the cheese core.

Consequence of Error: A pan that’s too cool yields a pale, greasy, and limp cheese. One that’s overcrowded steams instead of sears. You lose the essential textural contrast.

Control: Heat your dry pan for 2-3 minutes until a drop of water sizzles and vanishes instantly. Add your fat, let it shimmer, then add the cheese. Do not move it. Let the crust form. Peek at the edges for color, then flip decisively.

Variable 2: The Flambé – The Controlled Burn

Target: A quick, dramatic flame that burns for 10-20 seconds, combusting the alcohol, caramelizing any sugars, and leaving behind concentrated flavor.

Consequence of Error: Adding spirit to an active heat source can cause a dangerous flare-up. Using low-proof liquor results in a raw, boozy taste without the visual drama.

Control: This is your moment of command. Remove the pan from the heat source entirely. Pour in your pre-measured spirit (about 1-2 tablespoons) at the pan’s edge, not directly on the cheese. Carefully tip the pan toward the flame of your burner to ignite, or use a long-reach lighter. The flame will travel across the surface. Let it die out naturally—do not blow it out.

Advanced Practices: Flavor Optimization and Presentation

Now, shift from basic execution to crafting a memorable, shareable experience. This is where you imprint your personal touch.

Preparation and Flavor Layering

Infuse your cooking fat for an aromatic base. Add a smashed garlic clove and a pinch of red pepper flakes to the cool oil, then heat them together until fragrant before adding the cheese. Remove the garlic before it burns.

The finishing touch is non-negotiable: a generous squeeze of fresh lemon juice applied after the flambé. The bright acid cuts through the richness, elevating the dish from heavy to sublime.

The Fondue Transformation

To evolve from individual *saganaki* to a communal fondue, simply scale up your vessel. Use a 10-inch skillet. Sear multiple cheese portions. After the flambé, immediately add a liquid—a splash of dry white wine, chicken broth, or even a touch of cream—and stir vigorously. The melted cheese will emulsify into a gloriously creamy, dippable sauce. Serve instantly with crusty bread, sliced apples, and pear.

Threat Management: Problem Prevention and Solution

Adopt a proactive stance. Confidence at the stove comes from knowing how to prevent and solve issues before they spoil the show.

Prevention: Safety and Texture

Tie back long hair. Roll up sleeves. Keep a metal lid or baking sheet nearby to smother any runaway flames. Ensure your cheese is thoroughly patted dry—this is the single biggest factor in achieving a proper sear instead of a steam.

Intervention: Common Issues

Problem: Cheese won’t brown; it just sweats oil.
Solution: Your pan is not hot enough. Let it preheat longer. Also, double-check that the cheese surface is bone-dry.

Problem: The spirit will not ignite.
Solution: The proof is too low, or the spirit is cold. Use a higher-proof option (80+). You can gently warm the spirit in a separate container before adding it to the pan.

Problem: Cheese turns tough and rubbery.
Solution: You’ve overcooked it. The sear must be hot and fast to create a crust while preserving a soft interior. Reduce your cook time per side.

The Action Plan: A Step-by-Step Sequence

Follow this phased roadmap. Meticulous preparation makes the high-speed cooking sequence fluid and stress-free.

Phase Primary Tasks Focus On
Prep & Measure Slice cheese ½-inch thick. Pat dry completely. Dredge lightly in flour. Measure 2 tbsp spirit. Cut lemon wedges. Gather tools: pan, lid, tongs, lighter. Mise en place. Every component must be within arm’s reach. There is no time to search.
The Sear Heat dry pan over medium-high for 3 min. Add fat. When shimmering, add cheese. Sear undisturbed for 60-90 sec until golden. Flip and repeat. Developing the crust. Resist the urge to move or press the cheese. Let the Maillard reaction work.
The Flambé Remove pan from heat. Pour spirit at pan’s edge. Ignite carefully with a long lighter or by tipping pan toward burner. Let flames subside completely. Confident control. Pan is off heat. You command the flame. Let it burn out naturally.
The Finish & Serve Squeeze lemon juice over cheese. (For fondue: add splash of wine/broth, stir to emulsify.) Serve immediately in the hot pan. Immediate presentation. The sizzle and aroma are part of the experience. Serve while wildly hot.

The Art of the Shared Moment

Mastering Greek Saganaki-Style Flambé Fondue is a lesson in culinary alchemy. It demonstrates how commanding simple physics—intense heat and rapid combustion—transforms humble ingredients into a moment of pure joy. The journey from selecting the right cheese to tipping the pan with fearless confidence is short, but the impact is profound.

This is more than a recipe. It is a guaranteed method to create conversation, laughter, and an unforgettable highlight. It turns a meal into a shared event, enriching your table with the unparalleled satisfaction of a technique mastered and a spectacle delivered. Now, light the flame.


Related Articles

Try Our Free Tool: Use our Fondue Cheese Pairing Guide to discover the best cheese combinations for your fondue.

British Cheddar Fondue with Ale and Mustard


The Perfect British Cheddar Fondue with Ale and Mustard: Your Guide to Unbeatable Flavor and Texture

You’ve experienced it before: the promising pot of melted cheese that quickly turns into a greasy puddle or a stubborn, grainy mass. The conversation falters as the dip becomes a chore. This disappointment stems from a misunderstanding of fondue’s true nature. It is not merely melted cheese; it is a delicate, temporary emulsion—a suspension of fat, protein, and liquid held in perfect, silky balance. Mastering the British Cheddar Fondue with Ale and Mustard transforms this risk into a guaranteed triumph. It is the key to creating a convivial centerpiece of profound depth and unshakeable smoothness, moving far beyond the Swiss cliché into the realm of robust, sophisticated comfort.

Foundational Choices: The Flavor Hardware

Your ingredient selections are the non-negotiable architecture of your fondue. Compromise here, and the entire structure will falter. Precision in your foundation guarantees the spectacular result.

Cheese Selection and Sizing: The Core Architecture

A mature, sharp British Cheddar is non-negotiable. Look for a West Country Farmhouse Cheddar or similar; its complex, tangy flavor and optimal fat content provide both character and meltability. For added creaminess and to support the emulsion, blend in a secondary cheese like Double Gloucester or a mild Cheshire. Calculate 150-200 grams of total cheese per person as a generous starting point for a main course.

The Liquid Base: Building the Environment

Forget white wine. A British ale—a good bitter or pale ale—provides the malty, slightly bitter backbone that complements cheddar’s sharpness beautifully. Its carbonation also aids the emulsion. The critical stabilizer is acid. A tablespoon of lemon juice or a splash of dry cider is essential; it adjusts the pH, helping the proteins melt smoothly rather than clump.

Components for Stability and Flavor

Every component has a deliberate function. The thickener is your safety net, while mustard and aromatics define the flavor profile.

Component Category Options Key Characteristics
Thickener (Starch) Cornstarch, All-Purpose Flour Cornstarch: Creates a glossier, more transparent sauce; powerful thickening with a neutral taste. Flour: Offers a more opaque, “roux-based” texture; can impart a slight raw flavor if not cooked sufficiently.
Mustard Whole Grain Mustard, Dijon Mustard Whole Grain: Provides pops of sharp, vinous flavor and visual texture; authentically British. Dijon: Integrates seamlessly for a smoother, more uniform heat and acidity.
Aromatics Garlic, Worcestershire Sauce, Black Pepper Garlic: Rubbed on the pot for a foundational scent. Worcestershire: Adds umami depth and complexity. Black Pepper: Freshly ground pepper cuts through the richness.

The Core System: Managing the Emulsion

A great fondue is a dynamic system you control, not a static sauce. Your management of heat, motion, and sequence determines its fate.

Temperature Control: The Prime Directive

Apply heat gently and patiently. Use a heavy-bottomed saucepan over a low-to-medium flame. The goal is to melt the cheese slowly, preventing the proteins from seizing and the fats from separating. When transferring to a fondue pot, maintain the barest simmer—the flame should kiss the bottom, not aggressively heat it.

The Stir: Motion is Life

Constant, deliberate stirring is non-negotiable. Use a wooden spoon in a steady figure-eight pattern. This ensures even heat distribution and incorporates the cheese into the liquid base uniformly. Neglect leads to hot spots, scorching, and the dreaded grainy texture.

Sequence and Rhythm: The Methodical Additions

Follow a strict protocol. First, create a slurry by dissolving your cornstarch in the cold ale. Heat this mixture until just steaming. Then, add your room-temperature cheese in handfuls, stirring completely after each addition until smooth before adding the next. This gradual process is the heart of building a stable emulsion.

Advanced Practices: Optimization and Cultivation of Flavor

With the system under control, focus elevates your fondue from technically correct to memorably exquisite.

Preparation: The *Mise en Place* of Success

Grate your own cheese. Pre-grated cheese contains anti-caking agents like cellulose, which hinder smooth melting. Let the grated cheese sit out for 20-30 minutes to lose its chill. Before you begin cooking, cut a garlic clove in half and rub it vigorously over the entire interior surface of your cooking pot. This creates a subtle, pervasive layer of flavor.

Ongoing Inputs: The Stir-Ins and Garnishes

Once the emulsion is complete, taste and adjust. Does it need more mustard for sharpness? A squeeze of lemon for brightness? A dash of Worcestershire for depth? Finish with a garnish of finely chopped chives or crispy fried shallots for contrasting texture and a professional flourish.

Dipper Selection and Strategy

Move beyond simple bread. Create a platter with texture and function: crusty sourdough cubes, crisp apple and pear slices, steamed broccoli florets, roasted new potatoes, and slices of cured meat like salami. The variety cleanses the palate and makes each dip a new discovery.

Threat Management: Saving a Broken Fondue

A properly managed fondue rarely breaks. Prevention—through acid, starch, and gentle heat—is your primary defense. If problems arise, a calm, tiered response will save the day.

Intervention Protocol: First, identify the issue. Is it grainy (overheated cheese)? Immediately remove from heat, add a splash of hot ale or cider, and stir vigorously. Is it oily and separated (broken emulsion)? Combine a teaspoon of cornstarch with a tablespoon of cold ale in a separate cup. Whisk this new slurry into the broken fondue over low heat until it re-emulsifies. Do not boil.

Your Fondue Action Plan

Phase Primary Tasks Focus On
60 Minutes Before Grate all cheese; let it warm up. Prepare all dippers. Make cornstarch slurry with ale. Organization and prep. A calm cook is a successful cook.
The Cooking Phase (10-15 mins) Heat ale slurry. Add cheese in small batches, stirring constantly in a figure-eight. Incorporate mustard and seasonings. Patience and rhythm. Do not rush the melting process.
During the Feast Transfer to fondue pot. Adjust flame to maintain a bubble. Stir occasionally. Add garnishes. Socializing and maintenance. A gentle heat and occasional stir keep the emulsion perfect.

The journey from selecting a block of sharp cheddar to the communal joy of the shared pot is one of applied science and sensory delight. You have learned to command the emulsion, balance bold flavors, and create not just a dish, but an experience. The profound satisfaction comes when the pot reaches the table—deeply golden, aromatic, and flawlessly smooth. This British Cheddar Fondue with Ale and Mustard transforms a simple meal into a memorable event, establishing your mastery over the elemental pleasures of comfort and craft.


Related Articles

Try Our Free Tool: Use our Fondue Cheese Pairing Guide to discover the best cheese combinations for your fondue.

Scandinavian Seafood Fondue Traditions


Beyond the Pot, A Nordic Feast

Picture a long, dark Scandinavian evening. The world outside is cold, but inside, warmth radiates from a shared table. At its center, a pot of crystal-clear, herb-scented broth simmers gently, a fragrant sea waiting to embrace morsels of pristine cod, sweet scallops, and rosy salmon. This is not just dinner; it is a culinary ritual. Mastering Scandinavian seafood fondue traditions transforms a simple cooking method into an elegant, convivial experience. It is the key to unlocking the Nordic ethos of “hygge”—where exceptional ingredients, shared effort, and deep satisfaction converge around the hearth.

Foundational Choices: The Scandinavian Fondue “Kit”

Authenticity begins with intentional choices. Your equipment and base ingredients create the non-negotiable foundation for a true Nordic fondue experience.

Part A: The Vessel and Heat Source

Your pot is the heart of the hearth. For a broth-based fondue, heat control is paramount. A classic ceramic or enameled cast-iron fondue pot retains gentle heat beautifully but requires a stable gel or liquid fuel burner. A modern, high-quality stainless steel pot paired with an adjustable induction cooktop offers superior temperature precision. Japanese shabu-shabu pots with a central chimney are also excellent, promoting even circulation. For a gathering of four to six, a 2 to 3-quart capacity is ideal.

Part B: The Sacred Broth (The “Fond”)

In Nordic fondue, the broth is a flavor-infusing medium, not merely hot water. It must be pristine and aromatic. Start with high-quality water or a light fish stock. The essential aromatics are fresh dill fronds (never dried), whole white peppercorns, thin lemon slices, and a bay leaf. A splash of dry Nordic white wine or a teaspoon of aquavit adds a subtle, characteristic depth. This broth will become more valuable as the meal progresses.

Part C: The Seafood Selection Table

Quality is non-negotiable. Seek the freshest, most sustainable seafood available. Offer variety in texture and flavor to cater to all preferences and create a dynamic eating experience.

Component Category Options Key Characteristics
Firm White Fish (e.g., Cod, Haddock) Skinless fillets, cut into 1-inch thick chunks Mild and sweet flavor; holds its shape perfectly; cooks through in 60-90 seconds; the foundational, foolproof choice.
Salmon & Trout Skinless fillets, cut into 1-inch cubes Rich, fatty, and flavorful; cooks very quickly (45-60 seconds); adds luxurious color and taste to the broth.
Shellfish (Shrimp, Scallops) Peeled large shrimp (tail-on optional), dry-packed sea scallops Shrimp turn pink and curl in 1-2 minutes; scallops become opaque and tender in 60-90 seconds. They impart a sweet, briny essence to the broth.
Luxury Additions (Lobster, King Crab) Par-cooked lobster tail meat, king crab leg segments Primarily for warming through (30-45 seconds); these are for special occasions and provide spectacular, sweet flavor with minimal cooking.

The Core System: Managing the Fondue Experience

A perfect fondue is a dynamic system of control. Master these variables to ensure every piece of seafood is cooked to tender perfection.

Control Variable 1: Broth Temperature

The ideal range is a steady, gentle simmer between 185-200°F (85-93°C). You should see small bubbles rising lazily to the surface. A rolling boil is your enemy—it clouds the broth, makes aromatics bitter, and instantly toughens delicate seafood. Control it with an instant-read thermometer and by attentively adjusting your heat source. If the boil threatens, lift the pot off the heat momentarily.

Control Variable 2: Sequencing and Timing

Cook with strategy. Begin with firm white fish to establish the broth’s base flavor. Then introduce shellfish, and finish with the most delicate items like thin salmon. Never overcrowd the pot; adding more than 4-5 pieces at once crashes the temperature. Provide each guest with a small side plate for their cooked food and use color-coded fondue forks to avoid confusion. This maintains a steady, social cooking rhythm.

Control Variable 3: The Dipping Sauce Ecosystem

Nordic sauces complement; they never mask. Prepare a core trio ahead of time. A creamy dill and mustard sauce (sour cream, fresh dill, whole-grain mustard) is essential. A tangy lemon-caper remoulade (mayonnaise, lemon zest, chopped capers) adds brightness. Offer a small cup of warmed, clarified butter with chopped chives for pure, rich indulgence. This trio covers every possible craving.

Advanced Practices: The Art of the Nordic Spread

Elevate your gathering from a meal to a holistic feast with thoughtful accompaniments and strategic broth management.

Preparation: The Supporting Cast

The seafood is the star, but the supporting cast is crucial. Serve a bowl of small, boiled baby potatoes or buttery new potatoes. Offer dense, chewy dark rye bread or crispbread for soaking up sauces and broth. A bowl of quick-pickled vegetables—sliced cucumber, red onion, and carrot in a sweet vinegar brine—provides essential acidity and crunch to cut through the richness.

Ongoing Inputs: Broth Refinement and Refreshment

As the meal progresses, your broth will become a concentrated, delicious seafood stock. Skim off any foam that appears. If the liquid level drops more than an inch, carefully top it up with simmering hot water or a bit of reserved aromatic broth to maintain the depth of flavor without diluting it excessively.

Selection and Strategy: Curating the Finale

Plan for a grand finale. Once the last piece of seafood is cooked, ladle the now-incredibly flavorful broth into cups. Stir in a spoonful of the remaining dill sauce or a few cooked noodles for a simple, glorious soup. Sipping this essence of the meal is the ultimate, satisfying conclusion to the ritual.

Threat Management: Preventing Fondue Faux Pas

A proactive host ensures safety and seamless enjoyment, preventing common pitfalls before they occur.

Prevention: Safety and Flow

Seafood safety is paramount. Keep all raw seafood on a bed of ice until moments before serving. Emphasize fondue fork etiquette: the fondue fork is for cooking only. Each guest uses their personal dining fork to retrieve cooked food from their colored fondue fork, eliminating cross-contamination and dangerous “fork duels” in the pot. Set the table with ample space for plates, sauce bowls, and side dishes to avoid clutter.

Intervention: Troubleshooting Common Issues

Problem: Broth becomes cloudy or tastes weak.
Solution: Carefully ladle out a cup of broth, strain it through a fine-mesh sieve lined with cheesecloth, and return the clear liquid to the pot. Have a small pot of concentrated fish or vegetable stock simmering on the stovetop to boost flavor if needed.

Problem: Seafood sticks to the pot or falls off forks.
Solution: Pat every piece of seafood thoroughly dry with paper towels before arranging on the platter. Ensure fondue forks are clean and dry before spearing a new piece; moisture reduces grip.

The Action Plan: A Seasonal Fondue Roadmap

Season/Phase Primary Tasks What to Focus On
Winter (Nov-Feb) Source high-quality frozen or preserved summer dill. Focus on rich, hearty fish like salmon, cod, and halibut. Use a robust aquavit in the broth. Creating a cozy, candlelit “hygge” atmosphere. This is the classic season for fondue, a beacon of warmth against the dark.
Spring (Mar-May) Incorporate the first fresh dill and chives. Feature lighter white fish like pollock and spring shrimp. Add fresh green peas or asparagus as a side. Celebrating the return of light and fresh flavors. A brighter, greener presentation on the table.
Summer (Jun-Aug) Embrace abundance! Use loads of fresh, local dill. Highlight delicate shellfish like scallops and langoustines. Serve with new potatoes and a crisp, dry white wine. Al fresco dining. A lighter, celebratory feast that showcases the peak of Nordic seafood harvest.
Fall (Sep-Oct) Utilize the last of the fresh dill and begin incorporating preserved lemon. Feature meatier fish like monkfish and large prawns. Introduce earthy sides like roasted root vegetables. Transition and gratitude. A heartier spread that bridges the bounty of summer with the coming comfort of winter.

The Heart of the Hearth

Mastering Scandinavian seafood fondue traditions is an exercise in celebrating purity, community, and control. It begins with the foundational choice of a pristine scallop and culminates in the shared sip of a broth transformed by the meal itself. This ritual is more than cooking; it is an act of connection. It turns a simple pot into a hearth, gathering friends and family in a circle of warmth that nourishes the spirit as deeply as the body. This is the unparalleled joy and profound satisfaction of the Nordic table—a taste of hygge, mastered.


Related Articles

Try Our Free Tool: Use our Fondue Recipe Generator to generate an authentic regional fondue recipe.

Mediterranean Fondue with Feta and Olive Oil


Beyond the Cheese Pot – A Vision of Liquid Sunshine

You envision a gathering centered around a glistening pot, its contents creamy and inviting. Instead, you face a broken, greasy mess or a bland, glue-like paste. This disappointment stems from treating fondue as a simple melt. True mastery transforms it. Imagine a sauce that captures a sun-drenched coastline: tangy, herbal, rich, and impossibly smooth. This is not just fondue; it is a transportive experience. Mastering Mediterranean Fondue with Feta and Olive Oil is the key to creating an unforgettable, sophisticated centerpiece. It balances bold, tangy, and aromatic flavors in perfect, dippable harmony.

Foundational Choices: The Ingredients of Success

Your final dish is a direct reflection of your initial selections. The quality and character of these components form the non-negotiable foundation for texture and depth of flavor.

Part A: Cheese Selection and Balance

Feta is the star, but it needs a supporting cast. A solo feta fondue will be too salty and lack smooth meltability. You must build a team.

  • The Star (Feta): Greek feta, brined in sheep’s or goat’s milk, offers a bold, tangy punch. French feta (often from cow’s milk) is milder and creamier. For authentic Mediterranean character, choose a Greek variety and rinse it briefly to control saltiness.
  • The Support (Melting Cheeses): These provide the creamy, stable base. Gruyère adds nutty complexity and superb melt. Fontina offers a buttery, mild background. A 1:1 ratio of feta to melting cheese is an excellent starting point for balance.

Part B: The Liquid Foundation

The liquid base carries flavor and dictates the fondue’s personality. Your choice here is critical.

  • Wine vs. Broth: A dry white wine (like Sauvignon Blanc) is traditional. Its acidity helps stabilize the emulsion and cuts through richness. For a non-alcoholic or more subtle base, a light vegetable or chicken broth works, but you must add a squeeze of lemon juice to replicate the necessary acidity.
  • The Olive Oil Imperative: High-quality extra virgin olive oil is not just an ingredient; it is the soul of this dish. Swirled in at the end, it adds a fruity, peppery depth and contributes to a luxuriously silken mouthfeel. Do not cook with it over high heat; use it to finish.

Part C: Aromatics and Thickening

These elements build layers of flavor and guarantee the perfect consistency.

  • Aromatics: Fresh herbs define the Mediterranean profile. Oregano, thyme, and rosemary are essential. Gently infusing them into your warm base liquid or olive oil unlocks their oils without bitterness. A microplane of garlic or minced shallot adds foundational savoriness.
  • The Modern Thickener: A traditional roux can mute flavors. For this fondue, tossing your grated cheeses with cornstarch (or flour) is superior. The starch coats each cheese strand, preventing clumping and ensuring a velvety, stable emulsion as it melts.
Component Category Recommended Options Key Characteristics
Primary Cheese (Feta) Greek (Brined), French (Creamy) Greek: Bold, tangy, salty. Requires brief rinsing. French: Milder, softer, less pungent.
Melting Cheese Gruyère, Fontina Gruyère: Nutty, complex, excellent melt. Fontina: Buttery, mild, very creamy.
Liquid Base Dry White Wine, Light Broth Wine: Adds crucial acidity and flavor depth. Broth: Neutral; must be supplemented with lemon juice.
Key Flavor Agent Extra Virgin Olive Oil Fruity, peppery finish. Swirl in off-heat. Defines the Mediterranean character.

The Core System: Mastering Texture and Emulsion

This fondue is a delicate, oil-in-water emulsion you actively shepherd into existence. Control these variables precisely.

Control Variable 1: Temperature and Pace

High heat is the enemy. It causes proteins to tighten, expelling fat and creating a grainy, broken sauce.

  • The Rule: Low and slow. Your base liquid should be hot but never boiling when cheese is added.
  • The Tools: A heavy-bottomed saucepan distributes heat evenly. An instant-read thermometer is invaluable; aim for a consistent 160-180°F (71-82°C).
  • The Technique: Add cheese in small handfuls, stirring constantly with a wooden spoon or silicone spatula until fully melted before adding the next.

Control Variable 2: Acidity and Stability

Acidity keeps the milk proteins in cheese relaxed and dispersed, preventing them from clumping together.

  • How It Works: The wine or lemon juice in your base creates this stable acidic environment. This is why adding cheese to plain, hot milk often fails.
  • The Finish: Once all cheese is melted and smooth, remove the pot from heat. Vigorously swirl in your premium olive oil. This final enrichment leverages the existing stable emulsion.

Control Variable 3: Consistency

The ideal fondue coats the back of a spoon thickly but drips off slowly. It should cling to a dipper, not run off or sit in a glob.

  • Too Thick: Gently whisk in a splash of your warm base liquid (wine or broth) until it loosens.
  • Too Thin: Create a slurry with 1 teaspoon of cornstarch and 1 tablespoon of cold water or wine. Whisk it into the simmering fondue and cook for 1 minute until thickened.

Advanced Practices: The Art of Flavor and Presentation

With the core system mastered, elevate your craft through infusion and strategic composition.

Infusion and Layering

Build complexity before the cheese even hits the pot. Gently warm your olive oil with sprigs of rosemary, thyme, and a crushed garlic clove for 5 minutes, then strain. Use this infused oil for the finish. Alternatively, steep the herbs in the warming wine. For texture and bursts of flavor, fold in finely chopped sun-dried tomatoes, Kalamata olives, or a pinch of red chili flake after the fondue is emulsified.

The Dipping Battalion: Composition and Strategy

Move beyond crusty bread. Create a platter with contrasts in texture, temperature, and flavor to complement the rich, tangy fondue.

  • For Crunch: Blanched asparagus, endive leaves, radishes, bell pepper strips.
  • For Heartiness: Small roasted potatoes, grilled cubes of chicken or lamb, meatballs.
  • For Brightness: Crisp apple slices, pear slices (they cut the richness beautifully).

Threat Management: Saving the Sauce

A proactive approach guarantees success. When issues arise, targeted intervention saves the day.

Prevention: The Principles of a Smooth Fondue

Most disasters are avoidable. Follow this checklist: Grate or finely cube all cheese for even melting. Toss cheese thoroughly with cornstarch until every piece is coated. Bring refrigerated ingredients near room temperature before cooking. Use a heavy pot and maintain low, controlled heat.

Intervention: Troubleshooting Guide

If problems occur, diagnose and act quickly.

  • Grainy or Curdled: The heat was too high. Immediately remove from heat. Add an ice cube and whisk vigorously; the shock and extra liquid can sometimes re-emulsify. Alternatively, blend with an immersion blender.
  • Broken & Oily: Fat has separated. Create a “repair slurry” with 1 tbsp cornstarch and 2 tbsp cold wine/broth. Whisk into the broken fondue over low heat until recombined.
  • Too Thin: Use the cornstarch slurry method described in Consistency control.

The Action Plan: A Timeline for Flawless Execution

Phase/Time Primary Tasks Focus On
Prep (60 mins before) Cube/grate cheeses; toss with cornstarch. Prepare all dippers and arrange platter. Infuse olive oil with herbs (optional). Measure wine/broth and aromatics. Mise en place. Having every component measured, prepared, and within reach.
Cook (15 mins before serving) Warm wine/broth with aromatics over medium-low heat. Add cheese one handful at a time, stirring constantly in a figure-eight pattern. When smooth, remove from heat, swirl in infused olive oil. Patience and constant, gentle stirring. Maintaining a temperature below a simmer.
Serve & Sustain Transfer to a fondue pot or pre-warmed serving bowl. Adjust fondue burner or candle to the lowest possible setting—just enough to keep it warm. Stir occasionally. Maintaining warmth without bubbling. A skin will form if it gets too cool; a quick stir restores it.

The Shared Feast Realized

Mastering this dish hinges on one principle: balancing bold flavor with controlled technique. You begin by selecting a tangy feta and a fruity olive oil. You manage the emulsion with patience, building a sauce that is both robust and silken. You present it not just as a dip, but as an experience—a glistening pot surrounded by a curated array of colors and textures. The profound satisfaction arrives in the shared moment: friends gathered, dipping, laughing, transported by the sun-drenched joy of a perfected Mediterranean Fondue. This is the art of the communal table, realized in every smooth, flavorful bite.


Related Articles

Try Our Free Tool: Use our Fondue Cheese Pairing Guide to discover the best cheese combinations for your fondue.

Asian Fusion Fondue: Curry and Coconut Milk Bases


The Art of Asian Fusion Fondue: Mastering Curry and Coconut Milk Bases

Imagine the disappointment of a one-note, greasy fondue that cloys after one bite. Now, envision a fragrant, luxurious pot that invites exploration with every dip—a communal dining experience that is both exotic and comforting. This transformation lies in moving beyond traditional European styles to embrace the aromatic, creamy, and complex world of Asian fusion. Mastering the Curry and Coconut Milk Fondue is the key to unlocking a new dimension of interactive dining, where balance, fragrance, and depth of flavor turn a simple meal into an unforgettable event.

Foundational Choices: The Flavor Hardware

Your pot, heat source, and base ingredients form the non-negotiable foundation for success. Compromising here guarantees a compromised result.

Vessel and Heat Source Selection

Your equipment dictates control. Classic ceramic fondue pots work but can restrict stirring. I prefer a wide, shallow stainless steel or enameled cast iron pan paired with a tabletop butane burner. This setup offers superior temperature control and gives everyone easy access to the simmering broth. Electric hot pots with divided sections are another excellent, modern choice for hosting larger groups.

The Core Components: Building Your Base Liquids

This is where your fondue diverges from the ordinary. You are not making a thin broth but a rich, emulsified sauce that must remain stable for an hour. The quality and type of your coconut milk and curry foundation are paramount.

Component Category Options Key Characteristics
Coconut Milk Canned Full-Fat, Canned “Light,” Fresh Carton, Cream of Coconut
  • Full-fat (canned): Provides luxurious body and richness; the only choice for a stable, creamy emulsion. Shake the can well before opening.
  • “Light” versions: Offer a thinner consistency and will not provide the desired coating texture; avoid for fondue.
  • Fresh carton: Often diluted and designed for drinking; lacks the necessary fat content.
  • Cream of coconut: Heavily pre-sweetened; reserved for dessert fondues only.
Curry Foundation Store-bought Paste, Homemade Paste, Powdered Curry
  • Store-bought Paste (Red, Green, Yellow): Offers intense, authentic flavor and convenience. Maesri or Mae Ploy brands are reliable. This is your best starting point.
  • Homemade Paste: Allows for ultimate customization and unparalleled freshness, but requires time and specialty ingredients like galangal and lemongrass.
  • Powdered Curry: Quick but can lack depth and texture, often resulting in a gritty, one-dimensional broth. Not recommended for this application.

The Core System: Building and Balancing the Broth

Your fondue base is a dynamic, living system of flavors that requires active management. Follow this sequence religiously to build layers, not a muddled soup.

Controlling Flavor Layers

The ideal sequence is non-negotiable. First, sauté your curry paste in a neutral oil over medium heat for 1-2 minutes until it becomes fragrant and the oil starts to separate. This “cracking” the paste unlocks its full aromatic potential. Next, slowly whisk in a small amount of liquid—chicken, vegetable, or dashi stock—to dissolve the paste completely. Only then do you stir in the coconut milk. Bringing the coconut milk to a rapid boil will cause it to separate, creating a greasy, broken sauce. A gentle, steady simmer is your target.

Managing Texture and Consistency

Your target is a creamy, cohesive emulsion that coats ingredients without being gluey. Constant whisking during the initial combining phase is your primary tool. For a more stable, slightly thickened broth that clings perfectly, use an advanced solution: create a slurry with one tablespoon of cornstarch or tapioca starch mixed with two tablespoons of cold water. Whisk this into your simmering base and cook for one minute until glossy. A tablespoon of smooth peanut butter also acts as a brilliant natural emulsifier and flavor enhancer.

The Acidity & Sweetness Balance

A perfect curry fondue base should have a harmonious roundness. After simmering, you must fine-tune. Taste. If the richness feels heavy, brighten it with fresh lime juice. If the spices taste too sharp or acidic, soften them with a pinch of palm sugar or light brown sugar. This balance is what transforms a good base into a great one—it keeps the palate engaged and prevents flavor fatigue.

Advanced Practices: The Art of Dipping and Dining

Shift your focus from the pot to the complete interactive experience. The dippers and accompaniments are not afterthoughts; they are integral components of the meal.

Dipping Selection & Strategy

Move far beyond bread. Think in categories for optimal cooking and texture contrast. Provide a mix of Absorbent items like steamed bao buns, rice cakes, or udon noodles to soak up the sauce. Include Heartier Proteins such as thinly sliced ribeye, chicken thigh, plump shrimp, or fried tofu puffs. Offer Crisp Vegetables for freshness: bok choy stems, bell peppers, shiitake mushrooms, and water chestnuts. Blanch harder vegetables like broccoli briefly before serving to ensure they cook through in the broth.

The Accompaniment Ecosystem

Create a vibrant condiment platter that allows for personal customization. This is where each guest becomes their own chef. Include chopped roasted peanuts, fresh cilantro and Thai basil leaves, crispy fried shallots, chili crisp or sambal oelek, and lime wedges. These elements add crunch, freshness, heat, and acidity, refreshing the palate between bites and preventing monotony.

Sequential Dipping for Continuous Flavor

Guide your guests to start with delicate vegetables and quick-cooking seafood to build the broth’s flavor. Move to heartier proteins like beef and chicken. Finish with absorbent starches that will have absorbed the now deeply enriched liquid. This strategy prevents the broth from becoming cloudy or muddled too early in the meal.

Threat Management: Problem Prevention & Solution

Adopt a proactive stance. Most fondue disasters are avoidable with simple precautions.

Prevention: The First Defense

Constant, gentle heat is your mantra. A rolling boil will curse your coconut milk to separate. Use a burner with adjustable flame and monitor it. For food safety and to keep the broth clean, pre-cook any dense proteins like chicken or pork before adding them to the communal pot. Provide separate color-coded fondue forks to avoid cross-contamination.

Intervention: Saving the Sauce

Even experts face challenges. Here is your tiered response plan:

Broth Too Thin: Create a quick cornstarch slurry (1:2 ratio with cold water) and whisk it into the simmering pot.

Broth Separating: Immediately remove from heat. Whisk vigorously. If that fails, whisk in a splash of very hot stock or water to re-emulsify.

Flavor Too Sharp or Salty: Dilute with a bit more coconut milk and balance with a touch of sweetness. Add a squeeze of lime to brighten and distract.

The Fondue Session Roadmap

Follow this phased plan for a seamless, stress-free event where you can enjoy the meal as much as your guests.

Phase Primary Tasks What to Focus On
Preparation (60 mins before) Cut all dippers; arrange condiment platter; measure curry paste, stock, and coconut milk; set the table with heat source, pot, and utensils. Mise en place. Having every component prepped and within reach is the single greatest factor for a calm host. This is your non-negotiable.
Foundation (15 mins before serving) Build the base broth on the stovetop: fry paste, add liquids, incorporate coconut milk, simmer, and finalize seasoning with salt, acid, and sugar. Flavor development and emulsion. Achieve the perfect balance and texture in the kitchen. Do not attempt to adjust core seasoning at the table.
Cultivation & Enjoyment (At the table) Transfer broth to tabletop pot; maintain a gentle simmer; demonstrate dipping sequences; replenish dippers and condiments as needed. Temperature management and social flow. Your role shifts from cook to conductor. Keep the pot actively simmering, guide the conversation, and ensure everyone participates.

Mastering the Asian Fusion Fondue: Curry and Coconut Milk Bases is an exercise in controlled, communal flavor alchemy. It is a journey that begins with selecting the right full-fat coconut milk and culminates in the shared joy of discovery around the table. This mastery doesn’t just create a meal—it creates a moment. The profound satisfaction comes from gathering friends around a pot of steaming, fragrant curry, where the laughter is as rich as the sauce, and every dip is a new adventure. It is a culinary skill that consistently delivers unparalleled joy and enriches your life, one shared pot at a time.


Related Articles

Try Our Free Tool: Use our Fondue Recipe Generator to generate an authentic regional fondue recipe.

Mexican Queso Fundido vs. Swiss Fondue: A Comparison


Mexican Queso Fundido vs. Swiss Fondue: The Art of the Melted Cheese Masterpiece

Imagine the scene: a convivial table, laughter, and a shared pot of gloriously molten cheese. But is it a rustic, spicy chorizo-studded dip served with a stack of warm tortillas, or a refined, wine-laced communal feast centered around crusty bread? Your choice defines the entire social and sensory experience. While both are iconic dishes built on melted cheese, Queso Fundido and Swiss Fondue are born from vastly different culinary traditions, techniques, and philosophies. Understanding their core differences is the key to mastering each one, transforming you from a casual diner into an informed host who can create authentic, unforgettable moments of shared joy.

Foundational Choices: Culture, Vessel, and Flame

Every great melted cheese dish begins with its cultural DNA and the right physical tools. These foundational choices set the stage for everything that follows.

Part A: Origin and Purpose

Swiss Fondue is an Alpine necessity turned ritual. Born from the practical need to use aged cheeses and stale bread during long winters, it evolved into a formalized, communal dining experience centered around patience and conversation.

Mexican Queso Fundido is a celebratory antojito (little craving). Rooted in market culture and fiestas, it’s a festive, shareable appetizer meant for immediate, interactive enjoyment, often acting as a vibrant prelude to a larger meal.

Part B: The Vessel and Heat Source

Your pot and heat source are non-negotiable. For Fondue, you need a heavy-bottomed caquelon (ceramic or cast-iron pot) and a stable, gentle heat source like a fondue burner or candle. The goal is sustained, low heat to keep the emulsion smooth for an hour or more.

For Fundido, choose a small cast-iron skillet or earthenware cazuela. You’ll use direct, medium-high heat on the stovetop to achieve a quick, bubbling melt, then transfer it directly to the table, where its residual heat keeps it perfectly dippable for 15-20 minutes.

Part C: The Cheese: A Material Breakdown

The cheese itself is the primary component. Their inherent properties dictate the entire cooking method.

Component Category Primary Options Key Characteristics
Swiss Fondue Cheeses Gruyère, Emmental, Vacherin Fribourgeois Aged, low-moisture, flavorful. They require an acidic liquid (wine) and starch (cornstarch or flour) to create a stable, smooth emulsion. The melt is a deliberate chemical process.
Mexican Queso Fundido Cheeses Asadero, Oaxaca, Chihuahua, Monterey Jack Fresh, semi-soft, high-moisture, and mild. They melt easily and cohesively under direct heat. The technique is about simplicity, often incorporating mix-ins like chorizo or peppers during the cooking process.

The Core System: Chemistry and Composition

Think of each dish as a precise system where controlling key variables guarantees perfection. Getting this wrong is the difference between silky success and a broken, greasy failure.

The Emulsion: Wine vs. Direct Heat

For Fondue, the target is a stable, wine-infused emulsion. The consequences of error are severe: a separated, greasy, or stringy mass. Your method is precise: grate the cheese, toss it with cornstarch. In your caquelon, heat dry white wine with garlic until simmering. Add cheese gradually, stirring constantly in a figure-eight pattern until miraculously smooth. A splash of kirsch at the end fortifies the emulsion and adds aroma.

For Fundido, the target is a cohesive, bubbling, stretchy mass. The risk is oil separation or a rubbery texture. Your method is straightforward: in your hot skillet, cook any add-ins like chorizo or rajas (roasted pepper strips) to render their fats. Add your shredded cheese all at once. Let it melt over moderate heat with minimal stirring—just a fold or two to incorporate. The rendered fats from the mix-ins become the sauce.

The Flavor Base: Acid and Aromatics

This is where the flavor profiles fundamentally diverge. Fondue’s control variable is acidity. The wine and a hint of lemon juice provide the necessary tang that keeps the cheese proteins in suspension. A garlic-rubbed pot and a finish of kirsch provide subtle, sophisticated aromatics.

Fundido’s control variable is fat and spice. The flavor base is built on rendered chorizo fat, sautéed onions, or the smoky depth of roasted poblano peppers. These ingredients are cooked into the cheese, making them inseparable from the final dish.

Advanced Practices: Dipping Strategy and Accompaniments

Mastery extends beyond the pot to what you dip and serve alongside. This is the art of curation and contrast.

The Dipping Medium: Bread vs. Tortilla

Fondue demands a sturdy, day-old, crusty bread like a baguette or sourdough. Cut it into 1-inch cubes with a bit of crust on each piece to secure a sturdy dip that won’t sink into the abyss. The bread’s role is to carry the rich cheese and stand up to the swirling.

Fundido requires warm, pliable tortillas, either corn or flour. Their purpose is dual: as a scoop for the cheesy mass and as a wrapper to make instant, delicious tacos. I always keep a second warmer stacked with tortillas—they disappear faster than you think.

The Supporting Cast

Fondue’s traditional accompaniments are palate cleansers: tangy cornichons, pickled pearl onions, and slices of cured meat like viande des Grisons. They cut through the richness and reset your taste buds between bites.

Fundido’s essential garnishes are bright, fresh, and cooling: a vibrant pico de gallo, chopped fresh cilantro, slices of avocado, and a drizzle of crema or sour cream. They add necessary acidity, crunch, and contrast to the rich, spicy cheese.

Threat Management: Saving the Cheese

A proactive chef anticipates problems. Here is your tiered response plan for the most common cheese catastrophes.

Prevention: The Rules of Engagement

For Fondue, prevention is ritual. Maintain gentle, constant heat. Enforce communal stirring etiquette—a figure-eight motion keeps the emulsion stable. Quarantine potential disasters: no double-dipping, and don’t lose your bread in the pot.

For Fundido, prevention is in the prep. Always pre-cook watery vegetables like mushrooms or tomatoes to evaporate excess moisture that would make your cheese soggy. Ensure your serving vessel is piping hot to maintain an ideal serving temperature longer.

Intervention: Rescue Protocols

Fondue Rescue:
Identification: Cheese is seizing, becoming stringy, or fat is pooling.
Tiered Response: 1) Immediately add a tablespoon of warm wine or lemon juice and stir vigorously. 2) If separation persists, make a slurry of 1 tsp cornstarch with 1 tbsp of kirsch or wine, and stir it in.

Fundido Rescue:
Identification: Cheese is greasy (excess oil) or has turned rubbery and tough.
Tiered Response: 1) Carefully tilt the skillet and spoon out excess rendered oil. 2) For rubbery cheese, quickly fold in a fresh handful of shredded cheese off the heat; the new melt will often re-balance the texture.

Your Action Plan: A Roadmap for Cheese Mastery

Knowing which dish to deploy, and when, turns knowledge into memorable occasions. Use this calendar as your guide.

Season/Occasion Primary Dish to Feature What to Focus On
Winter / Cozy Gathering Swiss Fondue Ritual and conversation. Focus on achieving the perfect, stable emulsion and curating traditional accompaniments for a slow, wine-paced evening.
Summer / Casual Backyard Party Mexican Queso Fundido Bold, interactive fun. Focus on high-quality chorizo, keeping tortillas warm, and providing vibrant, fresh garnishes for contrast.
Game Day or Festive Mixer Fundido (with variations) Heartiness and customizability. Experiment with crowd-pleasing add-ins like shredded chicken, black beans, or jalapeños. Serve with robust tortilla chips.
Romantic Dinner or Special Date Fondue Elegant, shared intimacy. Focus on a premium cheese blend (like Gruyère and Vacherin) and a superb bottle of wine for both the pot and your glasses.

Ultimately, Swiss Fondue is a refined science of emulsion, a lesson in patience and precision where wine and starch transform aged cheese into a silky, communal nectar. Mexican Queso Fundido is a robust art of combination, a celebration of direct fire, bold flavors, and immediate, hands-on sharing. Mastering this delicious dichotomy does more than expand your recipe book—it deepens your connection to food as a vessel for culture and joy. Whether you’re crafting an Alpine ritual or igniting a fiesta, you hold the key to turning a simple pot of melted cheese into the unforgettable heart of the meal.


Related Articles

Try Our Free Tool: Use our Fondue Cheese Pairing Guide to discover the best cheese combinations for your fondue.

Affiliate Disclosure: FondueCooking.com is a participant in the Amazon Services LLC Associates Program, an affiliate advertising program designed to provide a means for sites to earn advertising fees by advertising and linking to Amazon.com. As an Amazon Associate we earn from qualifying purchases. Learn more