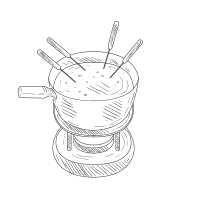

How to Use a Chocolate Fountain: A Step-by-Step Guide
A chocolate fountain is a luxurious centerpiece that can elevate any gathering, from birthday parties to weddings. The cascading tiers of melted chocolate, just begging to be dipped into, create an irresistible attraction for kids and adults alike. But before you plug it in and start dipping, there are a few things you need to know about how to use a chocolate fountain properly. This comprehensive guide will cover everything from choosing the right chocolate to cleaning tips and tricks, ensuring your chocolate fountain experience is smooth, delicious, and memorable.
Choosing the Right Chocolate
The key to a successful chocolate fountain experience lies in selecting the right type of chocolate. While it might be tempting to grab any bar from your pantry, using the right chocolate ensures proper flow and a smooth, dippable consistency.
Types of Chocolate to Use:
- Couverture Chocolate: This high-quality chocolate, with a higher percentage of cocoa butter, is specifically designed for melting and dipping. It melts smoothly and provides a luxurious, glossy finish.
- Chocolate Melts or Wafers: These are pre-portioned discs specifically formulated for melting, making them an incredibly convenient option. They typically contain vegetable oil for smoother melting, but might have a slightly less intense chocolate flavor compared to couverture chocolate.
Types of Chocolate to Avoid:
- Regular Chocolate Bars: While tempting, these often lack the necessary fat content for proper flow in a fountain. They can result in a thick, clumpy texture.
- Chocolate with Nuts or Fillings: Avoid chocolates containing nuts, fruits, or other fillings as they can clog the fountain and create a messy situation.
Tips for Melting Chocolate:
- Chop it Up: Chop couverture chocolate into small, even pieces to facilitate even melting.
- Use a Double Boiler or Microwave: Melt the chocolate slowly and gently, stirring frequently to prevent scorching. If using a microwave, heat in short bursts, stirring between each one, to avoid overheating.
- Add Oil (If Necessary): For smoother consistency, especially when using couverture chocolate, add a small amount of vegetable oil (about 1 tablespoon per pound of chocolate) during melting.
Setting Up Your Chocolate Fountain
Before you start dipping, it’s crucial to set up your chocolate fountain correctly. This ensures optimal performance and prevents any chocolate mishaps.
Steps for Setting Up:
- Location is Key: Choose a stable, level surface near an electrical outlet. Keep it away from drafts, air vents, or anything that could disrupt the chocolate flow.
- Assemble Carefully: Follow the manufacturer’s instructions for assembling the fountain. This typically involves attaching the tiers, basin, and screw.
- Pre-Heat the Fountain: Most fountains come with a heating element. Turn it on to pre-heat the fountain base, which helps maintain the chocolate’s temperature and consistency.
- Add Melted Chocolate: Once the fountain is preheated, pour the melted chocolate into the basin. Make sure it reaches the minimum fill line.
- Turn on the Motor: Start the motor to initiate the chocolate flow. Adjust the fountain’s feet to ensure a level flow across all tiers.
Dipping Delights: Choosing Your Treats
The fun part! Selecting the right dipping treats is essential for maximizing your chocolate fountain experience. The best dippers are those that can be easily coated and enjoyed, providing a satisfying contrast in texture and flavor against the rich chocolate.
Fruit Options:
- Strawberries: A classic choice. Opt for smaller strawberries for easier dipping.
- Bananas: Slice bananas into bite-sized pieces for optimal dipping.
- Pineapple: Cut pineapple into chunks or wedges. Grilled pineapple offers a unique, caramelized twist.
- Apples: Use firm apples like Granny Smith or Honeycrisp. Cut them into wedges and consider a quick dip in lemon juice to prevent browning.
- Berries: Raspberries, blueberries, and blackberries add pops of color and tartness.
Sweet Treats:
- Marshmallows: A timeless favorite that’s always a hit.
- Rice Krispies Treats: Cut into bite-sized squares for dipping ease.
- Pretzels: The salty-sweet combination is simply irresistible.
- Cookies: Biscotti, shortbread, or even graham crackers are great options.
- Cake Pops: Offer a fun and festive way to enjoy cake with a chocolate fountain.
Maintaining the Chocolate Flow
A well-maintained chocolate fountain is crucial for uninterrupted enjoyment. Here’s how to keep that chocolate flowing smoothly throughout your event:
Monitoring Consistency:
- Check Regularly: Chocolate can thicken as it cools, potentially disrupting the flow. Keep an eye on the consistency and add a small amount of vegetable oil (about a teaspoon at a time) if needed.
- Avoid Overcrowding: Too many treats dipped at once can cool the chocolate quickly, leading to thickening. Encourage guests to dip in batches.
Cleaning as You Go:
- Have Napkins Ready: Provide napkins to encourage guests to wipe drips and prevent chocolate from falling back into the fountain, which can cause clumping.
- Remove Debris: Keep a small spoon or fork handy to remove any small pieces of fruit or other debris that might fall into the basin.
Cleaning Your Chocolate Fountain
While cleaning a chocolate fountain might seem daunting, it’s surprisingly straightforward with the right approach.
Steps for Easy Cleaning:
- Let it Cool and Harden: Once the event is over, turn off the fountain and let the remaining chocolate cool and harden completely. This makes cleaning much easier.
- Remove Hardened Chocolate: Once hardened, the chocolate should easily break apart. Remove large pieces by hand and use a plastic spatula or spoon to scrape off any remaining bits.
- Disassemble and Wash: Disassemble the fountain according to the manufacturer’s instructions. Wash all removable parts (tiers, basin, screw) in warm, soapy water. Avoid using abrasive cleaners or scrubbers that could damage the surface.
- Wipe Down the Base: Use a damp cloth to wipe down the fountain base. Be careful not to get the heating element or motor wet.
- Dry Thoroughly: Dry all parts completely before storing to prevent watermarks or damage.
Tips for Chocolate Fountain Success
- Start Small: If you’re new to using a chocolate fountain, start with a smaller model and a smaller quantity of chocolate to get the hang of it.
- Keep it Warm: Chocolate can thicken quickly, so keep dipping items warm. Consider using a warming tray for treats like marshmallows or cookies.
- Get Creative with Decorations: Enhance the visual appeal of your fountain by decorating it with fruits, flowers, or other edible decorations that match your event’s theme.
- Have Fun!: Using a chocolate fountain should be an enjoyable experience. Relax, enjoy the process, and let your inner chocolatier shine!
A chocolate fountain is more than just a dessert; it’s an interactive experience that adds a touch of magic to any gathering. By following these tips, you can confidently navigate the world of chocolate fountains, ensuring a memorable and delicious event for yourself and your guests.