Introduction
Fondant, that smooth, velvety icing, has the power to transform ordinary cakes into edible masterpieces. It’s the secret weapon behind those stunning wedding cakes, whimsical character creations, and elegant dessert displays. While the thought of working with fondant might seem intimidating, especially if you’re a baking novice, fear not! With a dash of patience and a sprinkle of guidance, you’ll be shaping fondant like a pro in no time.
Essential Tools for Fondant Success: Gathering Your Cake Decorating Arsenal
Before we embark on our fondant adventure, let’s gather the essential tools that will pave the way for cake decorating triumph:
- Rolling Pin: The cornerstone of fondant work. Opt for a non-stick rolling pin, preferably made from acrylic or silicone, to prevent sticking and ensure a smooth roll.
- Fondant Smoothers: These handy tools are your secret weapon for achieving a flawless fondant finish, erasing any imperfections and leaving you with a surface as smooth as silk.
- Pizza Cutter or Sharp Knife: Essential for cutting clean, precise lines in your fondant, ensuring sharp edges and professional-looking designs.
- Fondant Cutters (Optional): These come in a dazzling array of shapes and sizes, allowing you to add intricate designs, patterns, and embellishments to your cake with ease.
- Cornstarch or Powdered Sugar: These act as your anti-stick agents, preventing the fondant from sticking to your work surface and rolling pin. A light dusting is all you need for a smooth rollout.
- Gel Food Coloring (Optional): Unleash your inner artist and transform plain white fondant into a vibrant palette of colors, perfect for creating eye-catching designs.
- Edible Glue or Water: These act as your fondant adhesives, ensuring that decorations, accents, and fondant pieces adhere seamlessly to your cake.
The Art of Preparing Your Cake for Fondant Application
Think of your cake as a blank canvas, and a properly prepped canvas is the foundation for a masterpiece. Here’s how to prepare your cake for its fondant transformation:
1. Leveling the Playing Field
If your cake layers have a mind of their own and resemble a mountain range rather than a flat surface, it’s time to bring in the cake leveler. This tool will help you create perfectly flat cake layers, ensuring your fondant drapes beautifully without any unsightly bulges.
2. Crumb Coat: Your Secret Weapon Against Stray Crumbs
A crumb coat is a thin layer of frosting that acts as a barrier between your cake and the fondant, sealing in any loose crumbs and creating a smooth, even surface for the fondant to adhere to. Use a simple buttercream frosting or ganache for this crucial step.
3. Chilling Out for a Flawless Finish
Once your crumb coat is applied, it’s time to give your cake a well-deserved rest in the refrigerator for at least 30 minutes, or even better, overnight. This chilling period allows the crumb coat to firm up, preventing any unwanted dents or imperfections when you apply the fondant.
Creating Your Fondant Masterpiece: A Step-by-Step Guide
Now comes the exciting part – working with fondant! Follow these steps to transform your cake into a fondant-covered masterpiece:
1. Kneading for Pliability
Just like bread dough, fondant benefits from a little kneading to make it pliable and easy to work with. Lightly dust your work surface with cornstarch or powdered sugar, then knead the fondant until it becomes soft and reaches a consistency similar to playdough.
2. Rolling Out the Red (or Any Color!) Carpet
Dust your work surface and rolling pin with cornstarch or powdered sugar to prevent sticking. Roll out the fondant to a thickness of about ¼ inch, ensuring it’s large enough to cover your entire cake with some overhang.
3. Draping Your Cake in Fondant Elegance
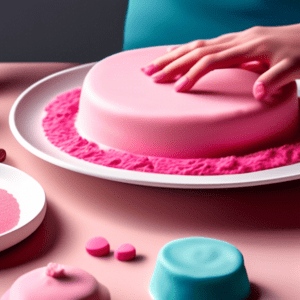
Gently lift the rolled-out fondant using your rolling pin and carefully drape it over your chilled cake. Starting from the top and gently working your way down, smooth the fondant over the sides of the cake, using your hands or fondant smoothers to eliminate any air bubbles or wrinkles.
4. Trimming for a Polished Look
Once the fondant is smooth and snug against the cake, use a sharp knife or pizza cutter to trim off the excess fondant at the base of the cake. Be sure to leave a clean, even edge for a professional finish.
Unleashing Your Creativity: Decorating Your Fondant-Covered Cake
Now that your cake is beautifully covered in fondant, it’s time to let your creativity shine! Here are some decorating ideas to inspire your inner cake artist:
1. Fondant Cut-Outs: Adding Whimsical Details
Fondant cutters are your best friends when it comes to adding charming details to your cake. From simple shapes like hearts and stars to intricate flowers and animals, fondant cutters allow you to create an array of decorations. Simply roll out your fondant, press the cutter firmly into the fondant, and carefully lift the cut-out shape.
2. Piping: The Art of Elegant Accents
Piping buttercream or royal icing onto your fondant-covered cake allows you to create intricate borders, delicate floral designs, and personalized messages. Use different piping tips to achieve various effects, from delicate swirls to bold lines.
3. Edible Accents: A Touch of Sparkle and Texture
Elevate your cake’s visual appeal by incorporating edible accents like sprinkles, edible pearls, or metallic dragees. These small details can add a touch of sparkle, texture, and visual interest to your creation.
Troubleshooting Common Fondant Challenges
Even seasoned bakers encounter the occasional fondant hiccup. Here are some common fondant challenges and how to troubleshoot them:
1. Sticky Situations: Taming Tacky Fondant
If your fondant feels sticky and difficult to work with, lightly dust it with cornstarch or powdered sugar. This will help absorb excess moisture and make the fondant more manageable.
2. Air Bubble Blues: Banishing Unwanted Pockets
Air bubbles can sometimes form under the fondant, creating unsightly bumps. To banish these unwanted pockets, carefully pierce the air bubble with a thin pin, then gently smooth the fondant back down, releasing the trapped air.
3. Elephant Skin: Restoring Fondant’s Smoothness
If your fondant develops a dry, cracked surface known as elephant skin, it’s often a sign of over-kneading or exposure to dry air. To revive dry fondant, knead in a small amount of vegetable shortening, one teaspoon at a time, until the fondant becomes smooth and pliable again.
Conclusion: Savoring the Sweet Taste of Fondant Success
Congratulations! You’ve navigated the world of fondant and emerged victorious, armed with the skills and knowledge to create stunning fondant-covered cakes. Remember, practice makes perfect, so don’t be afraid to experiment, embrace your creativity, and most importantly, have fun! With each fondant creation, you’ll gain confidence and discover new techniques, transforming ordinary cakes into extraordinary edible works of art.

