Indulge Your Senses: A Step-by-Step Guide to Creating a Chocolate Fountain Masterpiece
Introduction: The Allure of Cascading Chocolate
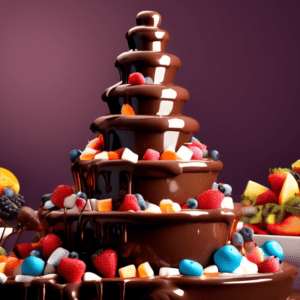
Picture this: a cascade of warm, velvety chocolate flowing effortlessly, inviting guests to dip their favorite treats. A chocolate fountain is more than just a dessert; it’s an experience, a centerpiece that transforms gatherings into unforgettable occasions. Whether you’re hosting a birthday bash, an elegant wedding reception, or simply craving a touch of decadence, crafting your own chocolate fountain is easier than you might think. This comprehensive guide will equip you with the knowledge and confidence to become a chocolate fountain maestro, ensuring your creation is the star of the show.
Essential Equipment: Gathering Your Chocolate Arsenal
Before embarking on this delectable journey, you’ll need to assemble the right tools. Don’t worry; creating a chocolate fountain doesn’t require a professional kitchen’s worth of equipment. Here’s what you’ll need:
- Chocolate Fountain: This is the heart of the operation. Choose a fountain size appropriate for your guest count. Smaller fountains are perfect for intimate gatherings, while larger ones cater to grand celebrations.
- Double Boiler or Microwave-Safe Bowl: Melting chocolate is an art form in itself, and using a double boiler ensures even heating, preventing scorching. A microwave-safe bowl works too, but requires shorter bursts of heat and constant stirring.
- Chocolate Melting Discs or Chopped Chocolate: Opt for high-quality chocolate specifically formulated for fountains. These contain a higher fat content, ensuring a smooth, flowing consistency. Avoid using regular chocolate chips, as they often contain stabilizers that can clog the fountain.
- Vegetable Oil (Optional): While not always necessary, adding a tablespoon or two of oil per pound of chocolate can enhance its fluidity, especially if you’re using a less expensive brand.
- Spatula or Whisk: These trusty tools are your mixing companions, ensuring the chocolate melts evenly and smoothly.
- Dipping Delights: The possibilities are endless! Fresh fruit, marshmallows, pretzels, cookies, brownie bites – let your imagination guide you. Cut larger items into bite-sized pieces for easy dipping.
- Skewers or Fondue Forks: Provide your guests with elegant tools for dipping their treats, minimizing mess and maximizing enjoyment.
Choosing the Perfect Chocolate: Unveiling the Flavor Palette
The chocolate you choose will determine the flavor profile of your fountain. Milk chocolate offers a crowd-pleasing sweetness, dark chocolate provides a sophisticated bitterness, and white chocolate lends a delicate, creamy touch. For a truly decadent experience, consider a blend of different chocolate types for a symphony of flavors.
- Milk Chocolate: The classic choice, milk chocolate is beloved for its smooth, creamy texture and approachable sweetness. It pairs wonderfully with a wide range of dipping items, making it an excellent option for diverse palates.
- Dark Chocolate: For those who appreciate a richer, more intense chocolate experience, dark chocolate is the perfect choice. Its slightly bitter notes provide a sophisticated contrast to sweet dipping items like strawberries and marshmallows.
- White Chocolate: Delicate and creamy, white chocolate offers a blank canvas for flavor experimentation. You can infuse it with extracts like vanilla or almond, or add a pop of color with food coloring. Its mild sweetness pairs well with tart fruits like raspberries and kiwi.
- Specialty Chocolate: Explore the world of specialty chocolate for unique and exciting flavor profiles. Ruby chocolate, with its naturally pink hue and berry-like notes, is a stunning addition. Vegan chocolate options are readily available, ensuring everyone can indulge.
Melting Mastery: Achieving the Perfect Consistency
Melting chocolate is arguably the most crucial step in creating a flawless fountain. Achieving the ideal consistency is key – too thick, and the chocolate won’t flow smoothly; too thin, and it won’t coat your dipping treats adequately. Here’s a breakdown of the two most common melting methods:
Double Boiler Method:
- Fill the bottom pot of the double boiler with water, ensuring it doesn’t touch the bottom of the top pot. Bring the water to a simmer over medium heat.
- Place the chocolate in the top pot of the double boiler. Stir occasionally to ensure even melting. Avoid overheating, as this can cause the chocolate to seize.
- Once the chocolate is fully melted and smooth, remove the top pot from the heat. If desired, whisk in vegetable oil one tablespoon at a time until the desired consistency is achieved.
Microwave Method:
- Place the chocolate in a microwave-safe bowl. Microwave in 30-second intervals, stirring vigorously between each burst. This prevents scorching and ensures even melting.
- Continue microwaving in 15-second intervals, stirring constantly, until the chocolate is almost fully melted. The residual heat will melt the remaining small pieces.
- If desired, add vegetable oil one tablespoon at a time, stirring until incorporated and the desired consistency is reached.
Assembling Your Chocolate Fountain: Building a Cascading Masterpiece
With your chocolate perfectly melted, it’s time to assemble your fountain. Consult the manufacturer’s instructions for your specific model, as assembly processes may vary. However, the general steps are as follows:
- Ensure all fountain parts are clean and dry. Any residual water can cause the chocolate to seize, hindering its flow.
- Place the fountain base on a stable, level surface. Plug it in and switch it to the warm setting to preheat the basin.
- Carefully pour a small amount of the melted chocolate into the fountain basin. This primes the pump and prevents air bubbles from forming.
- Once the initial chocolate is flowing smoothly, gradually pour in the remaining melted chocolate. Avoid overfilling the basin.
- Switch the fountain to the flow setting and adjust the flow control as needed. The chocolate should cascade gracefully down the tiers.
Creating a Feast for the Eyes: Arranging Your Dipping Delights
The visual appeal of your chocolate fountain is just as crucial as its taste. Arrange your dipping items artfully on platters surrounding the fountain. Consider using a variety of heights and textures to create visual interest. Here are some dipping item suggestions:
Fruits:
- Strawberries
- Blueberries
- Raspberries
- Blackberries
- Pineapple chunks
- Mango chunks
- Banana slices
Marshmallows:
- Regular marshmallows
- Jumbo marshmallows
- Flavored marshmallows
Pretzels:
- Pretzel sticks
- Pretzel twists
- Mini pretzels
Cookies:
- Biscotti
- Shortbread cookies
- Animal crackers
Other Treats:
- Brownie bites
- Rice Krispies Treats
- Mini donuts
Maintaining Chocolate Heaven: Tips for a Smooth Flow
To keep your chocolate fountain flowing smoothly throughout your event, follow these maintenance tips:
- Keep it Warm: The fountain’s heating element is designed to keep the chocolate at the ideal temperature. Avoid placing the fountain in direct sunlight or near drafts, as extreme temperatures can affect the chocolate’s consistency.
- Stir Occasionally: Even with the fountain’s heating element, the chocolate can start to thicken over time. Give it a gentle stir every 30 minutes to maintain a smooth, flowing consistency.
- Replenish as Needed: As guests indulge, you’ll likely need to replenish the chocolate supply. Keep a bowl of melted chocolate on hand and carefully pour it into the basin, ensuring it’s well incorporated.
- Avoid Water Contamination: Water is the enemy of melted chocolate. Ensure dipping items are dry before guests use them, as even a small drop of water can cause the chocolate to seize.
Cleaning Up: Sweet Endings, Easy Cleanup
While cleaning up after a chocolate fountain might seem daunting, it’s actually quite manageable with the right approach:
- Unplug and Cool: Unplug the fountain and allow the chocolate to cool completely. Once solidified, it will be easier to remove.
- Remove Chocolate: Carefully remove as much solidified chocolate as possible from the fountain tiers and basin. You can scrape off larger pieces with a spatula. For smaller areas, soak a cloth in hot water and hold it over the chocolate to soften it before wiping it away.
- Wash Removable Parts: Disassemble the fountain and wash the removable parts (tiers, basin, auger) in warm, soapy water. Rinse thoroughly and dry completely before storing.
- Wipe Down the Base: Wipe down the fountain base with a damp cloth. Avoid submerging the base in water, as this could damage the electrical components.
Conclusion: Creating Memories, One Dip at a Time
A chocolate fountain is more than just a dessert; it’s an experience, a centerpiece that transforms gatherings into truly memorable occasions. With the right equipment, a bit of patience, and a whole lot of chocolate, you can create a cascading masterpiece that will have guests raving. So gather your ingredients, embrace your inner chocolatier, and let the sweet indulgence begin!

